Remove the radiator of the high-temperature coolant circuit
Prerequisite
- Switch off ignition.
WARNING:
Hot surfaces.
Risk of burning!
Risk of burning!
- Perform all work only on components that have cooled down.
Preliminary work
- Refer to REMOVING THE COVER ON LEFT AND RIGHT IN THE ENGINE COMPARTMENT AT THE TOP .
- Refer to REMOVE BOTH FRONT-END STRUTS .
- Refer to REMOVE FRONT CROSS CONNECTION .
- Refer to REMOVE THE REAR TOP CROSS CONNECTION .
- Refer to REMOVING THE FAN COWL .
- Refer to REMOVING REAR UNDERBODY PROTECTION .
- Refer to REMOVE THE FRONT UNDERBODY PROTECTION OR FRONT THRUST FIELD .
- Refer to REMOVING THE UNDERBODY PROTECTION OF THE STEERING GEAR AND THRUST FIELD RESPECTIVELY .
Further information is available.
WARNING:
Hot surfaces.
Risk of burning!
Risk of burning!
- Perform all work only on components that have cooled down.
CAUTION:
Materials harmful to health.
Contact with fluids harmful to health!
Contact with fluids harmful to health!
- Note and follow safety instructions on containers.
- Conduct all work in appropriate personal protective equipment only.
NOTE:
TECHNICAL INFORMATION
Immobilization period-long fill of coolant!
Do not reuse used coolant.
When replacing and removing components which rely on the corrosion protection effect of the coolant, it is essential to change the coolant. The cooling system must therefore be emptied and refilled.
In the case of other removal work involving the draining of part quantities of coolant, the coolant level must be topped up with new coolant.
NOTE:
TECHNICAL INFORMATION
Follow notes for repair work on the cooling system.
For additional information see:
17 00... INSTRUCTIONS FOR REPAIR WORK ON COOLING SYSTEM
Follow notes for repair work on the cooling system.
For additional information see:
17 00... INSTRUCTIONS FOR REPAIR WORK ON COOLING SYSTEM
NOTE:
TECHNICAL INFORMATION
Collect and dispose of emerging fluids. Observe country-specific waste disposal regulations.
Collect and dispose of emerging fluids. Observe country-specific waste disposal regulations.
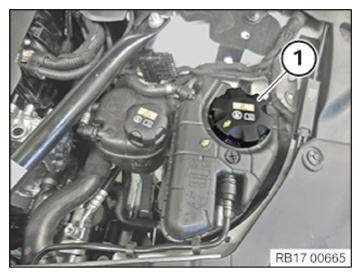
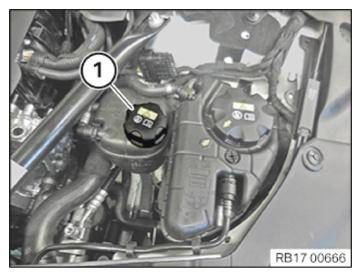
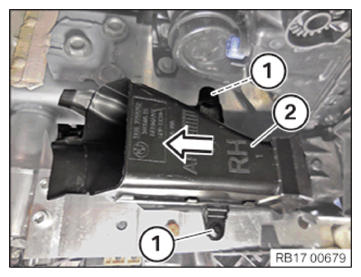
- Loosen sealing cap (1).
- Loosen sealing cap (1).
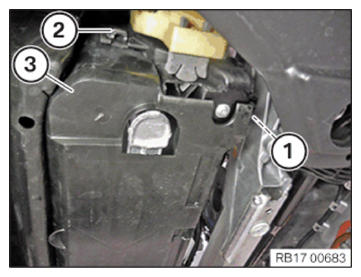
- Unlock the locks (1).
- Unlock the locks (2).
- Remove the cover (3) of the top cooling module.NOTE: The following step(s) must be performed if the listed component(s) is/are installed.
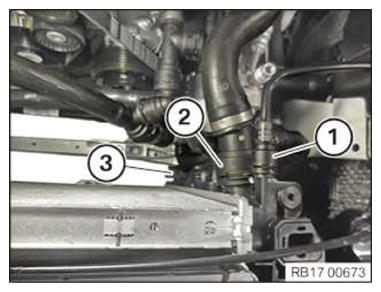
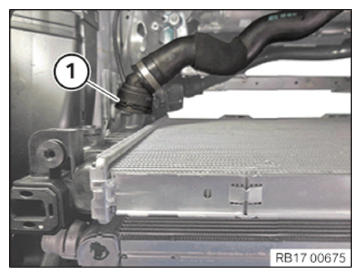
- Unlock and loosen coolant line (1).
- Unlock and loosen coolant line (2).
- Unlock and loosen coolant line (3).
- Catch and dispose of escaping coolant.
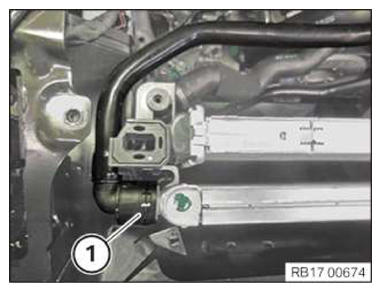
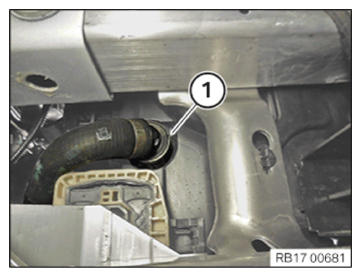
- Unlock and loosen coolant line (1).
- Catch and dispose of escaping coolant.
- Unlock and loosen coolant line (1).
- Catch and dispose of escaping coolant.
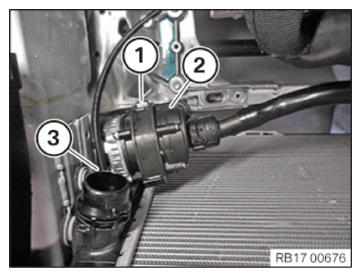
- Loosen the holder (1.)
- Remove the electric coolant pump (2) end put to one side.
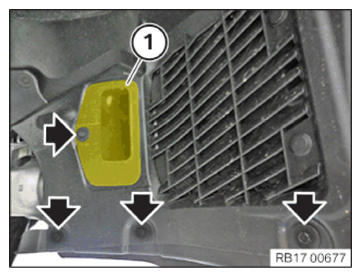
- Remove screws (arrows).
- Thread out air duct (1) and remove.
- Loosen clamps.
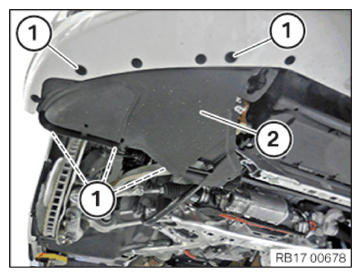
- Loosen screws (1).
- Guide out and remove the cover (2).
- Loosen clamps (1).
- Guide out air duct (2) in arrow direction and remove.
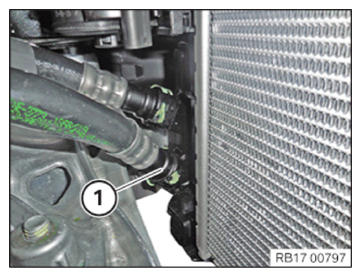
- Unlock and loosen coolant line (1).
- Catch and dispose of escaping coolant.
- Unlock lock (1).
- Unlock lock (2).
- Release the cover (3) of the cooling module at the bottom.
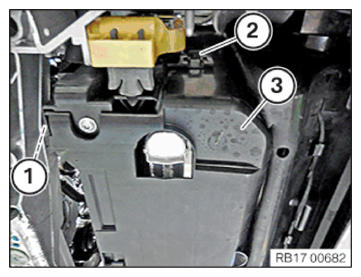
- Unlock the locks (1).
- Unlock lock (1).
- Unlock lock (2).
- Remove the cover (3) of the bottom cooling module.
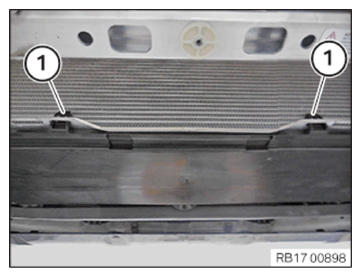
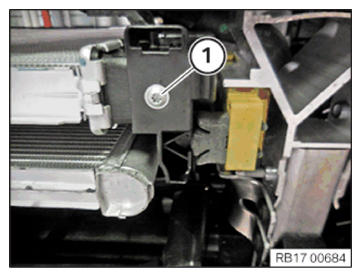
- Loosen screw (1).
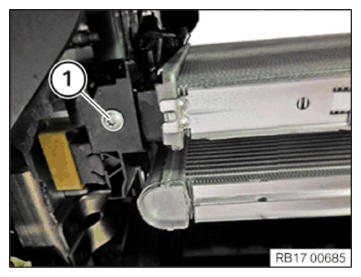
- Loosen screw (1).
- Unlock the transmission oil feed line (1) and detach it off the transmission oil cooler.
- Catch and dispose of escaping transmission oil.
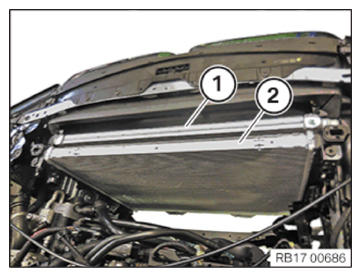
- Remove the radiator of the low-temperature coolant circuit (1) including the radiator of the high-temperature coolant circuit (2).