Prepare the coolant pump and the coolant pump housing
Further information is available.
NOTE:
RISK OF DAMAGE
Damage to the surface.
The use of metal-cutting tools (e.g., emery cloths) for cleaning surfaces can damage them and lead to leaks and/or engine damage.
Damage to the surface.
The use of metal-cutting tools (e.g., emery cloths) for cleaning surfaces can damage them and lead to leaks and/or engine damage.
- Do not use any metal-cutting tools.
NOTE:
TECHNICAL INFORMATION
The sealing surfaces must be free of oil, grease and cleaning agents.
The sealing surfaces must be free of oil, grease and cleaning agents.
NOTE:
TECHNICAL INFORMATION
When removing the coolant pump, always remove the sealing ring from the assembly rack.
When removing the coolant pump, always remove the sealing ring from the assembly rack.
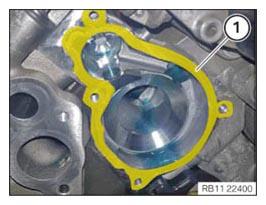
- Remove sealing ring (1) if necessary.NOTE: TECHNICAL INFORMATION
The sealing surfaces must be free of oil, grease and cleaning agents. - Clean sealing surface (1).
Check
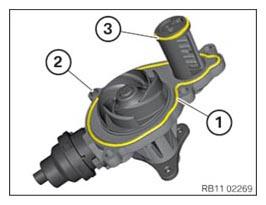
- Check the sealing bead (1) for damage.
- Check the protrusion of the sealing bead (1) on the coolant pump (2).
- Check the sealing ring (3) on the coolant pump (2) for damage.
Result
» The sealing bead (1) is not protruding or the sealing bead (1) is damaged.
Measure
- Replace the sealing bead (1).
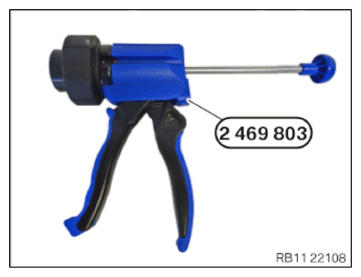
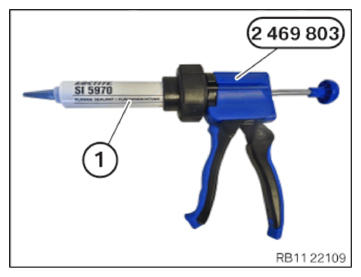
- Have the special tool 2 469 803
ready.NOTE: TECHNICAL INFORMATION
For additional information see: OVERVIEW OF CONSUMABLES (BMW PARTS CATALOGUE) - Position the sealing compound (1) as shown on the special tool 2 469 803.
Parts: Sealing compound
Sealing compound
Loctite 5970 liquid sealing compound Processing time <10 minutes at room temperature 50 ml, Cartridge 83190404517 NOTE: TECHNICAL INFORMATION
The processing time of the liquid sealing compound can be at a maximum of 10 min.Commissioning of the assembly is not possible until 25 minutes after the processing time.
Non-observance can lead to leaks in the assembly.
- Apply the sealing compound with a height of approximately 2 mm to 2.5 mm.
- Ensure that the sealing ring (3) is correctly installed.
- Check the guide sleeve (2) for correct fit.