Removing the Night Vision camera
NOTE:
RISK OF DAMAGE Electrostatic discharge. Damage to or destruction of electrical components.
- Leave electrical components in original packaging until just before they are installed. Use the original packaging only for any return shipments. Always package removed components straight away.
- Read and comply with user information on using the associated special tool 12 7 060.
- Only touch the housings of electrical components. Do not touch pins or multi-pin connectors directly.
- Wear electrically conductive clothing and antistatic shoes (with ESD symbol).
- For additional information see: 61 35...NOTES for ESD protection (electrostatic discharge)
Preliminary works
- Remove front ORNAMENTAL GRILLE .
- Release the screws (1) and remove the Night Vision camera (2).
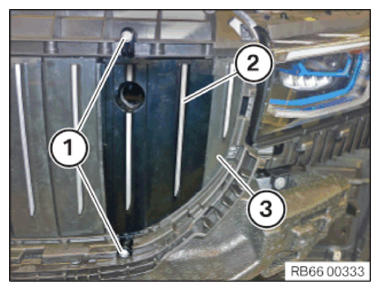
- Version with build level from 03/2019 (G11, G12):
Loosen screws (1).
Slightly pull the cover (2) of the Night Vision camera from the air flap control (3).
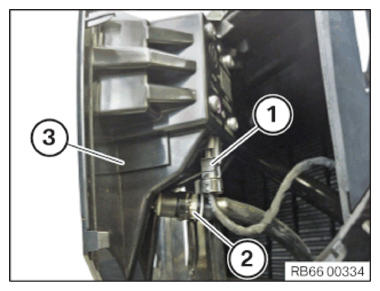
- Version with build level from 03/2019 (G11, G12):
Unlock plug connection (1) and disconnect.
Unlock and pull off the hose line (2).
Remove the night vision camera (3) with the cover.