Install exhaust system
CAUTION:
Component with heavy weight.
Injury hazard!
Injury hazard!
- Note component's center of gravity.
- Support component using a jack.
- Secure component against falling off the jack.
CAUTION:
Heavy component.
Heavy components can lead to injury or damage.
Heavy components can lead to injury or damage.
- Remove and install heavy components with the aid of another person/other persons.
CAUTION:
Grinding dust from grinding of components.
Hazardous to health!
Hazardous to health!
- Directly draw off the grinding dust.
- Ensure adequate ventilation.
- Conduct all work in appropriate personal protective equipment only.
NOTE:
TECHNICAL INFORMATION
Check the exhaust system for tightness after installation.
Check the exhaust system for tightness after installation.
NOTE:
TECHNICAL INFORMATION
Mount the exhaust system in a de-energized state, following the tightening sequence from the rear silencer towards the exhaust manifold.
Mount the exhaust system in a de-energized state, following the tightening sequence from the rear silencer towards the exhaust manifold.
CAUTION:
Shavings resulting from sawing or grinding components.
Injury hazard!
Injury hazard!
- Conduct all work in appropriate personal protective equipment only.
- Wear safety goggles and hand protection.
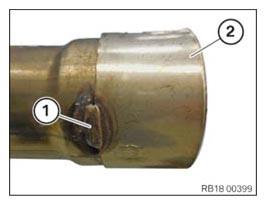
- Open the weld seam (1) with a conventional tool.NOTE: Perform the steps on the left and right side.
- Remove the circlip (2).
- Replace the clamps (2).
Parts: Clamps
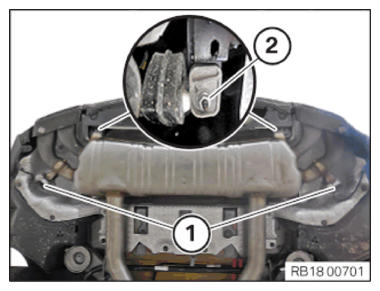
NOTE: Schematic diagram is for example purposes. Some parts may differ in certain details. - Check all rubber mounts (1) of the exhaust system for damage and replace, if necessary.
- Guide in and install the exhaust system with three people.
- Connect exhaust system to catalytic converters.
- Replace nuts (2).
Parts: Nuts
- Hand-tighten nuts (2).
- Connect the connector (1) on the left and right.
The connectors (1) must engage audibly.
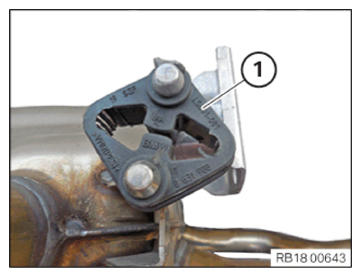
- Replace the screw (1).
Parts: Screw
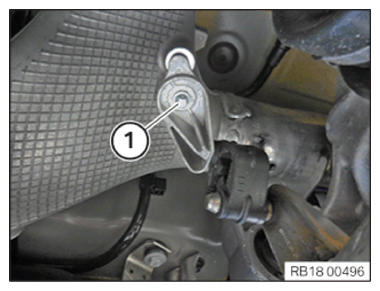
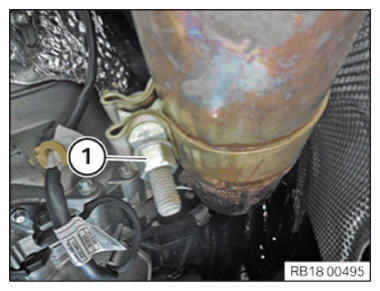
- Hand-tighten the bolt (1) to the left of the rear axle support.
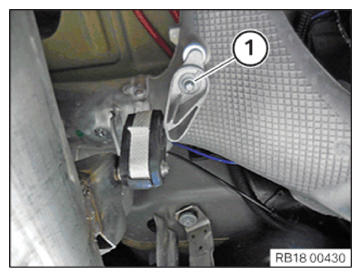
- Replace the screw (1).
Parts: Screw
- Hand-tighten the bolt (1) to the right of the rear axle support.
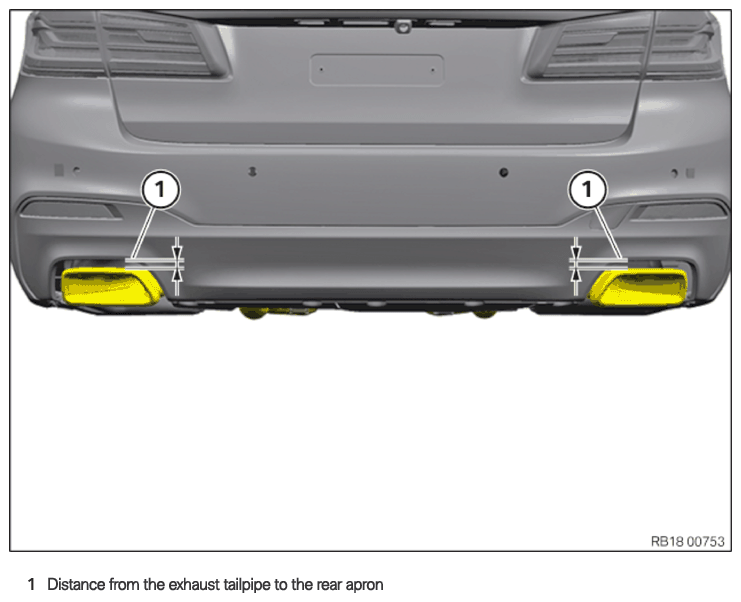
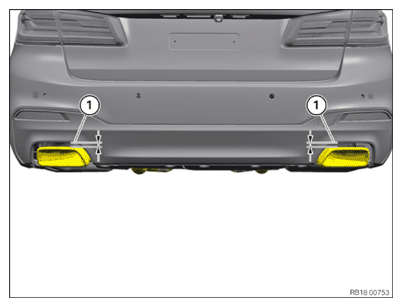
Align the rear silencer to the rear apron
Installation position of the rear silencer on the rear apron
- Before aligning the rear silencer to the rear apron, the front part of the exhaust system (SCR catalytic converter/pre-muffler) must be brought into a horizontal position.
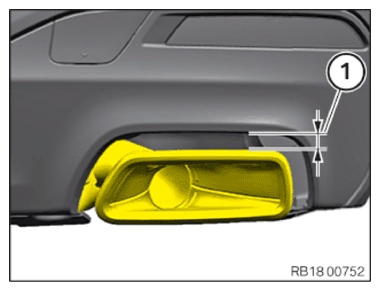
- Set up the exhaust system end pipes so that the spacing (1) of the left exhaust system end pipe to the rear apron is as small as possible compared to the spacing of the right exhaust system end pipe and is a maximum of 5 mm.
- Tighten nuts (2).TIGHTENING TORQUES SPECIFICATION
Rear silencer to bumper bracket/body Nut M8
Replace nut.Tightening torque 19 Nm - Tighten the screw (1) to the left of the rear axle support.TIGHTENING TORQUES SPECIFICATION
Exhaust system to rear axle carrier M8x25
Replace screw.Tightening torque 28 Nm - Tighten the screw (1) to the right of the rear axle support.TIGHTENING TORQUES SPECIFICATION
Exhaust system to rear axle carrier M8x25
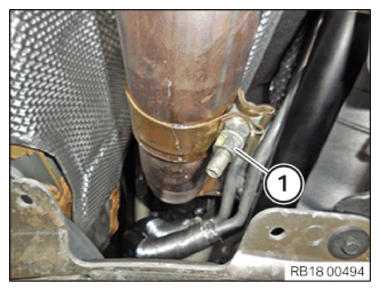
Replace screw.Tightening torque 28 Nm - Tighten the clamp (1) on the left.TIGHTENING TORQUES SPECIFICATION
Exhaust system/front silencer to catalytic converter cl.
If necessary, replace clamp.Tightening torque 55 Nm - Tighten the clamp (1) on the right.TIGHTENING TORQUES SPECIFICATION
Exhaust system/front silencer to catalytic converter cl.
If necessary, replace clamp.Tightening torque 55 Nm NOTE: TECHNICAL INFORMATION
After the work on the exhaust system is completed, take a 5 to 10 minute test drive. After the test drive, check the exhaust tailpipes for symmetrical distance from the rear apron and if necessary, readjust them. - Then carry out a visual inspection to ensure a symmetrical (above all horizontal) alignment of exhaust tailpipes (1).
Follow-up work