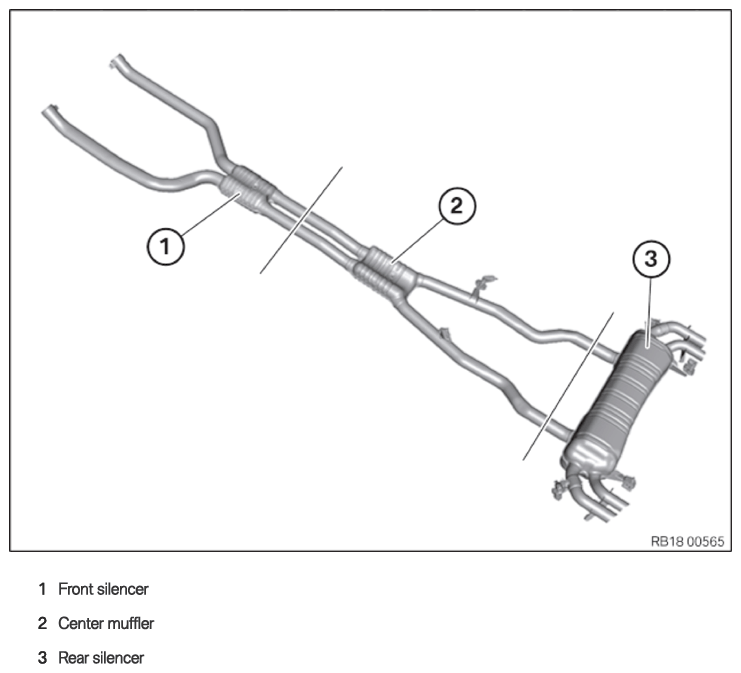
Replacing the rear silencer
WARNING:
Hot exhaust system.
Risk of burning!
Risk of burning!
- Any work must exclusively be carried out with an exhaust system that has cooled down.
NOTE:
RISK OF DAMAGE
Careless handling of tools and sharp-edged components.
Scratches, surface damage.
Careless handling of tools and sharp-edged components.
Scratches, surface damage.
- Protect working area.
- Handle tools and components carefully.
Preliminary work
- Refer to ADJUSTING THE EXHAUST FLAP SERVOMOTORS INTO INSTALLATION POSITION .
- Refer to REMOVING CENTER REAR UNDERSHIELD .
Exhaust system
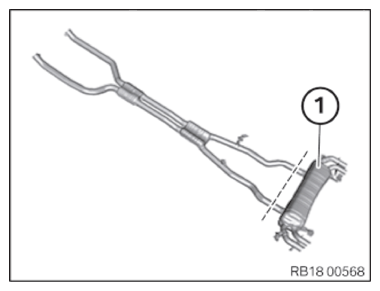
- If the separation point is not marked by a punch mark in the pipe, determine the separation point by means of the pipe length on the new rear silencer.
- Carry over separation point to faulty rear silencer and mark.
- Secure rear silencer against falling off.
- Cut through exhaust pipes at marked point with a suitable tool.
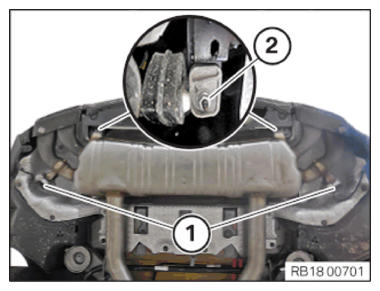
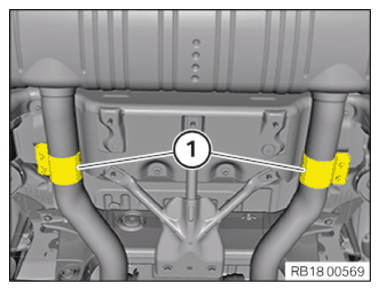
- Unlock and detach the connector (1) on the left and right.
- Loosen nuts (2).
- Lower the rear silencer with the assistance of another person and remove it.
- Adjust the new rear silencer (1) and attach it to the center silencer with the clamps.
- Check rubber mount for damage. Replaced damaged rubber mounts.
- Mount the rubber mount onto the new rear silencer.
- Replace nuts (2).
Parts: Nuts
- Hand-tighten nuts (2).
- Connect the connector (1) on the left and right.
The connectors (1) must engage audibly.
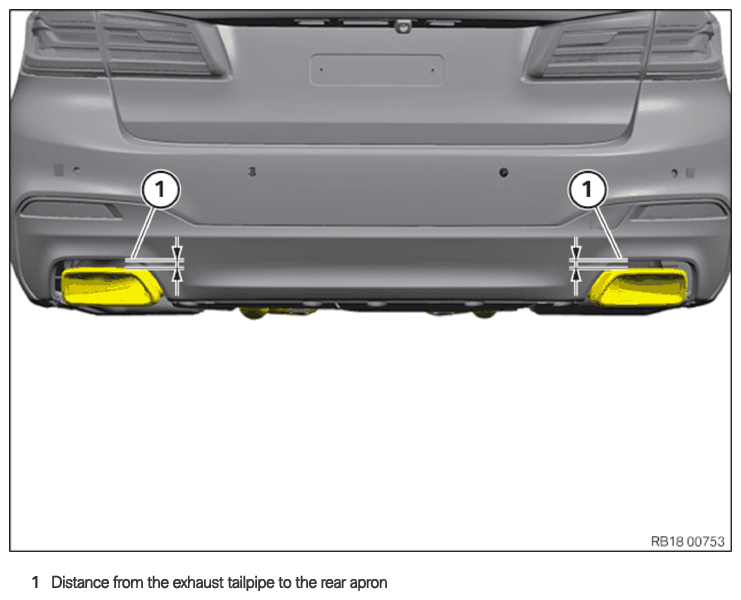
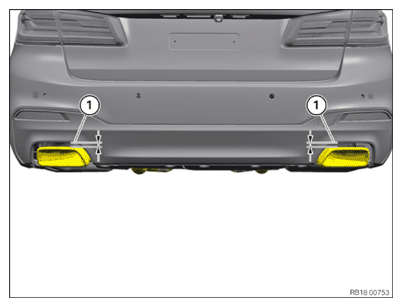
Align the rear silencer to the rear apron
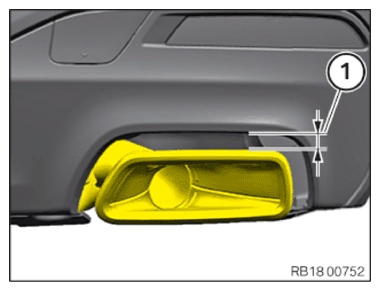
Installation position of the rear silencer on the rear apron
- Before aligning rear muffler to the rear apron, the front section of the exhaust system must be placed in a horizontal position.
- Set up the exhaust tailpipes so that the distance (1) of the left exhaust tailpipe to the rear apron is a maximum of 5 mm compared to the distance of the right exhaust tailpipe.
- Check rubber mount for damage. Replaced damaged rubber mounts.
- Mount the rubber mount onto the new rear silencer.
- Replace nuts (2).
Parts: Nuts
- Tighten nuts (2).TIGHTENING TORQUES SPECIFICATION
Rear silencer to bumper bracket/body Nut M8 Replace nut. Tightening torque 19 Nm - Connect the connector (1) on the left and right.
The connectors (1) must engage audibly.
- Center the clamps (1) and tighten down.TIGHTENING TORQUES SPECIFICATION
Clamp with partial replacement of exhaust system Clamp Tightening torque 45 Nm NOTE: TECHNICAL INFORMATION
After the work on the exhaust system is completed, take a 5 to 10 minute test drive. After the test drive, check the exhaust tailpipes for symmetrical distance from the rear apron and if necessary, readjust them. - Then carry out a visual inspection for the symmetrical (above all horizontal) orientation of the exhaust system tail pipes (1).
Follow-up work
- Refer to INSTALLING CENTER REAR UNDERSHIELD .