Remove catalytic converter
WARNING:
Hot surfaces.
Risk of burning!
Risk of burning!
- Perform all work only on components that have cooled down.
Preliminary work
- Refer to REMOVE THE SEAL FOR THE HOOD REAR .
- Refer to REMOVING THE ACOUSTIC COVER .
- Refer to REMOVING ACOUSTIC COVER AT REAR .
- Refer to REMOVING THE LAMBDA OXYGEN SENSOR .
- Refer to REMOVE THE CONNECTING SUPPORT FROM THE TUNNEL .
- Refer to IF INSTALLED: REMOVE THE TORSION STRUT ON THE RIGHT AND LEFT WHERE REQUIRED .
- Refer to REMOVE COMPLETE EXHAUST SYSTEM .
- Refer to REMOVING THE STIFFENING PLATE .
WARNING:
Hot surfaces.
Risk of burning!
Risk of burning!
- Perform all work only on components that have cooled down.
CAUTION:
Heavy component.
Heavy components can lead to injury or damage.
Heavy components can lead to injury or damage.
- Remove and install heavy components with the aid of another person/other persons.
CAUTION:
Component with heavy weight.
Injury hazard!
Injury hazard!
- Note component's center of gravity.
- Support component using a jack.
- Secure component against falling off the jack.
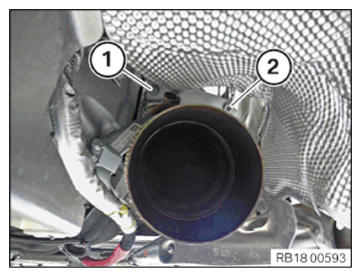
- Loosen nuts (1).
- Feed out and remove the heat shield (2).
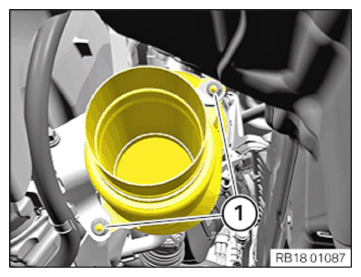
- Version A:
Loosen screw (1).
Loosen nut (2).
- Version B:
Release nuts (1).
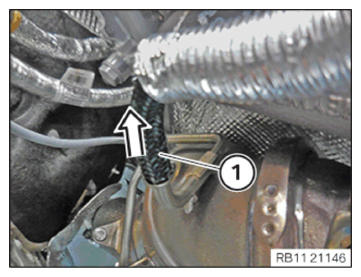
- Pull off the pressure hose (1) in arrow direction and set it aside.
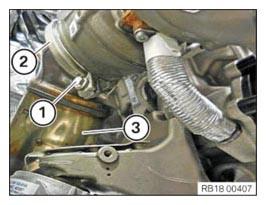
- Loosen screw (1).
- Feed out V-ribbon clamp (2) on the catalytic converter (3) and remove.
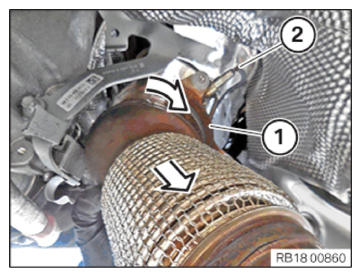
- Guide out the catalytic converter (1) in the arrow direction and remove.
- Make sure that the oxygen sensor monitor (2) is not damaged.