Prepare the injectors for installation
NOTE:
RISK OF DAMAGE
Damage to the injector tips and Teflon ring.
Improper handling of the injector tips and Teflon ring can lead to malfunctioning of the injector.
Damage to the injector tips and Teflon ring.
Improper handling of the injector tips and Teflon ring can lead to malfunctioning of the injector.
- Avoid mechanical contact with injector tip.
- When exchanging Teflon ring, hands and work surface must be clean and free of oil. Do not use any lubricating agents.
- Do not use fingernails to slide Teflon ring on.
NOTE:
TECHNICAL INFORMATION
Before re-exchanging the injector, the Teflon ring must be replaceed. Once a Teflon ring has been installed, it may not be re-used. New injectors are supplied with a new Teflon ring.
After installation of a new Teflon ring on the injectors, the injector must be installed in the cylinder head within 10 minutes or protected with protective caps; otherwise, the Teflon ring will swell.
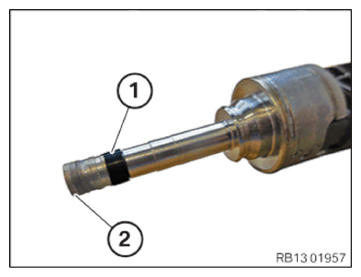
- Before installing the injectors: Replace the Teflon rings (1).
Parts: Teflon rings
- Avoid mechanical contact with injector tip (2).
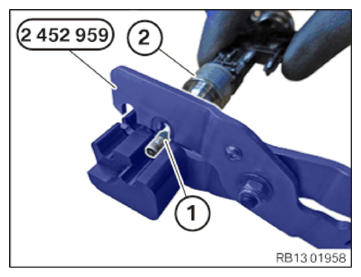
- Remove Teflon ring (1) by using special tool 2 452 959 from injector (2).
- If necessary, use a lint-free cloth to clean the cylindrical part of the injector tip. Do not use ultrasonic sound or other auxiliary materials.
- Do not
clean injector tip.
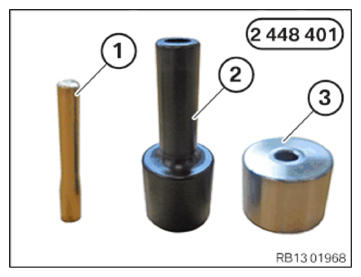
- For installing the new Teflon ring: Use 2 448 401
set of special tools:
- Installation cone
- Sliding sleeve
- Assembly sleeve
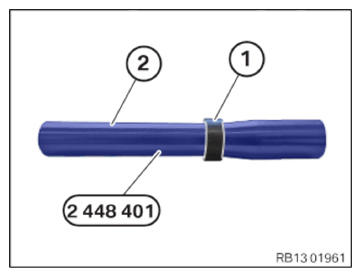
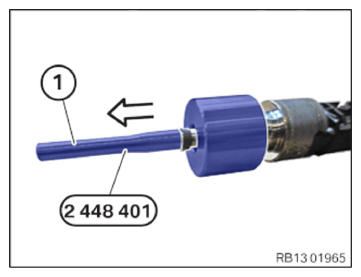
- Slide the new Teflon ring (1) onto the installation cone (2) from the set of special tools 2 448 401
.
- Make sure the assembly sleeve (1) from the set of special tools 2 448 401
is in the correct installation position:
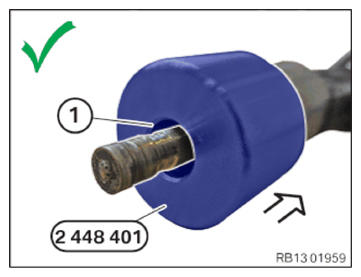
The larger diameter of the assembly sleeve (1) must point to the injector tip.
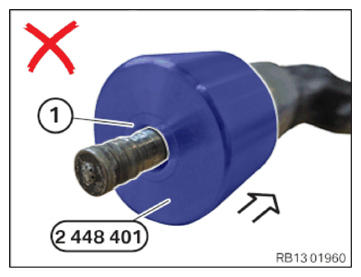
- Make sure the assembly sleeve (1) from the set of special tools 2 448 401
is in the correct installation position:
The assembly sleeve (1) is not correctly mounted if the smaller diameter points towards the injector tip.
- Mount the Teflon ring (2) with the installation cone (1) from the set of special tools 2 448 401
on the injector tip.
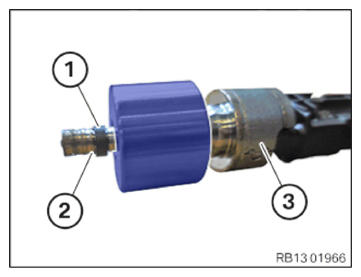
- Use the sliding sleeve (1) from the set of special tools 2 448 401
to push the Teflon ring (2) into the groove (3) on the injector in direction of arrow.
- Guide the sliding sleeve (1) of the set of special tools 2 448 401
in direction of arrow and remove.
- Guide the installation cone (1) of the set of special tools 2 448 401
in direction of arrow and remove.
- Make sure the widened Teflon ring (1) is lying cleanly in the groove (2) of the injector (3) and you can move it easily with your finger.
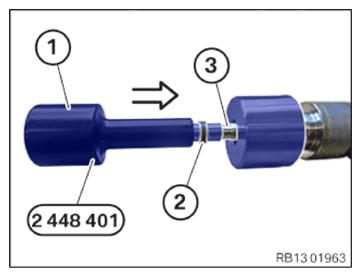
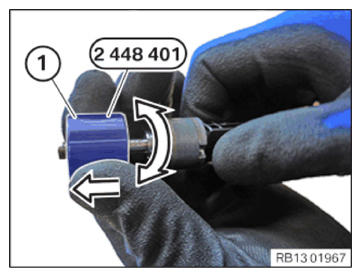
- Calibrate the widened Teflon ring with the assembly sleeve (1) from the set of special tools 2 448 401 to the installation dimensions in direction of arrow.
- Make rotational movements
in steps of 180° in sync with pulling movement
. Make the movements slowly and do not
jerk.
This calibrates the Teflon ring (1) to the installation dimension.
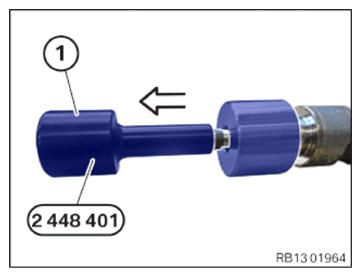
- Guide out and remove assembly sleeve (1).
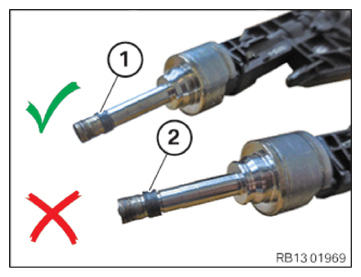
- Check if the installation dimension of the Teflon ring (1) is correct:
- (1) Shows that the Teflon ring has the correct installation dimension.
- (2) Shows that the Teflon ring does not have the correct installation dimension.