Prepare the injector for installation
Replace the Teflon ring and the decoupling element on the injector
NOTE:
RISK OF DAMAGE
Damage to the injector tips and Teflon ring.
Improper handling of the injector tips and Teflon ring can lead to malfunctioning of the injector.
Damage to the injector tips and Teflon ring.
Improper handling of the injector tips and Teflon ring can lead to malfunctioning of the injector.
- Avoid mechanical contact with injector tip.
- When exchanging Teflon ring, hands and work surface must be clean and free of oil. Do not use any lubricating agents.
- Do not use fingernails to slide Teflon ring on.
NOTE:
TECHNICAL INFORMATION
Before re-exchanging the injector, the Teflon ring must be replaceed. Once a Teflon ring has been installed, it may not be re-used. New injectors are supplied with a new Teflon ring.
After installation of a new Teflon ring on the injectors, the injector must be installed in the cylinder head within 10 minutes or protected with protective caps; otherwise, the Teflon ring will swell.
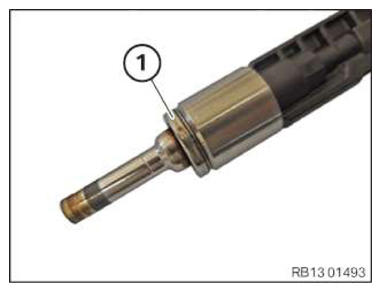
- Replace the decoupling element (1).
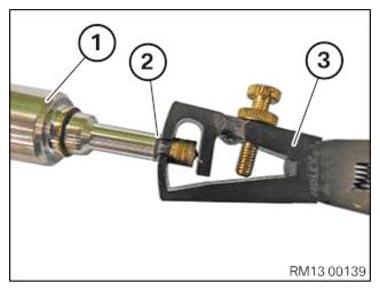
- Remove Teflon ring (2) by using special tool 0 495 757 (13 0 191)
(3) from injector (1).
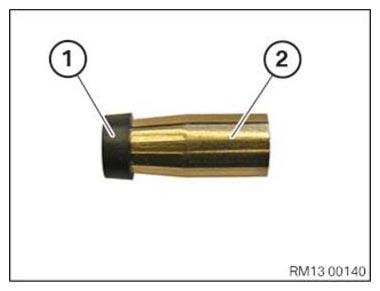
- Slide the new Teflon ring (1) on the installation cone 0 496 771 (13 0 283)
(2).
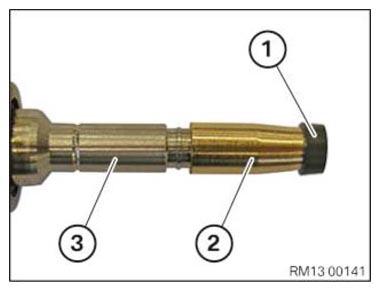
- Mount the Teflon ring (1) with the installation cone 0 496 771 (13 0 283)
(2) on the injector tip (3).
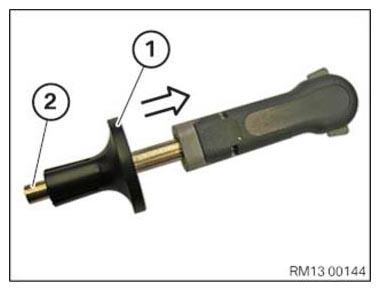
- Using the sliding sleeve (1) of the special tool 0 496 769 (13 0 281)
, slide the Teflon ring (2) in the groove (3) on the injector in arrow direction.
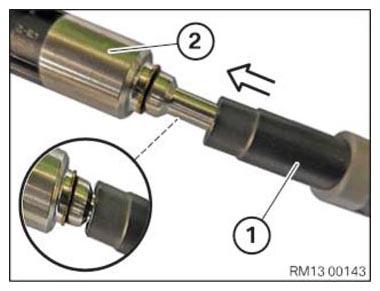
- Bring the expanded Teflon ring to the installation dimension with special tool 0 496 770 (13 0 282) (1).
- Slide the special tool 0 496 770 (13 0 282)
(1) in arrow direction up to the stop on the injector (2).
- Pull the sliding sleeve (1) of the special tool 0 496 769 (13 0 281) in the direction of the arrow toward the rear and release the installation cone 0 496 771 (13 0 283) (2).