Remove all valve springs
CAUTION:
Spring preload.
Injury hazard!
Injury hazard!
- The use of the specified special tool (tool) is mandatory.
- Carry out the described steps properly.
NOTE:
The description is for one component only. The procedure is identical for all further components.
- Get the set of special tools 0 494 362 (11 9 000)
ready.
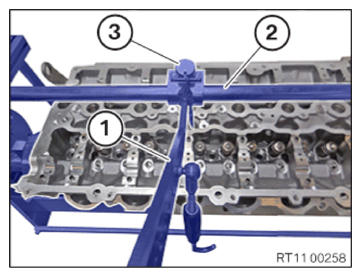
Number Description 1 Device 2 Rod 3 Adapter 4 Lug 5 Quick fastener 6 Aluminum frame insert 7 Shaped part 8 Plastic shaped part 9 lever 10 hook 11 Valve spring cage 12 Valve spring cage 13 Valve spring cage 14 Valve spring cage 15 Valve spring cage 16 Valve spring cage 17 Valve spring cage - Feed in the lever (1) at the bar (2) and install.
- Feed in the locking mechanism (3)
and install.NOTE: TECHNICAL INFORMATION
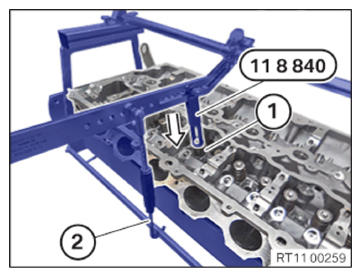
Wear safety goggles. - Press down the valve spring (1) on the spring plate at top in arrow direction with the special tool 0 496 143 (11 8840).
- Keep the valve spring (1) pressed down with the help of the hook (2) .
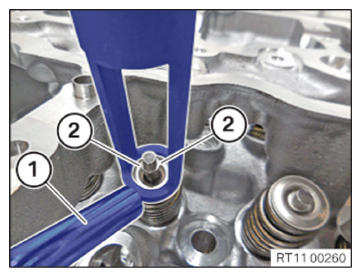
- Remove the valve shims (2)
with a magnet (1)
.
- Press down the valve spring (1) on the spring plate at top in arrow direction with the special tool 0 496 143 (11 8840) .
- Feed out the hook (2) and set it aside.
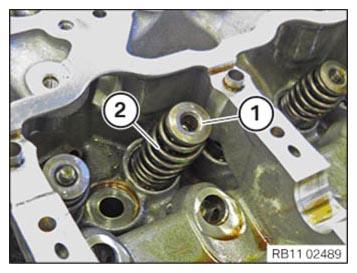
- Carefully
relieve the valve spring (1)
.
- Remove the spring cup (1)
and the valve spring (2) and position neatly in the special tool 0 495 105 (11 4 480)
.