Removing the exhaust camshaft (cylinder head removed)
NOTE:
RISK OF DAMAGE
Contaminant or foreign body.
Contamination can result in malfunctions, loss of function or leaks.
Contaminant or foreign body.
Contamination can result in malfunctions, loss of function or leaks.
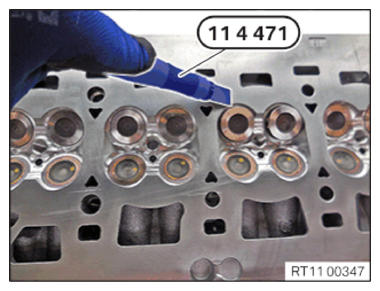
- Adhere to the utmost cleanliness.
- Protect components from contamination e.g. by covering.
- Close off line connections with seal plugs.
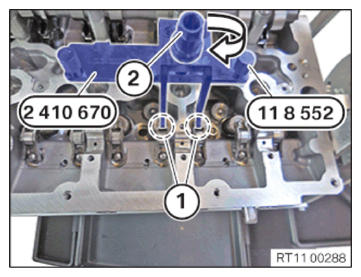
- Position the special tool 2 410 670 at the cylinder 2 and hand-tighten it with the special tool 0 495 741 (11 8 552) from the set of special tools 0 495 739 (11 8 550) .
- Screw in both the roller cam followers (1) on the cylinder 2 with the help of the spindle nut (2) of the special tool 2 410 670
in arrow direction up to the stop.
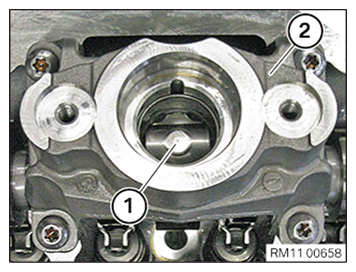
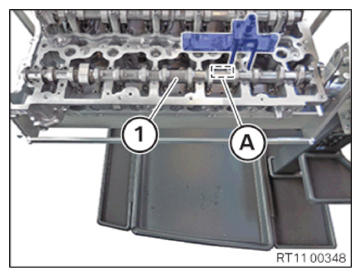
- Remove the roller tappet (1) from the high pressure pump bracket (2).
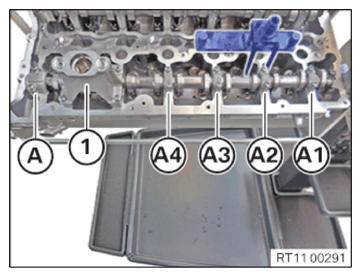
- Pay attention to the numbering of the exhaust camshaft bearing cap.
The exhaust camshaft bearing caps are numbered from (A1) to (A4) and placed according to their numbering in the special tool 0 495 105 (11 4 480) .
The exhaust camshaft bearing caps (A1) to (A4) can be read from the intake side.
The exhaust camshaft bearing cap (A) is a thrust bearing.
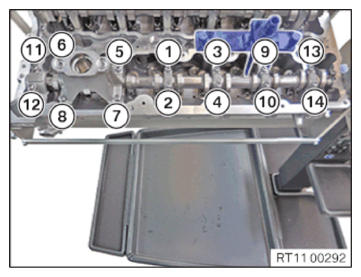
- Release the screws in the sequence (14) to (1) in half turns.
- Thread out all exhaust camshaft bearing caps (A1) to (A4) and exhaust camshaft bearing cap (A) and remove.
- Place all the exhaust camshaft bearing caps (A1) to (A4) and the exhaust camshaft bearing cap (A) in order in the special tool 0 495 105 (11 4 480) .
- Guide out and remove high-pressure pump bracket (1).
- (1) Remove exhaust camshaft in upward direction.