Replacing the front crankshaft seal
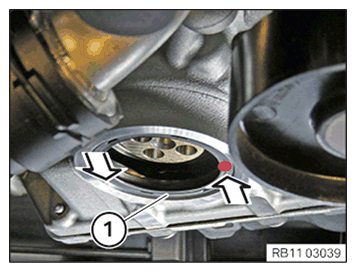
- Drive in the crankshaft seal (1) in the marked area with a punch to approx. 1 cm deep.NOTE: RISK OF DAMAGE
Careless handling of tools and sharp-edged components.
Scratches, surface damage.- Protect working area.
- Handle tools and components carefully.
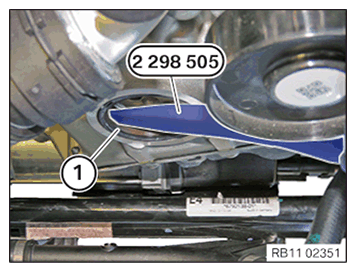
- Carefully lever out and remove the crankshaft seal (1) with the special tool 2 298 505.
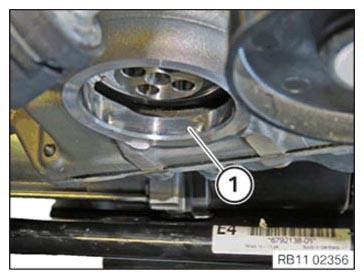
- Clean sealing surface (1).
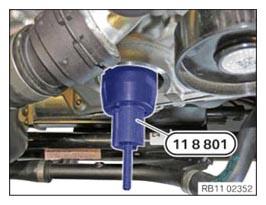
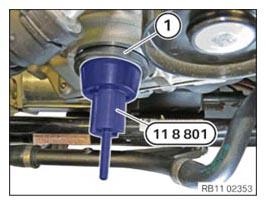
- Clean the special tool 0 496 128 (11 8 801) from the set of special tools 0 496 127 (11 8 800) and coat it with motor oil.
- Position the special tool 0 496 128 (11 8 801)
from the set of special tools 0 496 127 (11 8 800)
on the crankshaft and screw in.NOTE: RISK OF DAMAGE
Radial shaft seal damage.
Taping the sealing lip (inner) and applying oil to the radial shaft seal will lead to its destruction.- Do not tap the sealing lip (inner) of the radial shaft seal.
- Do not apply oil to the radial shaft seal.
- Install the radial shaft seal dry.
- Replace crankshaft seal (1).
Parts: Crankshaft seal
- Carefully slide the crankshaft seal (1) in a rotational movement onto the special tool 0 496 128 (11 8 801) from the set of special tools 0 496 127 (11 8 800) until the crankshaft seal rests on the crankcase.
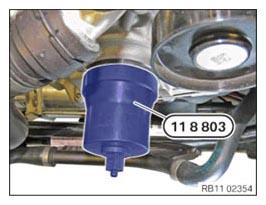
- Position the special tool 0 496 130 (11 8 803) from the set of special tools 0 496 127 (11 8 800) and screw it hand-tight using the nut.
- Ensure that the crankshaft seal shifts in evenly.
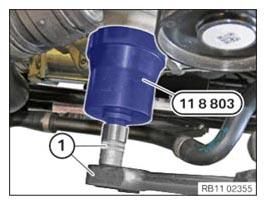
- Screw in the special tool (sleeve) 0 496 130 (11 8 803) from the set of special tools 0 496 127 (11 8 800) using the tool (1) until the sleeve lies flush on the crankcase.