Removing the engine from the installation position
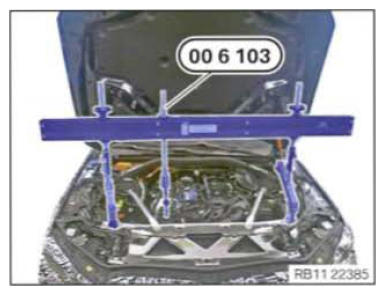
- Lower the combustion engine by turning the special tool 2 361 506 (00 6 103) until it lies completely on the engine mounts.
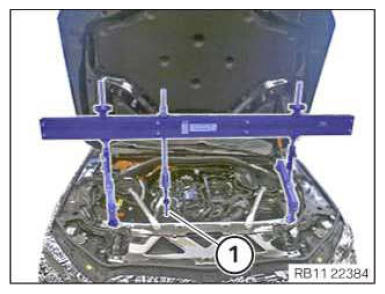
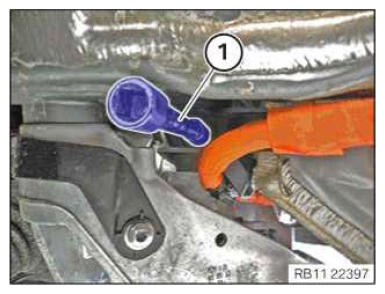
- Thread out hook (1) and place to the side.NOTE: TECHNICAL INFORMATION
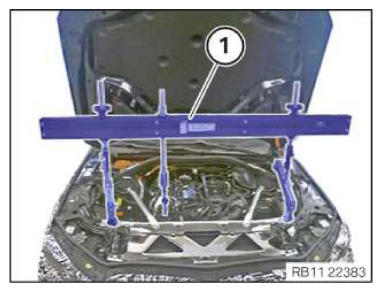
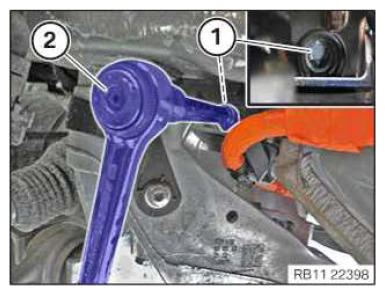
Conduct the following operation with the assistance of a second person. - Remove the engine bridge (1) with a support person.
- Keep all the standard tools ready.
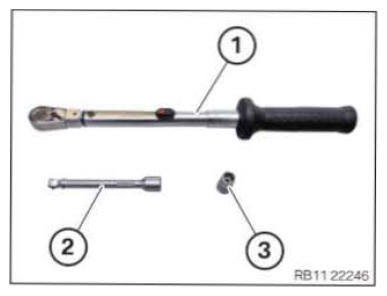
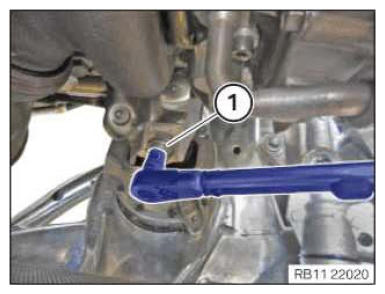
Number Description 1 Standard torque wrench 2 Swivelling extension 3 External Torx E14 - Position suitable tool (1).
- Tighten the screw (1) of the left engine mount from the side with the commercially available tool (2).TIGHTENING TORQUES SPECIFICATION
Engine mount to engine support bracket M12 tightening torque
100 Nm - Tighten the screw (1) of the right engine mount from above with the commercially available tool.TIGHTENING TORQUES SPECIFICATION
Engine mount to engine support bracket M12 tightening torque
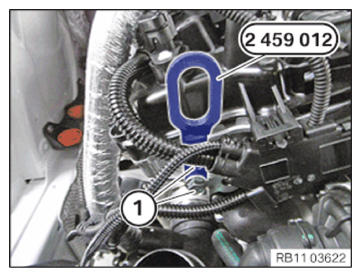
100 Nm - Unscrew the bolts (1) of the special tool 2 459 012.
- Feed out the special tool 2 459 012 at the cylinder head and remove.
Follow-up work:
- Refer to ATTACHING THE UNIVERSAL JOINT TO STEERING GEAR .
- Refer to INSTALLING THE REAR SECTION OF THE FRONT WHEEL ARCH COVER .
- Refer to INSTALLING THE COVER OF THE STEERING ASSEMBLY .
- Refer to INSTALLING THE REAR THRUST FIELD .
- Refer to INSTALLING THE UNDERBODY PROTECTION OF THE STEERING GEAR OR THE FRONT THRUST FIELD .
- Refer to INSTALLING REAR UNDERBODY PROTECTION .
- Refer to ATTACHING THE FRONT LEFT WHEEL .
- Refer to INSTALLING THE REAR RIGHT ENGINE COMPARTMENT COVER .
- Refer to INSTALLING THE COVER OF THE ENGINE COMPARTMENT ON THE REAR LEFT .
- Refer to INSTALLING THE COVER ON THE LEFT AND RIGHT IN THE ENGINE COMPARTMENT AT THE TOP
- Refer to INSTALLING RESONATOR .
- Refer to INSTALLING ACOUSTIC COVER .
- Refer to TAKING HOOD OUT OF THE SERVICE POSITION .