Replacement: Remounting all pistons
NOTE:
TECHNICAL INFORMATION
If one piston is replaced, all other pistons must also be replaced.
Replacing a single piston is not permitted.
If one piston is replaced, all other pistons must also be replaced.
Replacing a single piston is not permitted.
NOTE:
The description is for one component only. The procedure is identical for all further components.
Removing piston from connecting rod
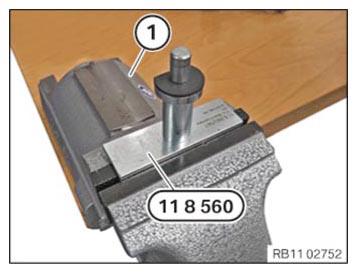
- Clamp the special tool 0 495 743 (11 8 560) on the vice (1).
- Position the piston on the piston pin circlip on the special tool 0 495 743 (11 8 560). CAUTION: Spring preload.
Injury hazard!- The use of the specified special tool (tool) is mandatory.
- Carry out the described steps properly.
NOTE: TECHNICAL INFORMATION
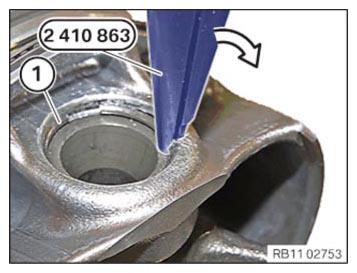
Wear safety goggles. - Hold the piston pin circlip (1) with the special tool 2 410 863 in the groove of the piston.
- Remove piston pin retaining ring (1).
Check
NOTE:
TECHNICAL INFORMATION
Piston and piston pin are matched to each other.
Always install piston and piston pin together and do not switch by mistake.
Piston and piston pin are matched to each other.
Always install piston and piston pin together and do not switch by mistake.
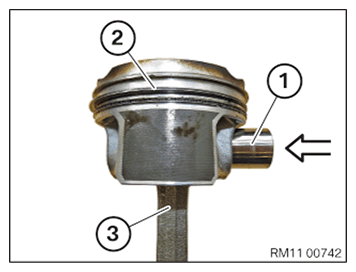
- Check whether the piston pin (1) has noticeable play in the piston.
Check whether the piston pin (1) can be removed without excessive force.

Result
» The piston pin (1) is very difficult to remove or the piston pin (1) has a noticeable play.
Measure
- Replace the piston (2) and the piston pin (1).
- Remove piston pin (1) from piston (2) and connecting rod (3).
Mounting the piston on the connecting rod
- Clean connecting rod bearing, piston pin, piston crown and piston pin boss.
- Oil connecting rod bearing, piston pin, piston crown and piston pin boss.NOTE: TECHNICAL INFORMATION
Piston and piston pin are matched to each other.
Always install piston and piston pin together and do not switch by mistake. - Install piston pin (1) in piston (2) and connecting rod (3).
- Secure the special tool 0 495 743 (11 8 560)
on the vice.
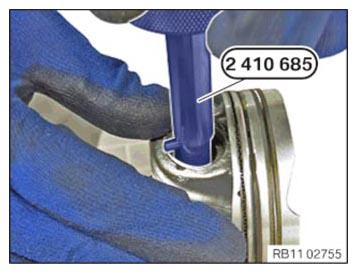
- Position the piston pin circlip (1).NOTE: The opening of the piston pin circlip (1) points in the direction of the piston crown.
- Preload the piston pin circlip with your thumb.
- At the same time, press the piston pin circlip into the piston using the special tool 2 410 685. NOTE: Do not press and rotate the special tool 2 410 685 at the same time, as this will cause the piston pin circlip to twist out of the piston.
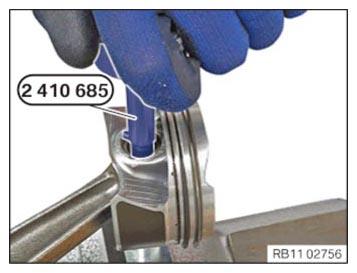
- Secure the piston pin circlip with your thumb.
- Reset the special tool 2 410 685
and continue to press the piston pin circlip into the piston.
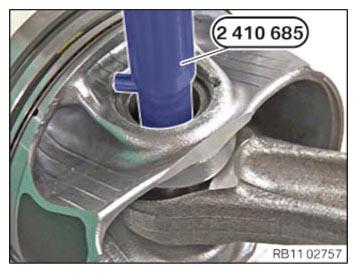
- Secure the piston pin circlip with your thumb.
- Reset the special tool 2 410 685 and press the piston pin circlip fully into the piston.