Remove the electric wastegate valve actuator
WARNING:
Hot surfaces.
Risk of burning!
Risk of burning!
- Perform all work only on components that have cooled down.
Preliminary work
- Refer to REMOVING THE ACOUSTIC COVER .
- Refer to REMOVING INTAKE SILENCER HOUSING .
- Refer to REMOVING TOP CLEAN AIR PIPE .
- Refer to REMOVING BOTTOM CLEAN AIR PIPE .
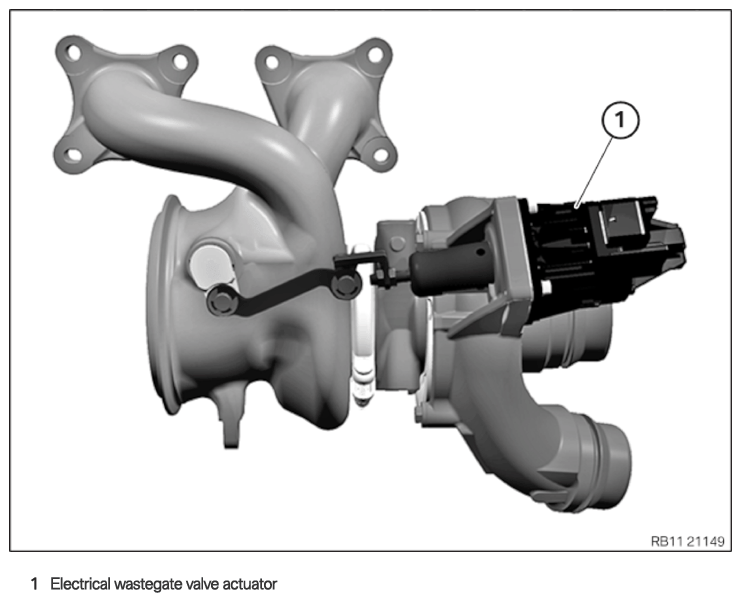
Electrical wastegate valve actuator
WARNING:
Hot surfaces.
Risk of burning!
Risk of burning!
- Perform all work only on components that have cooled down.
NOTE:
RISK OF DAMAGE
Electrostatic discharge.
Damage to or destruction of electrical components.
Electrostatic discharge.
Damage to or destruction of electrical components.
- Leave the electrical components in their original packaging until they are being installed. Only use the original packaging for returning the product. Always package removed components straight away.
- Read and comply with user information on using the associated special tool 12 7 060.
- Only tap the housings of electrical components. Do not tap pins or multi-pin connectors directly.
- Wear electrically conductive clothing and antistatic shoes (with ESD symbol).
- For additional information see: NOTES ON ESD (ELECTROSTATIC DISCHARGE) PROTECTION .
NOTE:
RISK OF DAMAGE
Damage to the electrical controller drive and the mechanical connection.
Improper handling of the electrical controller drive can lead to malfunctions or failure of the electrical controller drive.
Damage to the electrical controller drive and the mechanical connection.
Improper handling of the electrical controller drive can lead to malfunctions or failure of the electrical controller drive.
- Do not release the screw connection between the wastegate linkage and the control rod on the wastegate valve controller and do not twist it.
- Avoid exposure of lateral forces to the control rod of the electrical controller drive.
- Remove all the screws on the electrical controller drive before the control rod on the wastegate linkage is detached.
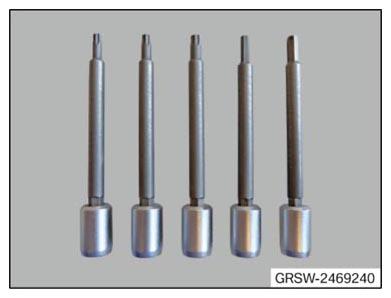
- Have the special tool 2 469 240
ready.
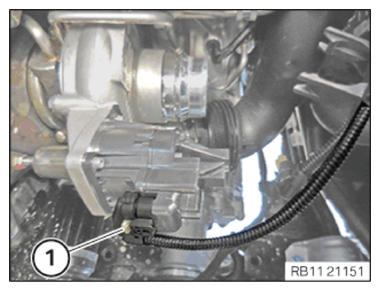
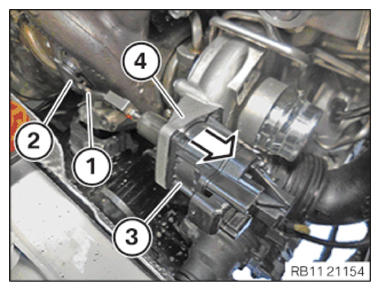
- Unlock and loosen connector (1).
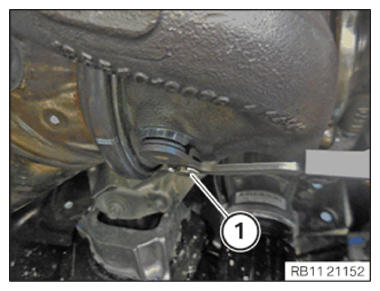
- Unlock and detach the retaining clip (1).
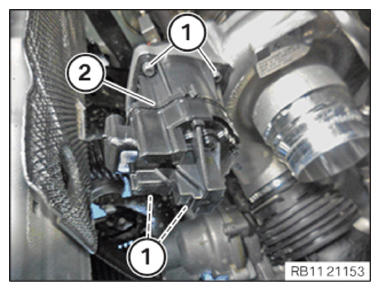
- Release screws (1) with special tool 2 469 240
on the electrical wastegate valve controller (2).
- Carefully
detach the control rack (1) of the electric wastegate valve actuator (3) from the pin on the lever of the wastegate valve (2).
In the process, any effect of transverse force on the control rack (1) is to be avoided.
- Guide the electrical wastegate valve controller (3) in the direction of the arrow out of the bore of the compressor housing (4) and remove.