Install the Head Unit High (HU-H)
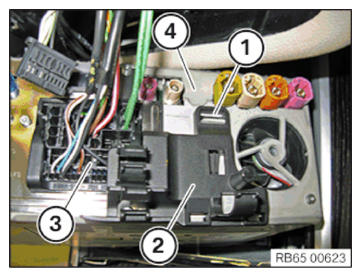
- Connect and lock the connector (3) to the head unit (4).
- Correctly position the cable clip (2) and engage it with the latch mechanism (1).
NOTE:
RISK OF DAMAGE, Damage to the instrument cluster (KOMBI) or the head unit While releasing and connecting the cable, it could lead to a ground offset. This can generate currents that render the instrument cluster (KOMBI) or the head unit unusable.
- While releasing: Release APIX data cable (blue) first.
- While connecting: Connect APIX data cable (blue) at the last.
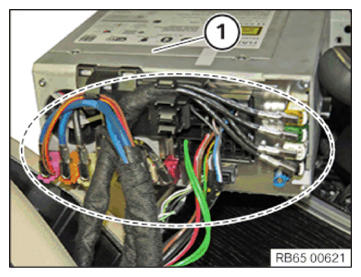
- Connect and lock all the connectors in the marked area with the head unit (1) in the correct assembly sequence.
All cables must be routed correctly.
- Push the head unit (2) into the instrument panel and tighten the screws (1).
TIGHTENING TORQUES SPECIFICATION
| Head unit to instrument panel | ||
| Screw | Tightening torque | 1.8 Nm |

Follow-up Work
- Install radio operating unit and air conditioning CONTROL PANEL .
- Install the finisher on the right INSTRUMENT PANEL .
- Install the right instrument panel SIDE PANEL .
- Connect all battery EARTH LEADS .
- Activate the 48 v ELECTRICAL SYSTEM .
- ENCODE/PROGRAM control unit(s).
- Install the correct NAVIGATION MAP .
- Import the SERVICE HISTORY .
- INITIALIZE component protection