Battery -A-, REMOVING AND INSTALLING, 0K2: Installing
TIP:
Batteries from the Audi Parts Program have a base strip adapter for conforming to different clamping strips. See the battery operating instructions for information on when and how to use the base strip adapter.
At vehicles using a central venting system hose, this hose needs to be inserted in the respective vent opening at the battery again. The vent opening on the opposing side must be closed with a blind plug.
-- Slide the battery all the way on the retaining bracket -1- -arrow- so that the battery clamping strip engages in the retaining bracket.
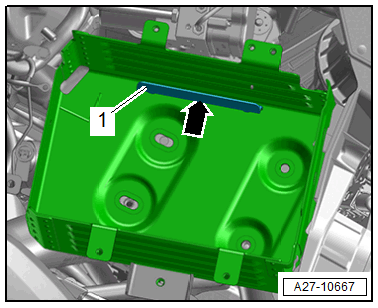
- The battery must not be able to move at all anymore.
Further installation is performed in reverse order of removal, while noting the following:
-- When the ignition and electrical equipment are switched off, connect the battery in the following sequence:
-- First connect the battery positive cable terminal clamp -2- to the battery positive terminal "+" by hand and tighten the nut -3-.
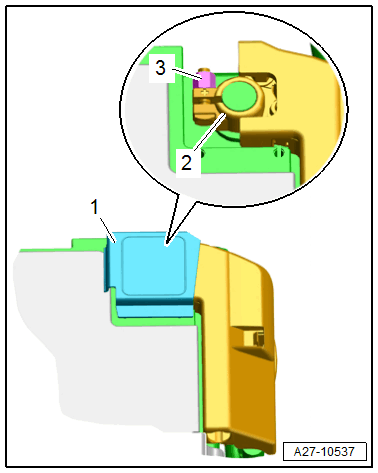
-- Close the cover -1- over the battery positive terminal.
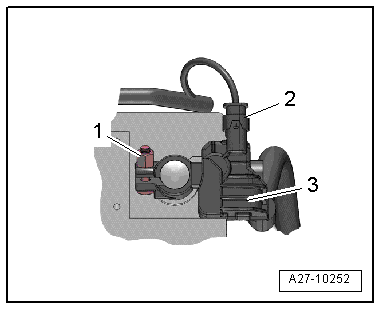
-- Disconnect the connector -2- from the Battery Monitoring Control Module -J367- -3-.
-- Connect the battery ground cable clamp to the battery negative terminal "-" by hand and tighten the nut -1-.
-- Reconnect the connector to the Battery Monitoring Control Module -J367-.
-- Check the battery for secure fit after installation.
-- If the battery was replaced, then the new battery must be adapted.
Procedure
-- Connect the Vehicle Diagnostic Tester.
-- Select the Diagnostic mode and start the diagnosis.
-- Select the Test plan tab.
-- Select the Select individual test button and select the following tree structure consecutively:
- Body
- Electrical system
- 0001 - OBD-capable system
- 0019 - Data Bus on Board Diagnostic Interface - J533
- 0019 - Data Bus on Board Diagnostic Interface, functions
- 0019 - Adaptation
- 0019 - Adapt battery
-- Start the selected program and follow the instructions on the Vehicle Diagnostic Tester display.
When the battery is reconnected, the following steps must be performed:
- Activate the one-touch up/down function for the power window regulators. Refer to the Owner's Manual.
- Check all the control module DTC memories and erase the displayed "undervoltage" entry using the Vehicle Diagnostic Tester.
TIP:
After reconnecting the power supply, the ESP warning lamp can only go out after the vehicle has been driven a few meters.