Piston & Connecting Rod Installation
Examples used in this article are general in nature and do not necessarily relate to a specific engine or system. Illustrations and procedures have been chosen to guide mechanic through engine overhaul process. Descriptions of processes of cleaning, inspection, assembly and machine shop practice are included.
Always refer to appropriate engine overhaul article, if available, in the ENGINES section for complete overhaul procedures and specifications for the vehicle being repaired.
Cylinders must be honed prior to piston installation. See CYLINDER HONING under CYLINDER BLOCK.
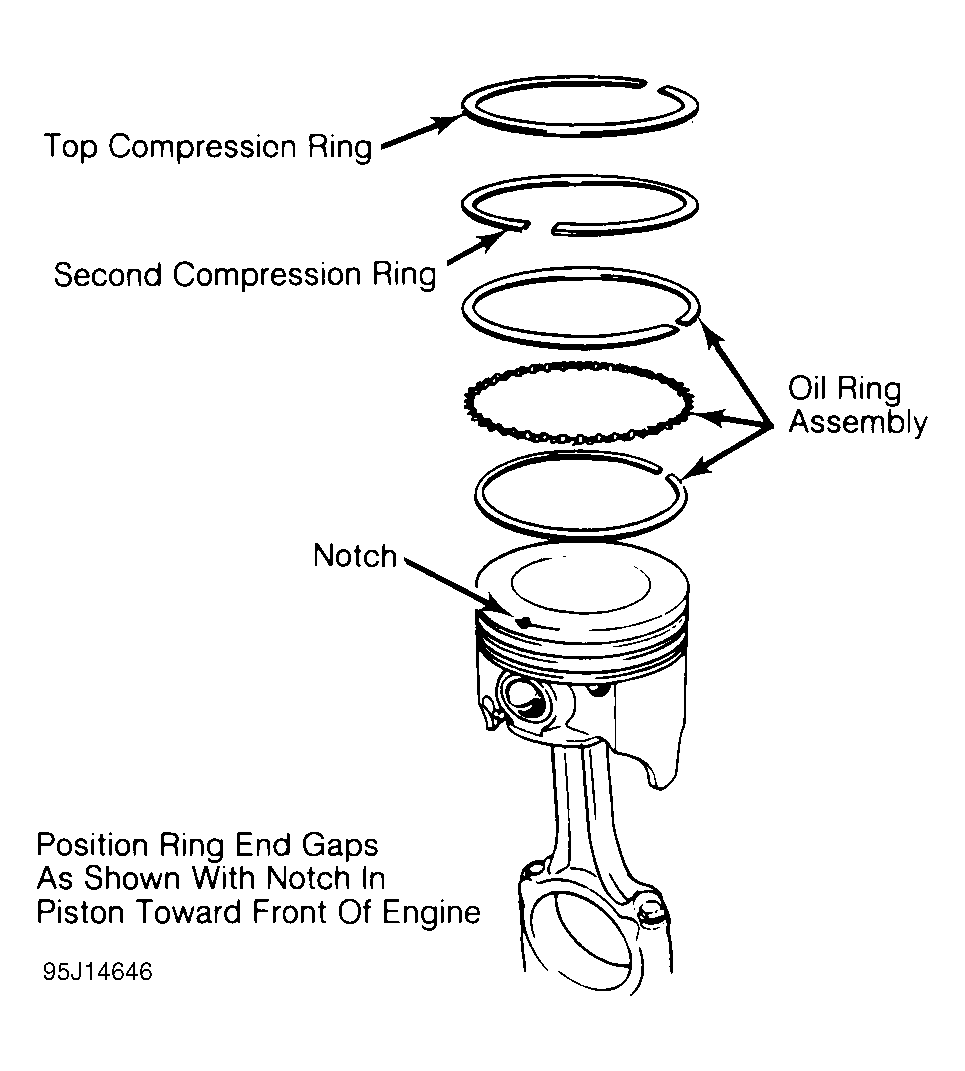
Install upper connecting rod bearings. Lubricate upper bearings with engine oil. Install lower bearings in rod caps. Ensure bearing tabs are properly seated. Position piston ring gaps according to manufacturer's recommendations. See Fig 1. Lubricate pistons, rings and cylinder walls.
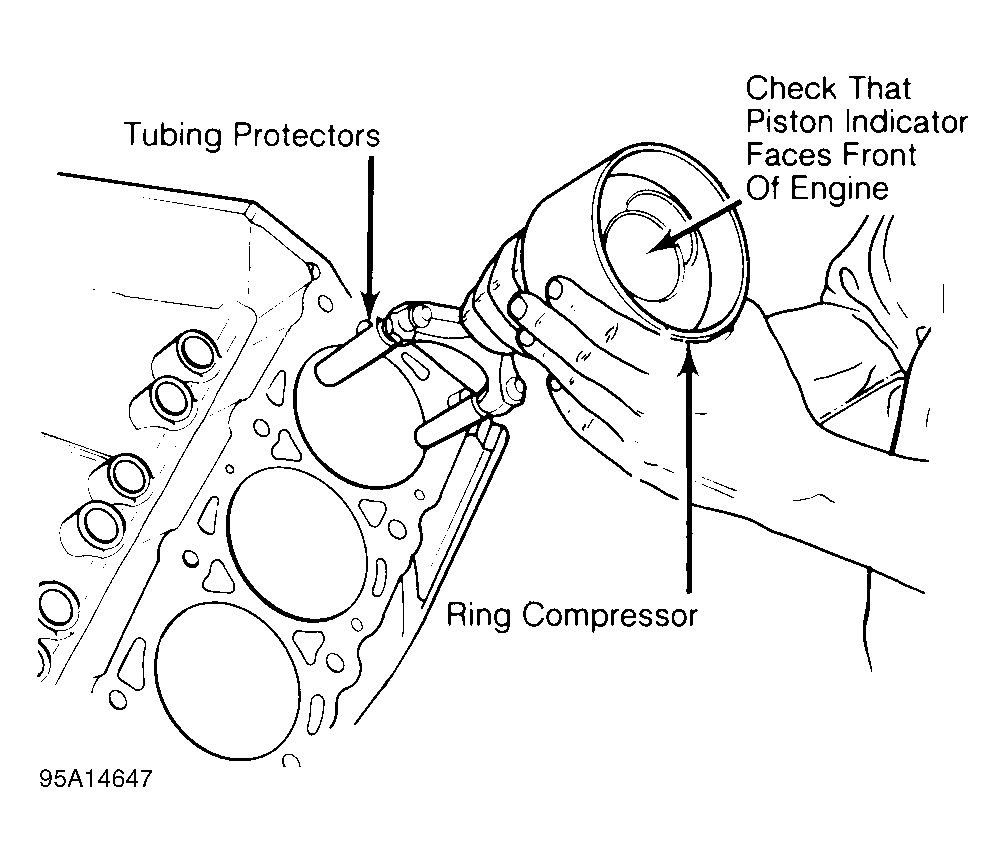
Install ring compressor. Use care not to rotate piston rings. Compress rings with ring compressor. Install plastic tubing protectors over connecting rod bolts. Install piston and connecting rod assembly. Ensure piston notch, arrow or FRONT mark is toward front of engine. See Fig 2.
Carefully tap piston into cylinder until rod bearing is seated on crankshaft journal. Remove protectors. Install rod cap and bearing. Lightly tighten connecting rod bolts. Repeat procedure for remaining cylinders. Check bearing clearance. See MAIN & CONNECTING ROD BEARING CLEARANCE .
Once clearance is checked, lubricate journals and bearings. Install bearing caps. Ensure marks are aligned on connecting rod and cap. Tighten rod nuts or bolts to specification. Ensure rod moves freely on crankshaft. Check connecting rod side clearance. See CONNECTING ROD SIDE CLEARANCE .