Overview - SUBFRAME, Fwd
CAUTION:
There is a risk of damaging the threads on the subframe threaded connection to the body.
- The subframe bolts on the body must not be loosened or tightened with an impact wrench.
- Always install all bolts by hand for the first few turns.
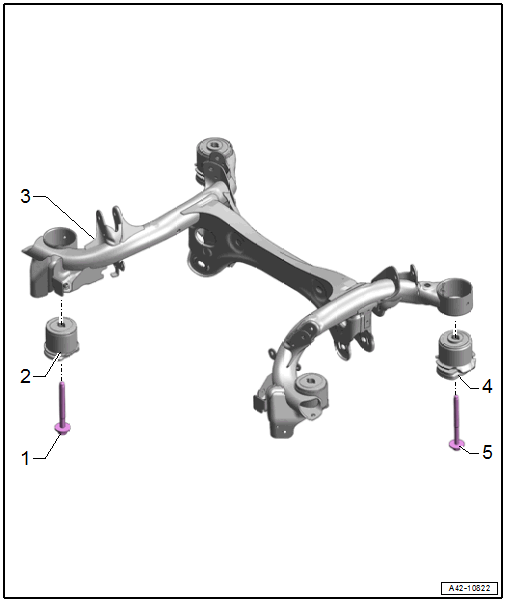
- Bolt
- 130 Nm + 180°
- Always replace after removing
- Front Bonded Rubber Bushing
- For the subframe
- Removing and Installing. Refer to SUBFRAME, SERVICING .
- Subframe
- Equipment versions with vibration damper. Refer to Fig 2.
- Removing and Installing. Refer to SUBFRAME, REMOVING AND INSTALLING .
- Rear Bonded Rubber Bushing
- For the subframe
- Removing and Installing. Refer to SUBFRAME, SERVICING .
- Bolt
- 90 Nm + 180°
- Always replace after removing
Equipment Versions with Vibration Damper
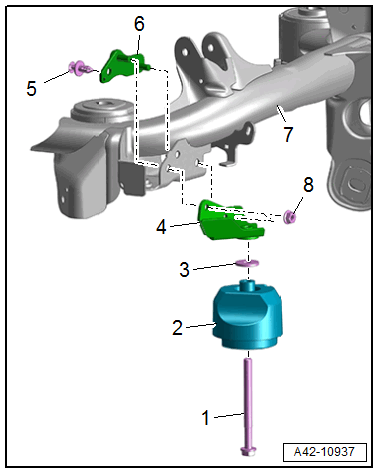
- Bolt
- 50 Nm + 180°
- Always replace after removing.
2 - Vibration Damper
3 - Washer
4 - Bracket
5 - Expanding Rivet
6 - Bracket
7 - Subframe
8 - Nut
- 20 Nm + 90°
- Always replace after removing.
Vibration Damper - Installation Position
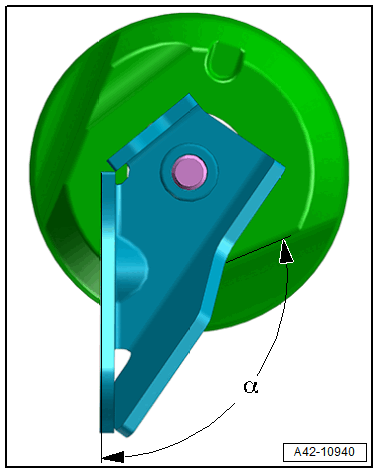
-- Align the bracket to the vibration damper.
- Angle -α- = 113 ± 2°