Drive Axle, Disassembling And Assembling, Outer CV Joint
Special tools and workshop equipment required
- Locking ring pliers, commercially available
- Sealant :D454 300 A2 . Refer to the Parts Information.
This procedure contains mandatory replaceable parts. Refer to component overview and parts information prior to starting procedure.
Mandatory Replacement Parts
- Bolt - Outer CV Joint to Drive Axle
- Clamp - CV Boot to Outer CV Joint
- Clamp - CV Boot to Drive Axle
Outer CV Joint, Removing
-- Clamp the drive axle in a vise with protective covers.
-- Open clamps.
-- Slide back the CV boot.
-- Push the CV joint off of the drive axle using a drift -A-.
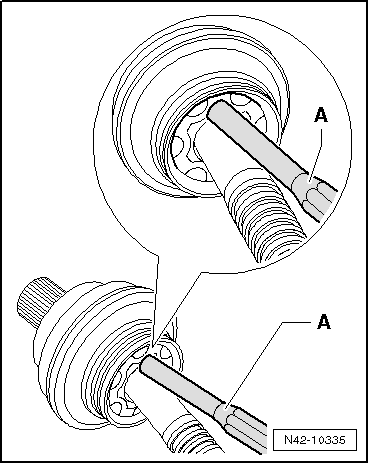
- The drift must be precisely positioned on the CV joint ball hub.
-- Remove joint and CV boot.
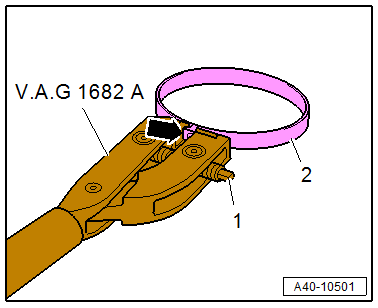
-- Remove the circlip -1- with the locking ring pliers.
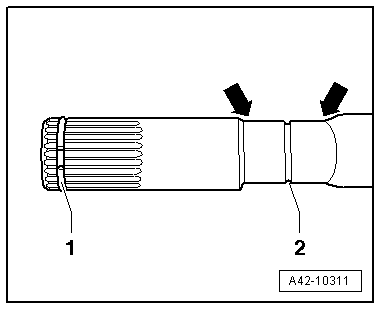
Ignore item -2 and arrows-.
Outer CV Joint, Installing
-- Push the CV boot and a new clamp onto the drive axle.
- The CV boot and the drive axle must be free of grease.
-- Push on the CV boot between the -arrows- in the groove -2- until it engages.
-- Apply and evenly distribute drive axle grease to the inside of the joint. Refer to Grease Quantity and Type .
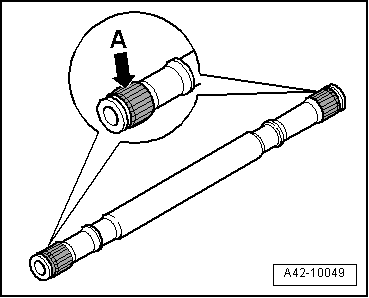
-- Before installing the joint, the splines -arrow A- must be lightly coated with grease used in the joint.
-- Insert the circlip into the groove on the shaft.
-- Slide on the CV joint up to the circlip.

-- Align the circlip at center with opening upward -arrows-.
-- Install the old bolt in the joint as shown.
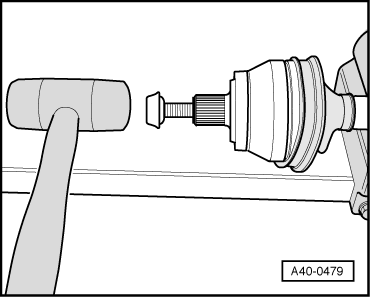
-- Drive joint onto the drive axle with a plastic hammer until the circlip engages.
-- Mount the CV boot on the metal cap.
-- Bleed the CV boot.
-- Make sure the CV boot is seated on the joint correctly.
- The CV boot must fit in the groove and on joint contour.
-- Tension the clamps on the outer joint. Refer to Figure.