Repair Information: Components
Rear Final Drive
- Allocate bolts and other components according to final drive code using the Parts Information
- When replacing the rear final drive, check the oil level in the rear final drive and fill if necessary. Refer to GEAR OIL, CHECKING LEVEL .
- Capacities and specifications. Refer to CAPACITIES .
- Clean the contact surfaces when installing mounting brackets and waxed components. Contact surfaces must be free of wax and grease.
- Thoroughly clean the connection points and the surrounding area before loosening.
Driveshaft
- The attached driveshaft can only be separated from the transmission if it is completely removed.
- Always remove or install the driveshaft horizontally at the all-wheel drive clutch output shaft.
- Always store and transport the driveshaft when it is fully extended.
- The driveshaft can be bent all the way to the center joint without force. Bending the joint forcibly all the way can damage the center joint and/or the protective boot.
- If the driveshaft is separated only from the rear final drive, the driveshaft must be tied up or supported. If necessary, the driveshaft can be bent as far as the end stop of the center without force.
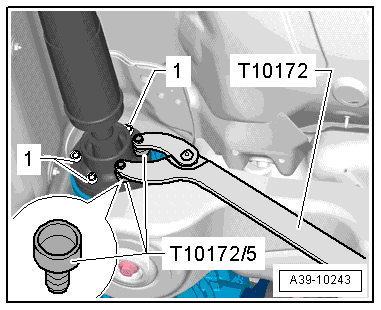
- Pay attention to the tightening sequence for the driveshaft bolt on the rear final drive. Refer to Fig 1.
Should there be complaints (noise, vibration), do the following before replacing the driveshaft:
-- Remove all the driveshaft bolts from the rear final drive.
-- Tighten the driveshaft with new bolts according to the tightening sequence. Refer to Fig 1.
 Courtesy of AUDI OF AMERICA, LLC
Oil, Environmental and Disposal Regulations
- Handle ATF, transmission fluid and other oils with care.
- Dispose of drained fluid properly.
- Follow the legal, environmental, and disposal regulations.
- Follow the instructions listed on the fluid packaging.
O-Rings, Gaskets and Seals
- O-rings, gaskets and seals must always be replaced.
- After removing the seals, examine the contact surface on the housing or shaft for burrs resulting from removal or for other signs of damage.
- Thoroughly clean the housing separating surfaces before assembling.
- Lightly lubricate the O-rings before inserting to prevent the rings from being crushed during assembly.
- Lightly coat the seal on the outer diameter with oil before installing.
- Fill the space between the sealing lips -arrow- halfway with Sealing Grease :G 052 128 A1 .
- The open side on the shaft seals faces the fluid to be sealed off.
- After replacing the seals, gaskets and O-rings check the gear oil level. Refer to GEAR OIL, CHECKING LEVEL .

Circlips
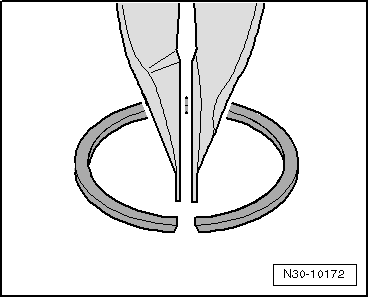
- Do not stretch the circlips.
- Always replace damaged or stretched circlips.
- Installation position for some of the circlips: the circlip is >>narrower at the top<< and so is its installation position. This makes it easier for the pliers to grab the circlip when removing and installing it.
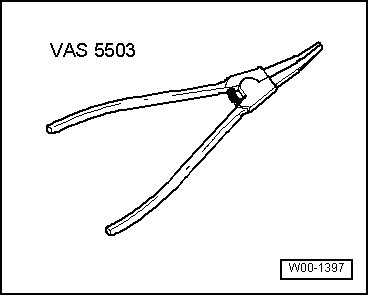
- To assemble, use the Circlip Pliers :VAS 5503A
.
- The circlips must rest at the bottom of the groove.
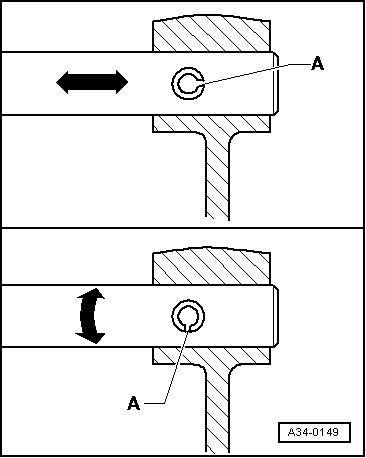
- Replace the adapter sleeves. Installation position: the slot -A- should align with the line of force -arrow-.
- Do not stretch the circlips.
- Always replace damaged or stretched circlips.
- The circlips must rest at the bottom of the groove.
- Replace the adapter sleeves. Installation position: the slot -A- should align with the line of force -arrow-.
Bolts and nuts

- Always loosen or tighten bolts and nuts on covers and housings diagonally.
- Parts which are particularly sensitive must not be tilted and must be loosened or tightened diagonally in stages.
- The tightening specifications given apply to unoiled bolts and nuts.
- Always replace self-locking bolts and nuts.
- Clean threads of bolts that were applied with locking fluid using a wire brush (does not apply to driveshaft bolts: these must be replaced). Then insert the bolts with Locking Fluid :AMV 185 101 A1 .
- If self-locking bolts were installed or if regular bolts were installed with locking fluid, then the threaded holes must be cleaned, for example with a thread tap. Otherwise there is the risk that the bolts could break off when they are removed again.