Drain The Coolant
Special tools and workshop equipment required
- Shop Crane - Drip Tray: VAS6208
- Hose Clip Pliers: VAS6362
- Safety Gloves
- Protective Eyewear
Procedure
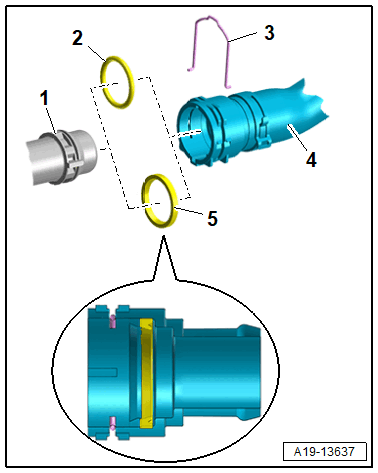
- During installation, all heat shield boots must be installed at the same location.
A partial coolant replacement in the engine coolant circuit is not possible on vehicles with a high-voltage system.
For repairs and partial replacement on the engine coolant circuit the entire coolant must be drained and refilled.
The cooling system is under pressure when the engine is warm. There is a risk of scalding due to hot steam and hot coolant.
Scalding the skin and other parts of the body is possible.
- Wear safety gloves.
- Wear protective eyewear.
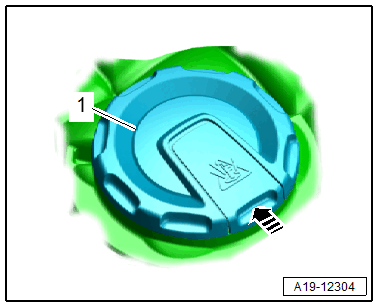
- Reduce the pressure by covering the coolant expansion tank cap with a cloth and carefully opening it.
-- Open the coolant expansion tank cap -1- by releasing the catch in direction of -arrow-.
-- Remove the respective noise insulation. Refer to OVERVIEW - NOISE INSULATION .
Audi A6/A7:
-- Remove the front left wheel spoiler. Refer to OVERVIEW - FRONT WHEEL HOUSING LINER .
Vehicle without High-Voltage System:
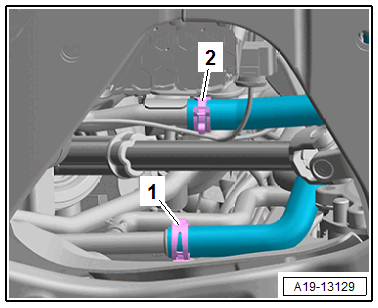
-- Lift the clamp -2- and remove the coolant hose from the lower right of the radiator and drain the coolant (example image).
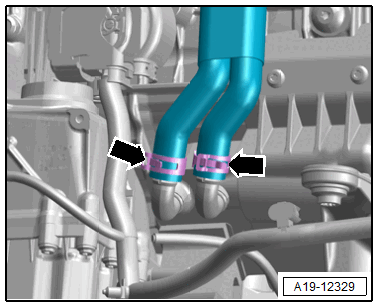
-- Version with dual clutch transmission: loosen the hose clamp -right arrow- and remove the coolant hose from the ATF cooler and drain the coolant, to do so open the heat shield boot if equipped.
Audi A8:
-- Place the Shop Crane - Drip Tray: VAS6208 underneath.
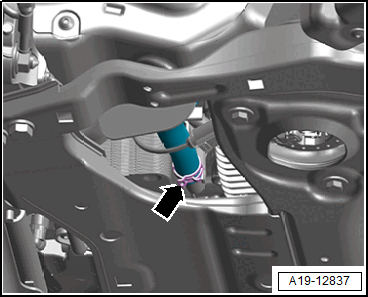
-- Loosen the coolant hose -arrow-, remove the coolant hose and hold it toward the rear and let the coolant drain.
Audi A6/A7 with High-Voltage System:
-- Place the Shop Crane - Drip Tray: VAS6208 underneath.
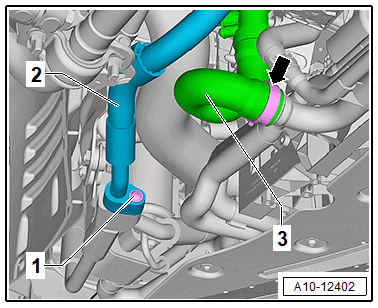
-- Loosen the hose clamp -arrow-, remove the coolant hose -3- and let the coolant drain out.
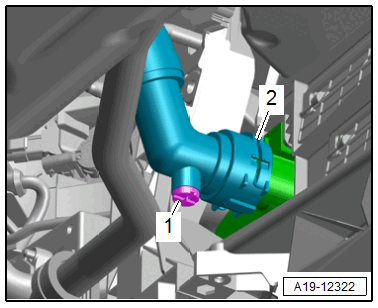
Audi Q5 with High-Voltage System:
-- Place the Shop Crane - Drip Tray: VAS6208 underneath.
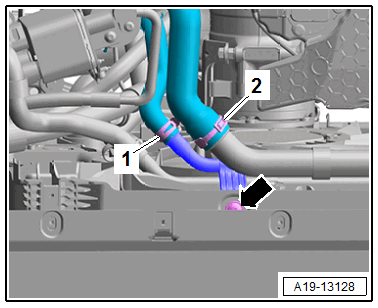
-- Loosen the hose clamp -2-, remove and free up the coolant hose and let the coolant drain out.
Audi A6/A7 and Q5 with High-Voltage System:
-- Place the Shop Crane - Drip Tray: VAS6208 underneath.
-- Loosen the hose clamp -2-, remove and free up the coolant hose and let the coolant drain out (example illustration).
Continuation for All Vehicles:
- Secure all hose connections with hose clamps that match the ones used in series production. Refer to the Electronic Parts Information (ETKA).
-- Reattach the coolant hoses. Refer to Figure for versions with a connector coupling.
-- Fill the cooling system. Refer to COOLANT, FILLING USING Cooling System Charge Kit: VAS6096 [DMTA, DPAA, DPUA, DPVA, DMTC, DRYA, DUVA] .