Overview - Balance Shaft Drive Chain
WARNING: This page is about a different variant/trim than selected.
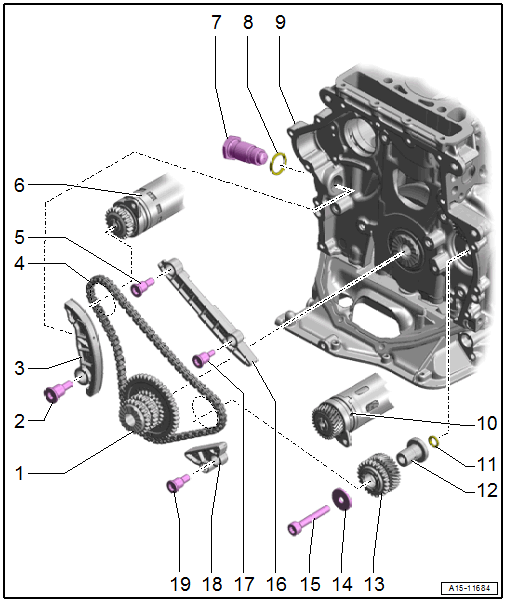
- Three Stage Chain Sprocket
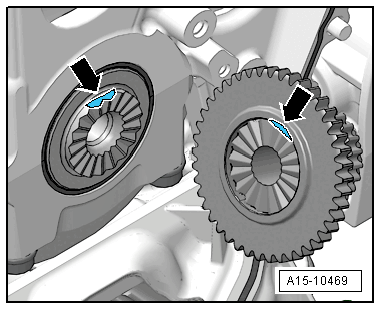
- Installation position. Refer to Figure.
- Guide Pin
- 20 Nm
- Tensioning Rail
- For balance shaft drive chains
- Balance Shaft Drive Chain
- Removing and Installing. Refer to BALANCE SHAFT DRIVE CHAIN, REMOVING AND INSTALLING .
- Guide Pin
- 20 Nm
- Exhaust Side Balance Shaft
- Overview. Refer to OVERVIEW - BALANCE SHAFT .
- Chain Tensioner
- 85 Nm
- Replace after removing
- Seal
- Not available separately, included in the delivery package -item : Chain Tensioner
- Cylinder Block
- Intake Side Balance Shaft
- Overview. Refer to OVERVIEW - BALANCE SHAFT .
- O-Ring
- Replace after removing
- Lubricate with engine oil
- Mounting Pin
- Lubricate with engine oil
- Installation position. Refer to Fig 2.
- Intermediate Sprocket
- The intermediate sprocket must be replaced if the bolt -item : Bolt is loosened.
- Thrust Washer
- Bolt
- Replace after removing
- The intermediate sprocket -item : Intermediate Sprocket must be replaced if the bolt is loosened.
- Tightening Specifications and Sequence. Refer to Fig 3.
- Guide Rail
- For balance shaft drive chains
- Guide Pin
- 12 Nm
- Guide Rail
- For the balance shaft timing chain
- Guide Pin
- 20 Nm
Mounting Pins - Installation Position
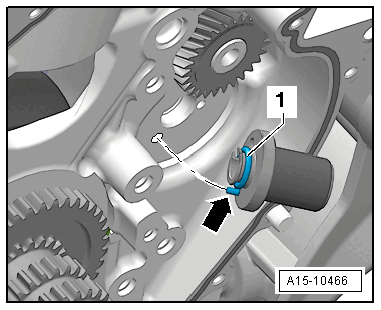
-- Coat the new O-ring -1- before installing with engine oil.
- The alignment pin -arrow- for the bearing pins must engage in the hole in the cylinder block.
-- Coat the bearing pin with engine oil.
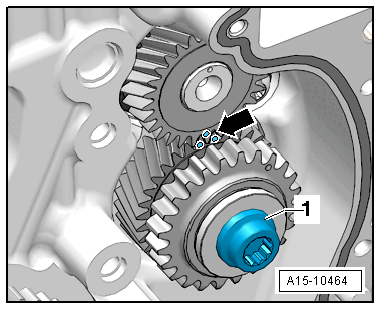
Intermediate Sprocket - Tightening Specifications and Sequence
- Replace bolts that were tightened with an additional turn after removing them.
-- Tighten the bolt in steps:
| Step | Tightening Specification/Additional Turn |
|---|---|
| 1. | 10 Nm |
| 2. | -- Turn the intermediate sprocket
|
| 3. | 25 Nm |
| 4. | 90° additional turn |