Balance Shaft Drive Chain, Removing And Installing: Installing
WARNING: This page is about a different variant/trim than selected.
Install in the reverse order of removal while noting the following:
Requirements:
Vehicle without High-Voltage System:

- The crankshaft is at "TDC" ; the V-shaped cut-out on the three-layer chain sprocket points in an imaginary vertical line -arrows- centered between the camshaft chain sprockets.
- Three-layer chain sprocket locked with the Assembly Tool - Tensioning Bolt: T10531/6 .
Vehicle with High-Voltage System:
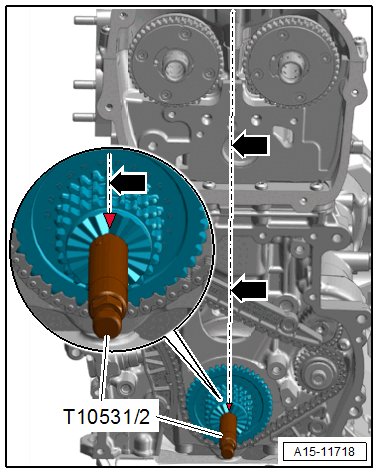
- The crankshaft is at "TDC" ; the V-shaped cut-out on the three-layer chain sprocket points in an imaginary vertical line -arrows- centered between the camshaft chain sprockets.
- Three-layer chain sprocket locked with the Vibration Damper Assembly Tool - Tensioning Bolt: T10531/2 .
Continuation for All Vehicles:
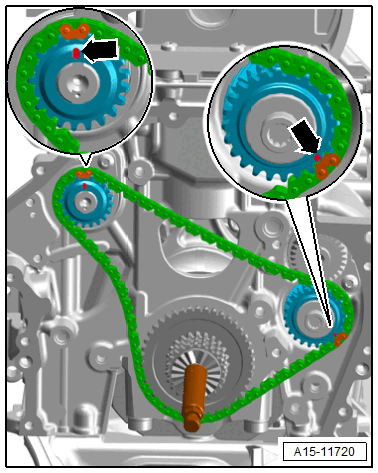
-- First apply the balance shaft drive chain as shown onto the exhaust side balance shaft and the intermediate sprocket.
- The painted chain links must align with the markings -arrows- on the chain sprockets.
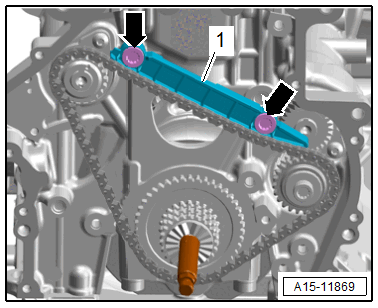
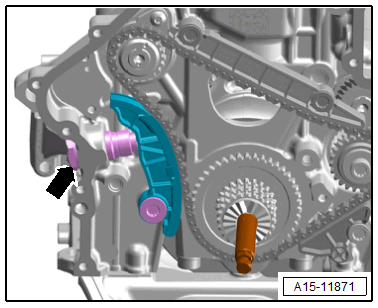
-- Insert the guide track -1- and tighten the guide pins -arrows-.
-- Position the center painted chain link -arrow- from the balance shaft drive chain at the marking on the three-layer chain sprocket as shown.
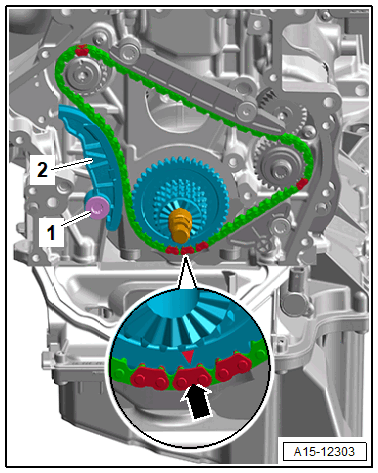
-- Insert the tensioning rail -2- and tighten the guide pin -1-.
-- Tighten the chain tensioner -arrow-.
-- Check the position again:
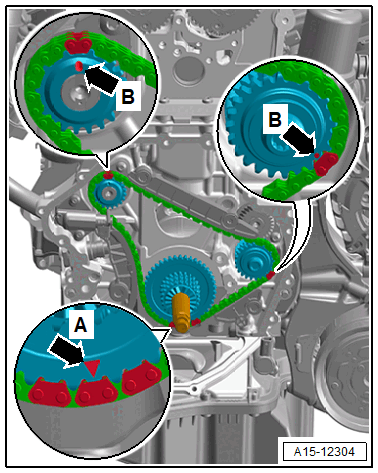
- The center colored chain link must be facing the marking -arrow A- on the three-layered chain sprocket.
- The colored chain links must face the markings -arrows B- on the exhaust side balance shaft and the intermediate sprocket.
-- Install the camshaft timing chain. Refer to CAMSHAFT TIMING CHAIN, REMOVING AND INSTALLING .