Battery, 48 V -A6-, REMOVING AND INSTALLING, 0K4 AND VH2: Installing
Install in reverse order of removal and Note The Following:
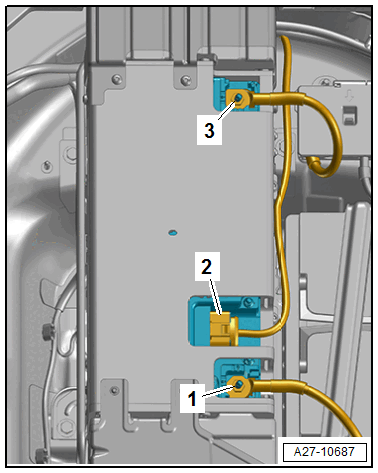
-- When the ignition and electrical equipment are switched off, connect the battery in the following sequence:
-- First connect the battery positive cable terminal clamp -3- to the battery positive terminal "+" by hand and tighten the nut.
-- Connect the battery ground cable terminal clamp -1- to the battery negative terminal "-" by hand and tighten the nut.
-- Attach the caps until they engage audibly.
-- Connect the connector -2-.
-- Check the battery for secure fit after installation.
-- Install the Battery -A-. Refer to Battery -A-, REMOVING AND INSTALLING, 0K4 AND VH2 .
-- If the Battery, 48 V -A6- was replaced, the new Battery, 48 V -A6- must be adapted.
Procedure
-- Connect the Vehicle Diagnostic Tester.
-- Select the Diagnostic mode and start the diagnosis.
-- Select the Test plan tab.
-- Select the Select individual test button and select the following tree structure consecutively:
- Diagnostic-capable systems
- 0021 - 48V battery management -A6-
- 0021 - 48V battery management, functions
- 0021 - Replacing control module (Battery, 48 V -A6-)
-- Start the selected program and follow the instructions on the Vehicle Diagnostic Tester display.