RIGHT AND LEFT LED HEADLAMP POWER OUTPUT Module 1 -A27- / -A31-, REMOVING AND INSTALLING, RS4: Removing
-- Remove the front bumper cover. Refer to FRONT BUMPER COVER, REMOVING AND INSTALLING .
-- Remove the headlamp washer system washer nozzle and move it to the side with the washer fluid hose still attached. Refer to WASHER NOZZLES, REMOVING AND INSTALLING .
Left Side of Vehicle:
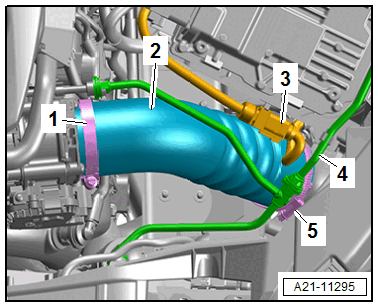
-- Remove the connector -3- from the bracket and move to the side.
-- Free up the coolant line -4-.
-- Loosen the hose clamps -1 and 5- and remove the air duct hose -2-.
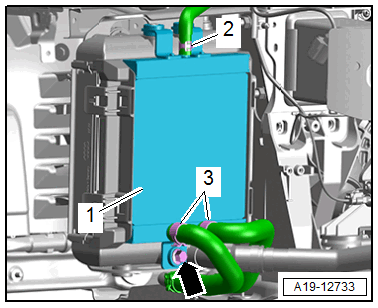
-- Remove the nut -1-.
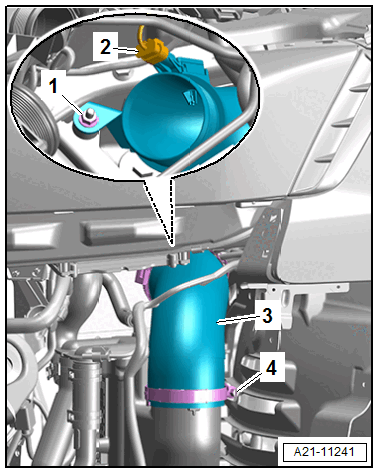
-- Disconnect the connector -2-.
-- Loosen the hose clamp -4- and remove the air duct hose -3- upward.
-- Remove the screws -arrows-.
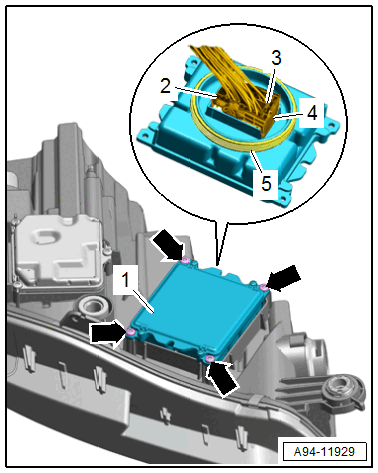
-- Remove the power output Module -1-.
-- Disconnect the connector -2-.
-- To disconnect push the connector tab -3-, pivot the retaining bracket -4- upward and remove the connector.
Right Side of Vehicle:
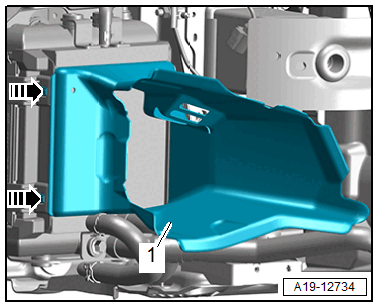
-- Release the left and right catches in direction of -arrows- and remove the air duct -1-.
-- Remove the bolt -arrow-.
-- Disengage the radiator -1- toward the front and the upward and push to the side with the coolant hoses -2 and 3- attached.
-- Remove the horn. Refer to High Tone Horn -H2- /Low Tone Horn -H7-, REMOVING AND INSTALLING .
-- Remove the screws -arrows-.
-- Remove the power output Module -1-.
-- Disconnect the connector -2-.
-- Press the circlip -3- to disconnect the connector with the :T10118 , then pivot the retaining bracket -4- upward and remove the connector.
-- Remove the power output Module forward.