Lock Carrier, Removing And Installing: Removing
-- Remove the noise insulation. Refer to NOISE INSULATION, REMOVING AND INSTALLING, FRONT .
-- Remove the front bumper cover. Refer to BUMPER COVER, REMOVING AND INSTALLING .
-- RS 4 and RS 5: discharge the refrigerant circuit. Refer to Refrigerant Circuit or REFRIGERANT CIRCUIT, DISCHARGING .
-- Remove the bumper cover mount. Refer to BUMPER COVER MOUNT, REMOVING AND INSTALLING .
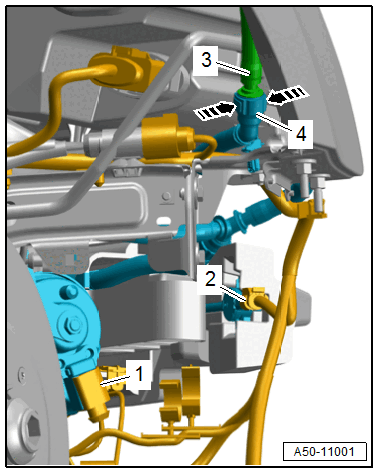
-- Disconnect the connector -2-.

-- Remove the breather hose -1-.
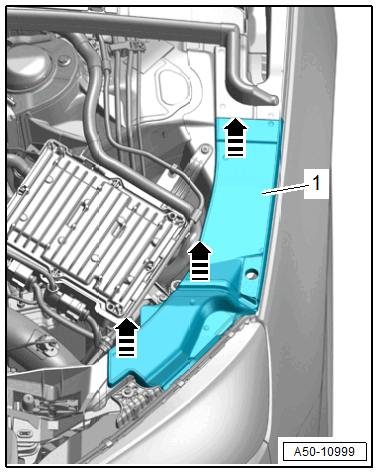
-- Remove the bolts -arrows- and air ducts -1 and 2-.
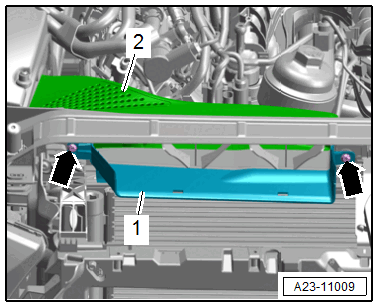
-- A4 / A5 on the left: release the retainers -arrow- and remove the air duct -3-.
-- Disconnect the connector -2- for the High Pressure Sensor -G65-.
Risk of destroying the refrigerant lines by tearing the inner film.
- Never bend the refrigerant lines to a radius smaller than r = 100 mm.
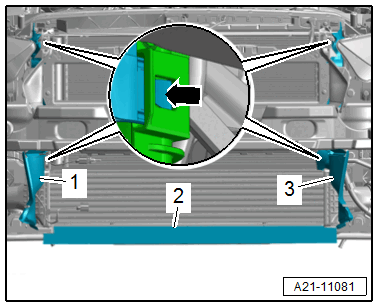
-- A4 and A5: release the left and right catches in direction of -arrows- disengage the condenser -1- from the radiator and tie up to the side.
-- RS 4 and RS 5: disconnect the refrigerant lines from the condenser. Refer to CONDENSER, REMOVING AND INSTALLING .
Pyrotechnical components can deploy unintentionally.
Risk of injury.
- Discharge the static electricity: quickly touch the door striker.
-- Vehicles with pedestrian protection: disconnect the connector -1- from the pedestrian protection crash sensor and free up the wiring harness -2-.
TIP:
Depending on the version one or three crash sensors for the pedestrian protection are installed.
-- If required, remove the air filter housing. For TDI vehicles. Refer to the appropriate service information . For TFSI vehicles. Refer to AIR FILTER HOUSING, REMOVING AND INSTALLING .
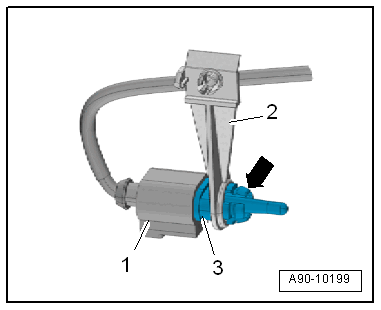
-- If equipped, release the retainer -arrow-, remove the NOx Sensor Control Module -J583- -3- and free it up.

-- Disconnect the latch cable at the coupling and free it up on the lock carrier. Refer to OVERVIEW - RELEASE CABLE .
-- Disconnect the connector -2-.
-- Disconnect the connector -1- from the pedestrian protection crash sensor and free up the wiring harness.
-- Disconnect the connector -1- and free up the wiring harness.
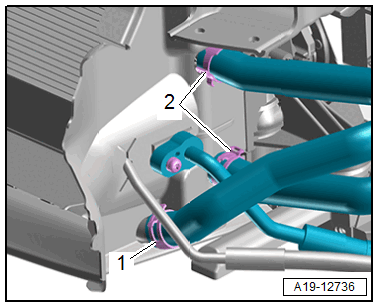
-- If equipped, place the drip tray under the separating point and disconnect the washer fluid hose -3- by pressing the release buttons in direction of -arrows-.
-- Free up the washer fluid hose -4-.
-- Disconnect the connector -2- from the pedestrian protection crash sensor.
-- If equipped remove the bolt on the right lock carrier and push the coolant distributor to the side.
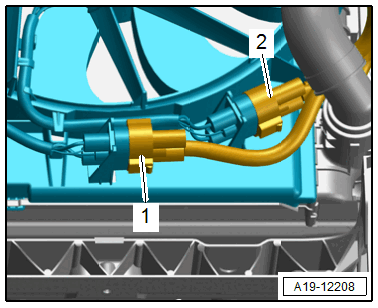
-- Disconnect the connector -1- from the Outside Air Temperature Sensor -G17- -3- and free up the wiring harness.
-- Drain the coolant. Refer to COOLANT, DRAINING AND FILLING .
-- Remove the coolant hoses from the radiator. Refer to RADIATOR, REMOVING AND INSTALLING .
-- Versions with charge air cooler (air flows through): remove the air duct pipe from the charge air cooler. Refer to CHARGE AIR COOLER, REMOVING AND INSTALLING .
-- Versions with charge air cooling circuit cooler (water flows through): remove and free up the coolant hoses from the charge air cooling circuit cooler. Refer to the appropriate service information .
RS 4 / RS 5:
-- Place the container of the :VAS5014 or the :VAS6208 underneath.
-- Loosen the left and right hose clamps -1- and remove the coolant hose.
-- Loosen the hose clamps -2- and remove the coolant hoses.
Continuation:
 Courtesy of AUDI OF AMERICA, LLC
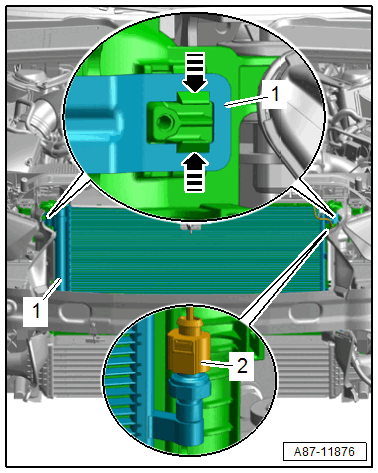
-- If installed, disconnect the connector -1- for the Engine Coolant Temperature Sensor on Radiator Outlet -G83-.
There is a risk of injury if the radiator fan turns on by itself.
- Disconnect the connectors.
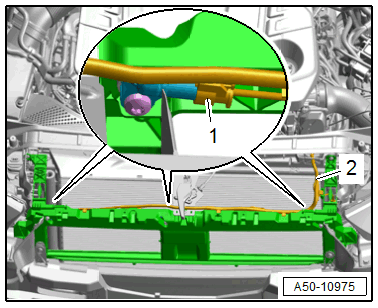
-- Disconnect the connectors -1 and 2- for the radiator fan.
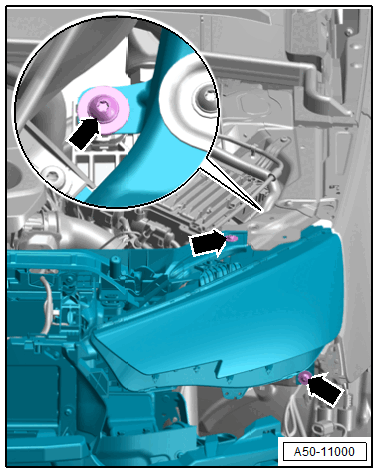
-- If equipped, pry out the front section of the cover -1- in direction of -front arrow-.
-- Remove the screws -arrows-.
-- Have a second technician hold the lock carrier and remove the bolts -arrows-.
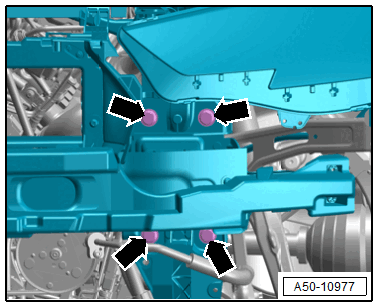
-- Remove the lock carrier with a second technician.
-- The following components must also be removed if the lock carrier is being replaced:
- Radiator. Refer to RADIATOR, REMOVING AND INSTALLING .
- Charge air cooler (air flows through). Refer to CHARGE AIR COOLER, REMOVING AND INSTALLING .
- Charge air cooling circuit cooler (water flowing through). Refer to the appropriate service information .
- Headlamps. Refer to HEADLAMP, REMOVING AND INSTALLING .
- Impact Member. Refer to IMPACT MEMBER, REMOVING AND INSTALLING .
- Latch. Refer to LATCH, REMOVING AND INSTALLING .