Rain/Light Recognition Sensor -G397-, Removing And Installing: Installing
Install in reverse order of removal and note the following:
- Replace the silicone pad and spring.
-- Release the retainers on the old spring -1- in the direction of -arrows- and remove it from the sensor -2-.
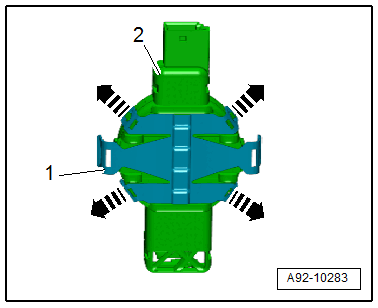
-- Press on the new spring until it audibly engages.
-- Remove the silicone pad -2- from the sensor -3- without leaving any residue.
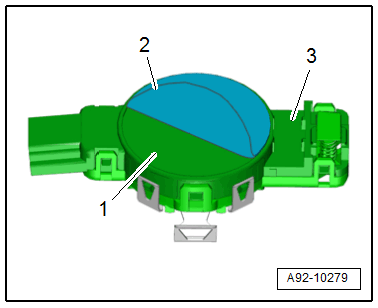
-- Clean the adhesive surface -1- on the sensors with a lint-free towel.
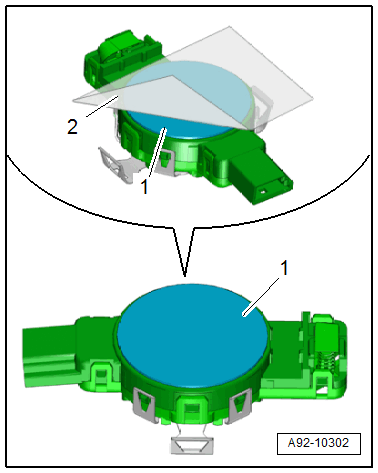
-- Remove the silicone paper -1- from the silicone pad -3-.
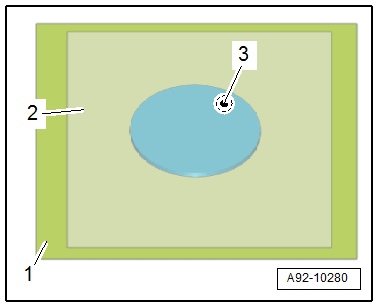
-- The clear protective film -2- remains on the silicone pad as an assembly aid.
-- Center the silicone pad -2- on the sensor -3- using the clear protective film -1-.
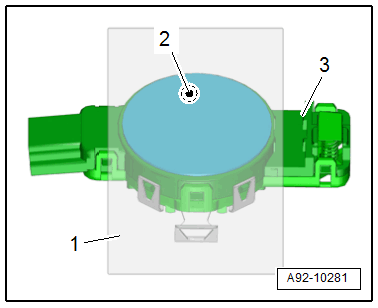
-- Press the silicone pad through the protective film onto the sensor without forming any bubbles.
-- Remove the protective film -2- from the silicone pad -1-.
-- Coat the silicone pad with Cleaning Solution :D 009 401 04 .
TIP:
To avoid contaminating the silicone pad, remove the protective film just before installing it.
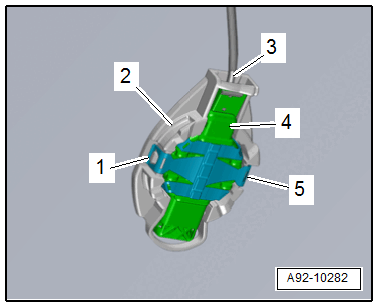
-- Insert the sensor -4- into the mount -2-.
- The Rain/Light Recognition Sensor -G397- must not have any embedded objects or bubbles between it and the windshield so that it functions correctly.
-- Press on the clips -1 and 5- until they audibly engage.
-- Connect the connector -3-.