SUBFRAME, Lowering: Procedure
During installation, all cable ties must be installed at the same location.
-- Before starting the procedure, determine the curb weight position. Refer to WHEEL BEARING IN CURB WEIGHT POSITION, LIFTING VEHICLES WITH COIL SPRING .
-- Secure the subframe. Refer to SUBFRAME, SECURING .
-- Disconnect the connector -2- and free up the wire.
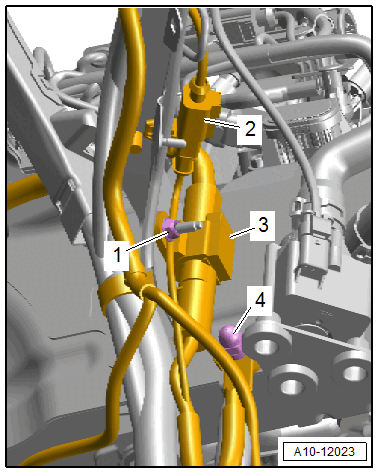
-- Loosen the nut -1- several turns, and free up and disconnect the connector -3-.
-- Remove the nut -4- and free up the ground wire.
-- Free up the wires to the steering gear.
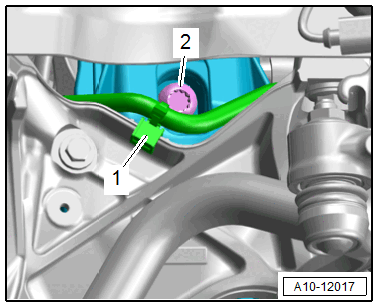
-- Equipment versions with electro-hydraulic engine mount: Disconnect the left and right connector -2- for the electrohydraulic engine mount solenoid valve.
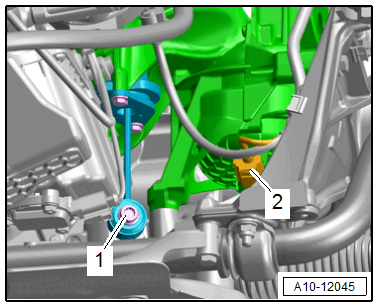
-- Equipment versions with support bearing: Remove the left and right bolt -1- for the support bearing.
The illustration shows the installation position on a vehicle with a 2.0L TFSI engine.
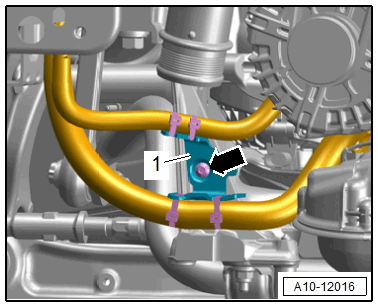
-- Remove the bolt -arrow- and free up the bracket -1- with the wiring harness.
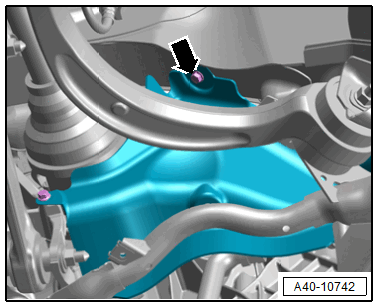
-- Remove the left and right bolts -arrow- for the subframe shield.
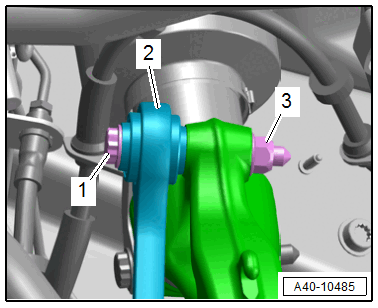
-- Remove the left and right nut -3- and the bolt -1- for the coupling rod -2-.
-- Remove the steering intermediate shaft from the steering gear and then push together. Refer to STEERING INTERMEDIATE SHAFT, REMOVING AND INSTALLING .
-- Remove the left and right drive axle from the transmission. Refer to DRIVE AXLE, REMOVING AND INSTALLING .
-- Equipment versions with electronic damping: Disconnect the left and right connector -3- for the level control system sensor and free up the wire.
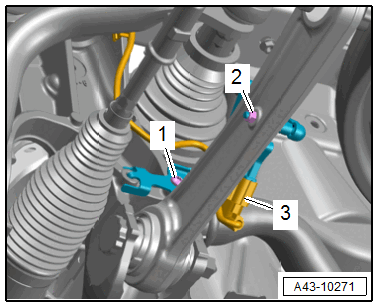
Ignore items -1 and 2-.
-- Equipment versions with SCR system: Free up the SCR delivery line -1- on the subframe.
-- Remove the left and right bolt -2- and lower the subframe with the :VAS6931 .
Make sure there is enough clearance for the wires when lowering the subframe.
If required for other procedures, tie up the subframe to the body with :T10038 and remove the :VAS6931 .