SUBFRAME Rear Bonded Rubber Bushing, Replacing: Installing
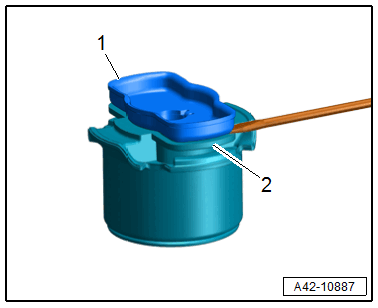
-- Pry out the anti-twist mechanism -1- in the area of the retaining tabs -arrows- with a screwdriver from the bonded rubber bushing alternating from side to side.
-- Pry out the plastic insert from the bonded rubber bushing.
-- Arrange the special tools as shown.
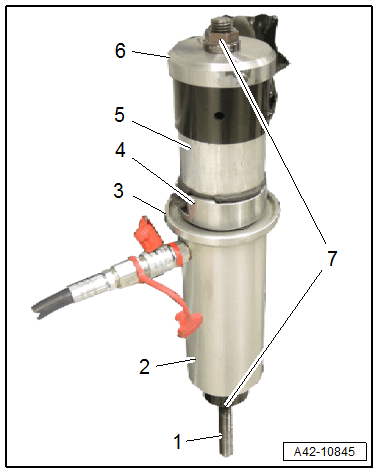
- :T10205/8-1
- :VAS6178
- :T40328/3
- :T40373/4 . The ribs must engage in the bonded rubber bushing openings
- Bonded Rubber Bushing
- :T40328/9
- :T10205/8-2
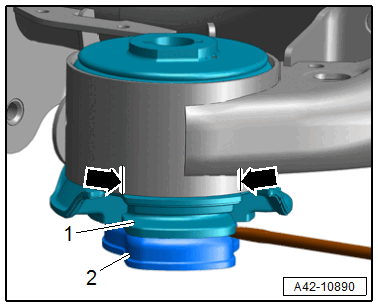
-- Align the bonded rubber bushing with the markings made previously and push it in until the collar comes in contact with the bushing in the subframe without any gaps.
If necessary, tension and press over cylinder several times.
To prevent damage to the outer race, while pushing in, pay attention that the bonded rubber bushing is not tilted.
- The ends of the rubber bead on the bonded rubber bushing must align with the markings -arrows- on the subframe.
Correct any paint damage on subframe with corrosion protection, primer and black top coat.
-- Install the plastic insert and the anti-twist mechanism on the hydraulic bonded rubber bushing.
Further installation is the reverse order of removal.