Brake Master Cylinder, Removing And Installing: Installing
Install in reverse order of removal and note the following:
Always replace the self-locking nuts and bolts.
Replace damaged bolts and nuts.
Clean the bolts and nuts before reusing.
- Replace the seal after removal.
- Do not let any brake fluid run into the brake booster.
- The actuator pin -Item 19- for the brake lamp switch must be inserted in the brake master cylinder.
Always replace the self-locking nuts and bolts.
Replace damaged bolts and nuts.
Clean the bolts and nuts before reusing.
-- When inserting the brake master cylinder -1-, make sure that the pressure rod -3- is seated correctly in the brake booster -2-.
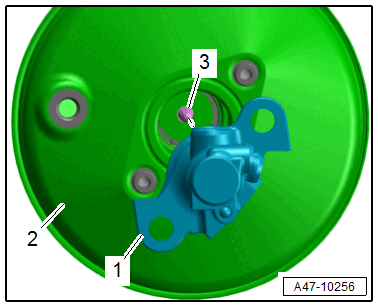
-- If necessary, have a second technician press the brake pedal downward slightly. This allows the brake master cylinder to be guided into the pushrod more easily.
-- Install the tower brace. Refer to TOWER BRACE, REMOVING AND INSTALLING .
-- Install the brake fluid reservoir. Refer to BRAKE FLUID RESERVOIR, REMOVING AND INSTALLING .
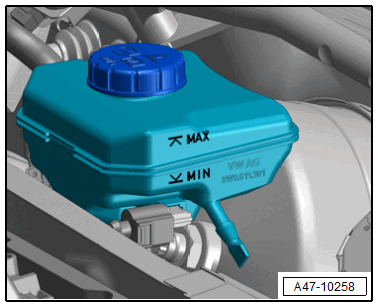
-- Fill the brake fluid reservoir up to the "MIN" mark.
-- Remove all cloths from the vehicle that were previously placed down.
-- Bleed the brake system. Refer to HYDRAULIC SYSTEM, BLEEDING .
Faulty brakes increase the risk of an accident.
- Make sure the brakes are working correctly before driving the vehicle for the first time.