Charge Air System, Checking For Leaks
Special tools and workshop equipment required
- Turbo System Tester Kit: VAG1687
- Turbo System Tester Kit - Adapter 6: VAG1687/6 and the Adapters : VAG1687/3 , : VAG1687/13-2 , : VAG1687/15
Procedure
- Follow the guidelines for clean working conditions. Refer to GUIDELINES FOR CLEAN WORKING CONDITIONS .
-- Remove the engine cover. Refer to ENGINE COVER, REMOVING AND INSTALLING .
-- Remove the lock carrier cover. Refer to LOCK CARRIER COVER, REMOVING AND INSTALLING .
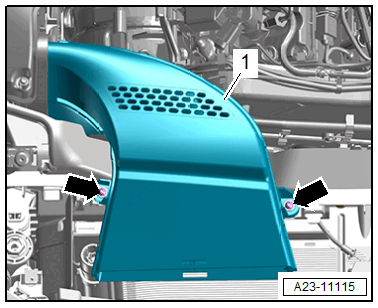
Audi A4/A5:
-- Remove the bolts -arrows- and the air guide -2-.
-- Loosen the hose clamps -arrows-.
-- Remove the vacuum hose -2- at the same time to not damage it.
-- Remove the air duct pipe -1-.
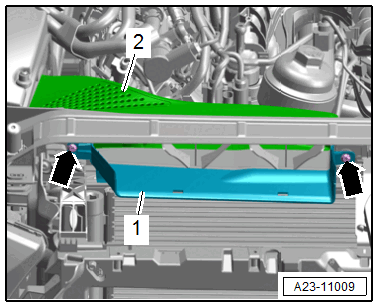
Audi A6/A7
-- Remove the bolts -arrows- and then remove the air guides -1 and 2-.
-- Disengage the EVAP system hose -1- with the fuel hose.

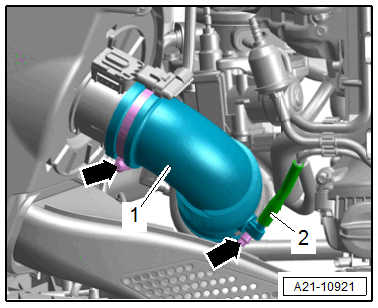
-- Loosen the hose clamps -arrows-.
-- Remove the vacuum hose -2- and air duct pipe -1-.
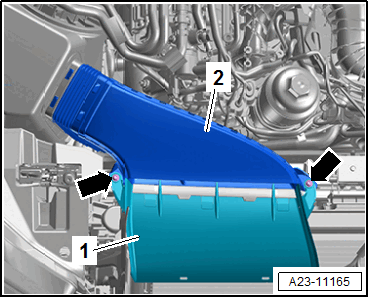
Audi Q5:
-- Remove the bolts -arrows- and air duct -1-.
-- Loosen the hose clamps -arrows-.
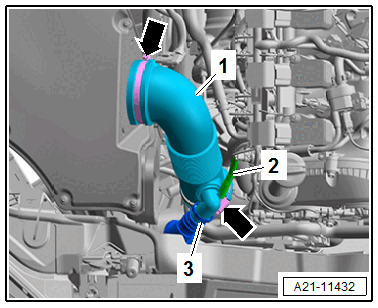
-- Remove the vacuum hose -2- at the same time to not damage it.
-- Remove the air duct pipe -1-.
Continuation for All Vehicles:
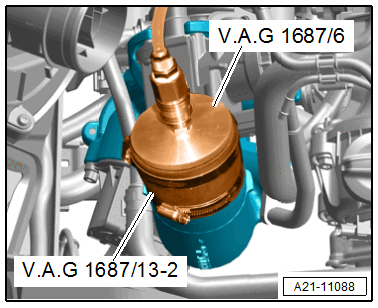
-- Install the : VAG1687/6 and : VAG1687/13-2 on the turbocharger.
Risk of damaging the coupling due to improper handling.
- Coupling must not be bent more than 10°.
- Do not load the coupling on the cable.
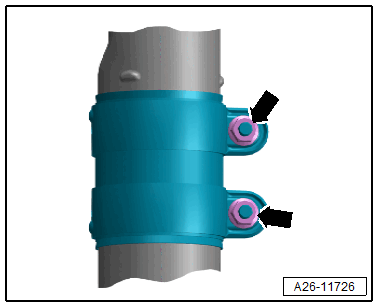
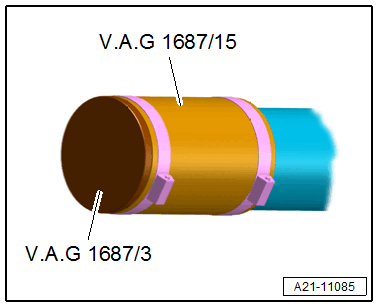
-- Loosen the front clamping sleeve -arrows- and push toward the rear.
-- Slightly lower the front muffler -2- and secure as shown with a cable tie -1-.
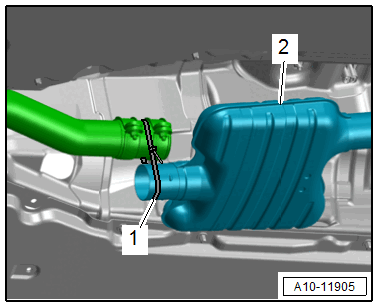
-- Seal the front muffler with : VAG1687/3 and : VAG1687/15 .
-- Connect the : VAG1687 to the : VAG1687/6 using the connection -5-.
-- Completely remove the pressure regulating valve -2- and close the valves -3 and 4-.
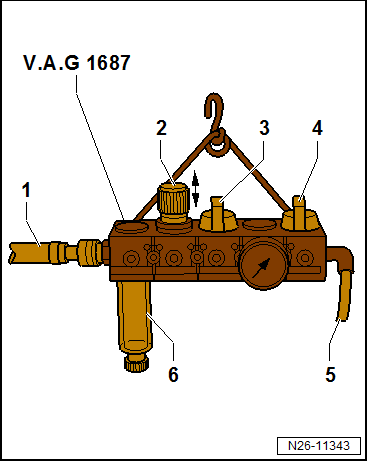
- Pull the knob in order to rotate the pressure regulating valve -2-.
-- Connect the : VAG1687 to compressed air -1- with a commercially available intermediate piece.
-- Drain the water in the viewing glass via the water drain plug -6-.
-- Open the valve -3-.
Risk of damaging the components if the pressure is set too high.
- Never set the test pressure above the specified adjustment.
-- Set the pressure to 0.2 bar (2.9 psi) using the pressure regulating valve -2-.
-- Open the valve -4- and wait until the test circuit is filled. Regulate the pressure to 0.2 bar (2.9 psi) again if necessary.
-- Check the charge air system for leaks by listening, feeling and using commercially available leak detection spray or the : VAG1842S .
- A small quantity of air dissipates via the valves in the engine. For this reason a pressure retention test is not possible.
- Refer to the Operating Instructions for information on using the : VAG1842S .
Assembling
Assembly is performed in reverse order.
- Release the pressure in the test circuit by pulling off the coupling before removing the adapter.
- Secure all hose connections with hose clamps that match the ones used in series production. Refer to the Parts Information.
-- Install the lock carrier cover. Refer to LOCK CARRIER COVER, REMOVING AND INSTALLING 4 .
-- Install the engine cover. Refer to ENGINE COVER, REMOVING AND INSTALLING .
Tightening Specifications
- Refer to OVERVIEW - AIR FILTER HOUSING
- Refer to OVERVIEW - MUFFLER
- Refer to OVERVIEW - CHARGE AIR HOSE CONNECTIONS