Vibration Damper, Removing And Installing, Vehicle With Generator Or With High-Voltage System: Removing
Audi A6/A7/Q5:
-- Remove the noise insulation (front). Refer to OVERVIEW - NOISE INSULATION .
Audi A6/A7:
Refer to the appropriate service information.
-- Place the Shop Crane - Drip Tray: VAS6208 underneath.
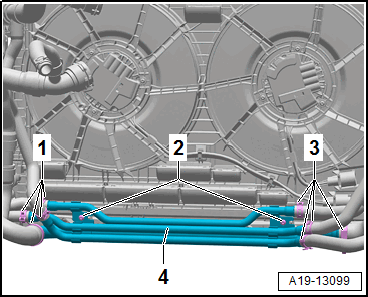
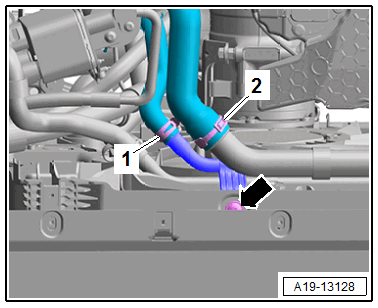
-- Loosen the hose clamps -1- and remove the coolant hoses.
-- Remove the bolts -2-, press the coolant pipes -4- to the right side.
Audi Q5:
-- Remove the left and right bolt -arrow- to do so loosen the bumper cover end plate on the lock carrier. Refer to OVERVIEW - BUMPER COVER .
-- Push the coolant pipes to the side.
Audi A8/Q7/Q8:
Risk of destroying a used ribbed belt by reversing the running direction.
- Mark the running direction before removal.
- Pay attention to the running direction when reinstalling.
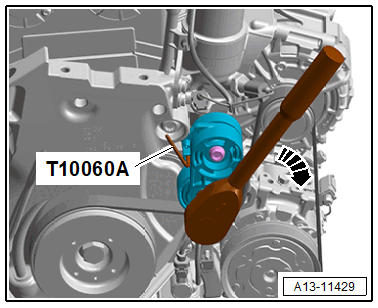
-- Turn the tensioner clockwise -arrow- to release the tension on the ribbed belt.
-- Remove the ribbed belts and leave the tension in its resting position.
Continuation for All Vehicles:
- The vibration damper bolts can only be loosened maximum 1 /2 turn at first.
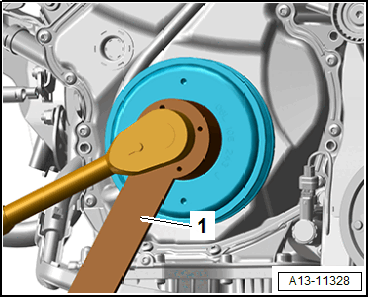
-- Loosen the vibration damper bolt approximately 1 /2 , to do this use the Counterholder: T40378 -1-.
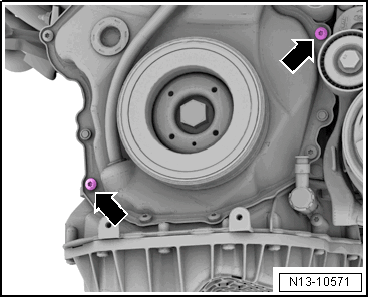
-- Remove the bolts -arrows- for the lower timing chain cover.
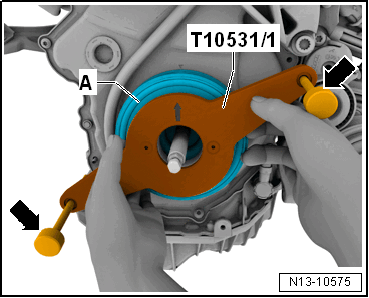
-- Place the Vibration Damper Assembly Tool - Counterhold Tool: T10531/1 as shown on the vibration damper and tighten it hand-tight using the knurled bolts -arrows-.

- The arrow marking on the Vibration Damper Assembly Tool - Counterhold Tool: T10531/1 must point upward.
-- Remove the vibration damper bolt completely.
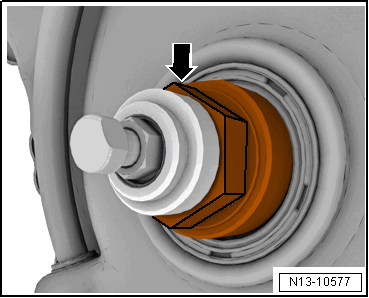
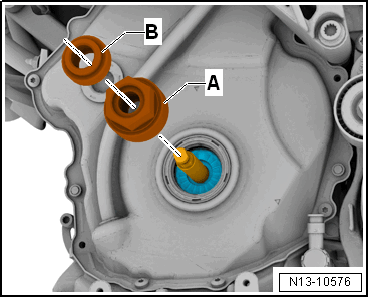
-- Check if the Vibration Damper Assembly Tool - Turning Over Tool: T10531/3 -A- can be easily pushed over the clamping piece -B-. If necessary, remove the tensioning bolt -arrow- slightly.
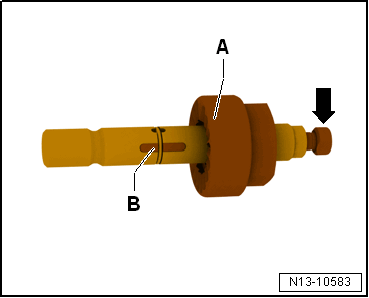
- Do not turn the tensioning bolt further, otherwise the Assembly Tool - Tensioning Pins: T10531/2 becomes jammed when installing in the crankshaft
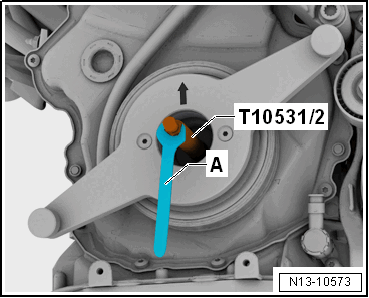
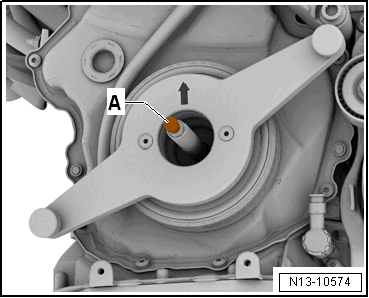
-- Install the Vibration Damper Assembly Tool - Tensioning Pin: T10531/2 in the crankshaft and tighten it hand-tight using a 12 mm open end wrench -A-.
-- Tighten the adjusting bolt -A- hand-tight, to secure the chain sprocket to the crankshaft.
-- Remove the knurled bolts -arrows-. Remove the Vibration Damper Assembly Tool - Counterhold Tool: T10531/1 and vibration damper -A-.
If the Crankshaft Should Be Turned without the Vibration Damper:
-- Place the Vibration Damper Assembly Tool - Turning Over Tool: T10531/3 -A- on the Vibration Damper Assembly Tool - Tensioning Pin: T10531/2 and pay attention to the chain sprocket tooth contour while doing so.
-- Tighten the turning over tool using the Vibration Damper Assembly Tool - Knurled Nut: T10531/4 -B-.
-- The crankshaft can now be turned at the hex fitting -arrow-.