Sub-Assembly Bracket, Removing And Installing: Installing
Install in the reverse order of removal while noting the following:
- Replace bolts that were tightened with an additional turn after removing them.
- Replace the O-ring and seals after removing.
- Used coolant cannot be used again.
-- Coat the new O-rings -4- with coolant.
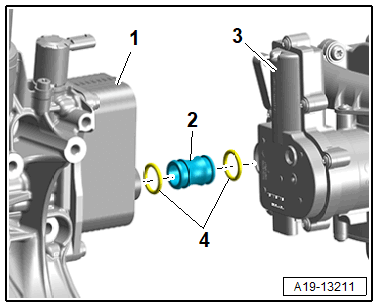
-- Insert the connecting piece -2- in the Engine Temperature Control Actuator -N493- -3-.
-- Push the engine oil cooler -1- with the sub-assembly bracket onto the connecting piece, position the bolts and tighten.
-- Install the generator/starter generator. Refer to GENERATOR, REMOVING AND INSTALLING .
-- Install the A/C compressor. Refer to A/C COMPRESSOR, REMOVING AND INSTALLING FROM BRACKET or A/C COMPRESSOR, REMOVING AND INSTALLING .
-- Install the ribbed belt. Refer to RIBBED BELT, REMOVING AND INSTALLING .
-- Install the oil filter element and check the oil level. Refer to ENGINE OIL .
-- Connect the coolant hose to the connector coupling. Refer to Fig 1.
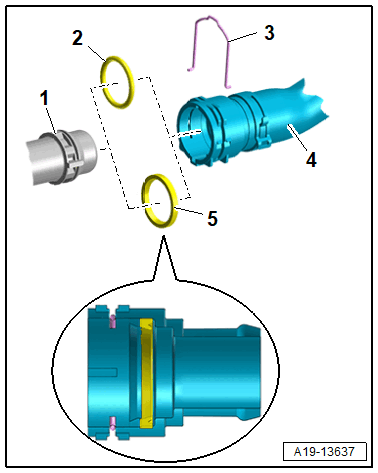
Refer to the appropriate service information.
-- Install the engine cover. Refer to ENGINE COVER, REMOVING AND INSTALLING .
-- Fill the cooling system. Refer to COOLANT, FILLING USING Cooling System Charge Kit: VAS6096 [DMTA, DPAA, DPUA, DPVA, DMTC, DRYA, DUVA] .