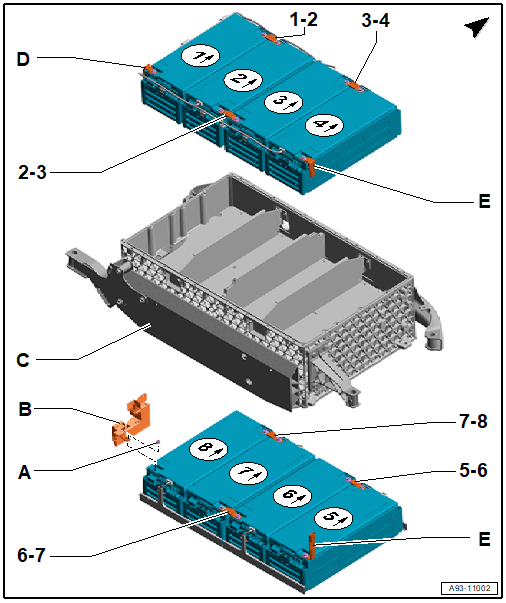
Component Location Overview - Battery Connector
WARNING: This page is about a different variant/trim than selected.
- The battery connector must be installed at the same position again.
- The name of the battery connector is derived from the numbering of the battery modules, that are connected on this location.
- The contact surfaces must not be touched with bare hands.
-- Mark the battery connector for reinstallation as shown. Use a waterproof felt-tip pen to mark.
- A -
Nut
- Tightening Specification. Refer to the appropriate Service Information .
- B - High-Voltage Battery Control Module -SX6- Connection
- C -
Battery Housing
- For the high-voltage battery
- D -
Left Riser
- To the connection -item : B - High-Voltage Battery Control Module -SX6- Connection
- E -
Right Riser
- Upper layer to lower layer
- Two-part
- Connects Battery Module 4 -J994- and Battery Module 5 -J995-
Battery Connector - Tightening Specification
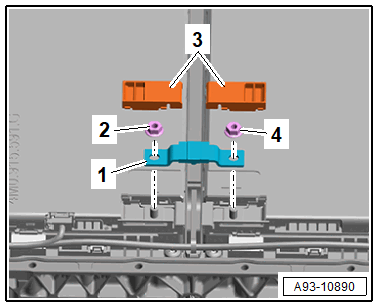
-- Tighten the nuts -2 and 4- to 7 Nm.