Bearing Bracket, Removing And Installing: Installing

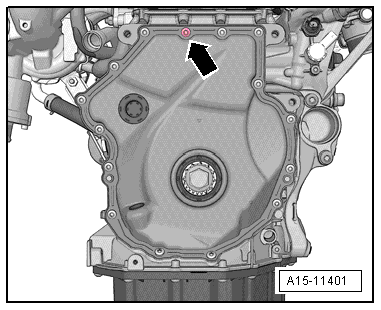
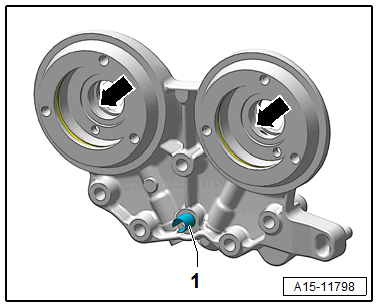
-- Remove the plug -arrow-.
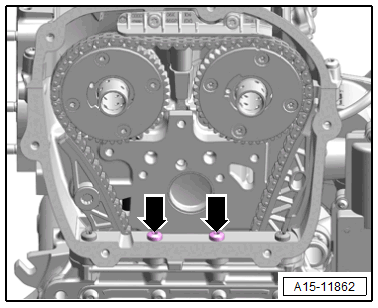
-- Remove the bolts -arrows-.
-- Remove the bolt -arrow-.
-- Remove the noise insulation (front). Refer to OVERVIEW - NOISE INSULATION .
-- Install the : T40243 on the cylinder head -lower arrows-.
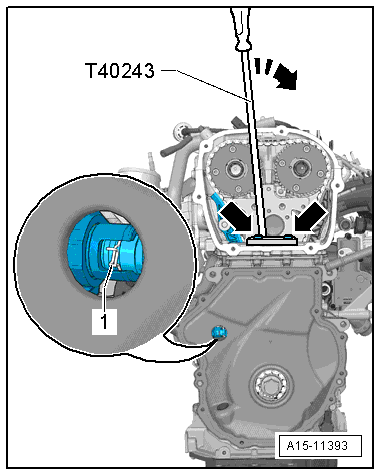
- A second technician is required for the following steps.
-- Press the chain tensioner circlip -1- together and hold it.
-- Slowly press and hold the : T40243 in the direction of -arrow-.
- This will push back the chain tensioner.
TIP:
The chain tensioner is lubricated with oil and can only be pushed back slowly by applying constant pressure.
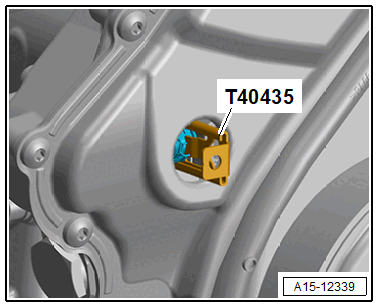
-- Lock the chain tensioner with the : T40435 .
-- Remove the : T40243 .
-- Install the bolts -arrows- and tighten them. Tightening specification. Refer to -item ) Bolt.
-- Coat the holes -arrows- with engine oil.
-- Check if the adapter sleeve -1- is installed.
-- If the bearing bracket should be reused, then the adapter sleeve must be driven back.
- The adapter sleeve must be flush in the housing of the bearing bracket.
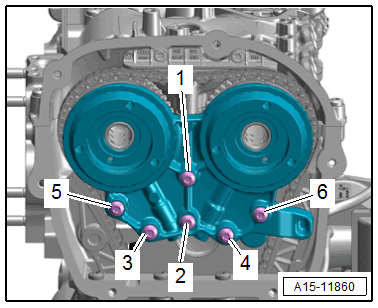
-- Attach the bearing mount and install the bolts -1 to 6- all the way by hand.
-- Remove the : T40435 .
-- Tighten the bearing bracket bolts (refer to Figure), at the same time the adapter sleeve is pulled into the cylinder head with the bolt -2-.
Installation is performed in reverse order of removal, noting the following:
-- Install the upper timing chain cover. Refer to UPPER TIMING CHAIN COVER, REMOVING AND INSTALLING .