Sealing Flange, Removing And Installing, Transmission Side: Installing
Risk of injuring the eyes from sealant residue.
- Wear protective eyewear.
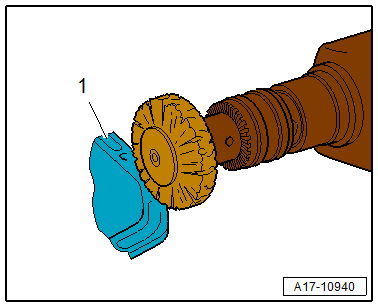
-- Remove the sealant residue on the cylinder block -1- using a flat-blade scraper or a rotating plastic brush.
-- Clean any oil or grease off the sealing surfaces.
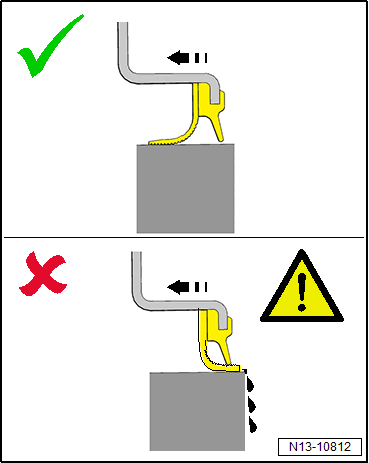
- Check the sealing lip of the sealing flange, it must not be kinked or damaged.
- The sealing lip must be pointed to the engine after installing. If the sealing lip >>folds<< outward when installing, leaks will result.
-- Inspect the : T10122/6A -B- ; it must not have any sharp edges or be dirty.
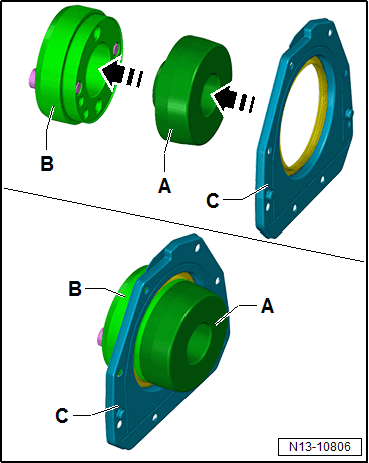
-- Attach the : T10122/1 -A- to the : T10122/6A -B-.
-- Slide the sealing flange -C- on the : T10122/1 -A-, with the outer side on it.
-- Remove the : T10122/1 -A-.
- Be sure to check the expiration date of the sealant.
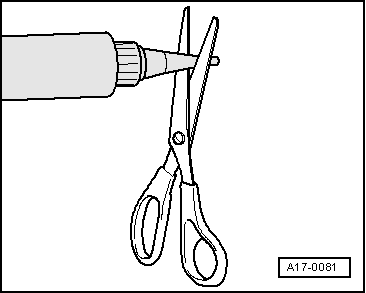
-- Cut the tube nozzle at the front marking (nozzle diameter: about 2 mm).
TIP:
In the illustration the : T10122/6A is not shown.
Risk of engine damage due to excess sealant in the lubrication system.
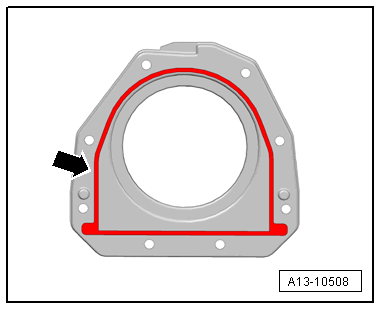
- Do not apply sealant bead thicker than indicated.
- Sealant bead thickness: 2 to 3 mm.
- Install the sealing flange within five minutes of applying the sealant.
-- Insert the : T10122/6A -A- with the sealing flange -B- on the crankshaft journal.
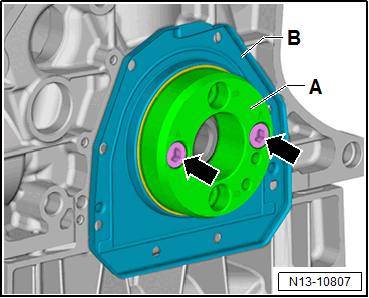
TIP:
It is not necessary to tighten the bolts -arrows-
-- Bring the sealing flange -B- carefully over the guide piece -A- into the installation position. Pay attention to the left and right side of the centering collar.
-- Remove the : T10122/6A -A-.
-- Tighten the sealing flange.
- Perform a visual inspection after installation, check if the sealing lip is upside down or damaged in another way.
Install in reverse order of removal. Note the following:
-- Install the drive plate. Refer to DRIVE PLATE, REMOVING AND INSTALLING .
-- Check the oil level. Refer to ENGINE OIL .