Connecting Rods, Checking Radial Clearance
WARNING: This page is about a different variant/trim than selected.
Special tools and workshop equipment required
- Plastigauge®
Procedure
-- Mark the installation position and which connecting rod bearing cap -1- belongs to which connecting rod -item ) Connecting Rod Bearing Cap.
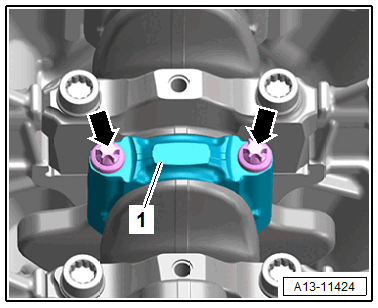
-- Remove the bolts -arrows- and remove the connecting rod bearing cap.
- Do not damage the cracked surfaces of the connecting rods and connecting rod bearing caps.
-- Clean the bearing cap and pin.
-- Place the Plastigauge® over the entire width of the bearing journal or into the bearing shells.
-- Position the connecting rod bearing cap and fasten with the old bolts -item ) Bolts. Do not turn the crankshaft at the same time.
-- Remove the connecting rod bearing cap again.
-- Compare the width of the Plastigauge® with the measuring scale.
Radial clearance
- New: 0.02 to 0.06 mm.
- Wear limit: 0.09 mm.
-- Replace the bolts for the final assembly.