Engine Mount, Removing And Installing, AUDI A6/A7: Removing
-- Remove the noise insulation. Refer to OVERVIEW - NOISE INSULATION .
-- Remove the affected front wheel. Refer to WHEEL, CHANGING .
-- Remove the affected front wheel spoiler, and loosen the front of the front wheel housing liner and press it to the side. Refer to OVERVIEW - FRONT WHEEL HOUSING LINER .
-- Disconnect the connector -2- for the electrohydraulic engine mount solenoid valves.
Left Engine Mount:
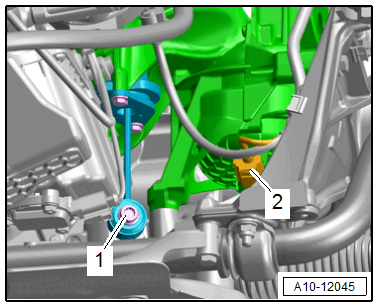
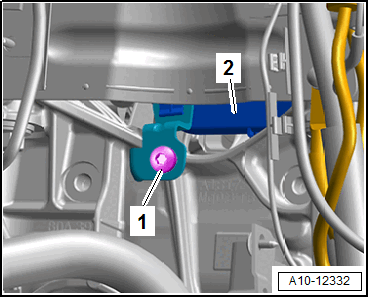
-- Remove the bolt -1- for the support bearing.
-- Remove the bumper cover end plate. Refer to OVERVIEW - BUMPER COVER .
-- Disconnect the connector -2- for the Charge Air Pressure Sensor -G31-.

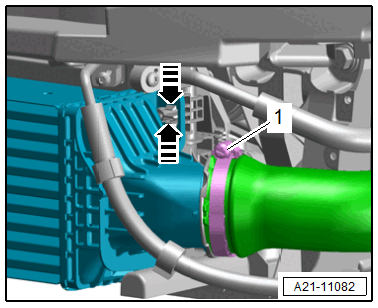
-- Loosen the screw-type clamp -1- and remove the air duct pipe from the Throttle Valve Control Module -GX3- (example illustration).
-- Loosen the screw-type clamp -1-, detach the air duct hose and remove it downward.
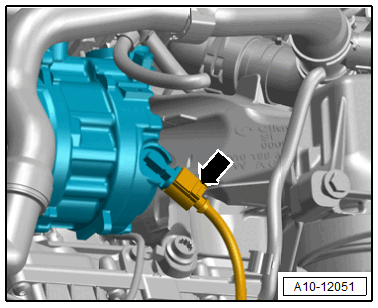
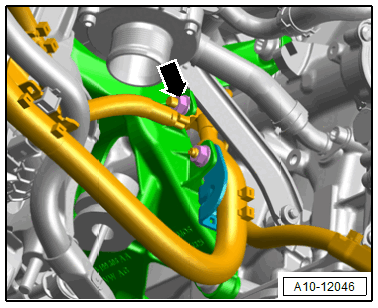
-- Disconnect the connector -arrow- for the A/C compressor.
Right Engine Mount:
-- Remove the right support bearing. Refer to SUPPORT BEARING, REMOVING AND INSTALLING .
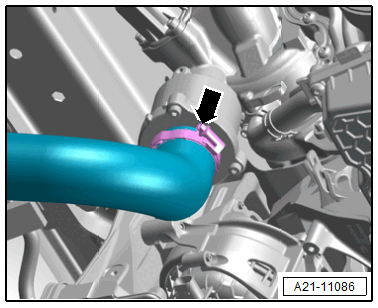
-- Loosen the screw-type clamp -arrow- and remove the air duct hose.
-- Free up the wiring duct -2- from the bracket and the subframe.
-- Remove the bolt -1- and the bracket.
-- Remove the nut -arrow- and free up the ground wire.
Continuation for Both Sides:
Risk of damaging the drive axles due to impact with the suspension struts.
- Lift the engine so that the drive axles do not touch the suspension struts.
-- Support the engine in the installation position (refer to ENGINE, SUPPORTING IN INSTALLATION POSITION, AUDI A6/A7 ) and pretension it with the : 10-222A/11 until the pressure on the engine mount is released.
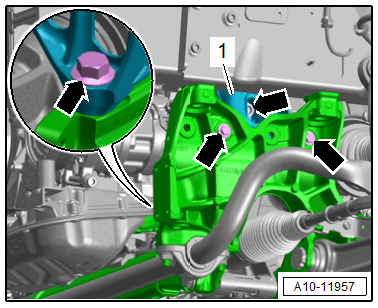
-- Remove the bolts -arrows- and engine mount -1-.