Fan Shroud, Removing And Installing, AUDI A6/A7: Removing
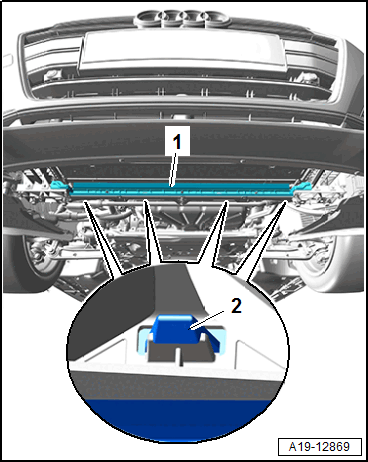
-- Remove the noise insulation. Refer to OVERVIEW - NOISE INSULATION .
-- Remove the front left wheel spoiler. Refer to OVERVIEW - FRONT WHEEL HOUSING LINER .
-- Remove the charge air cooler. Refer to CHARGE AIR COOLER, REMOVING AND INSTALLING .
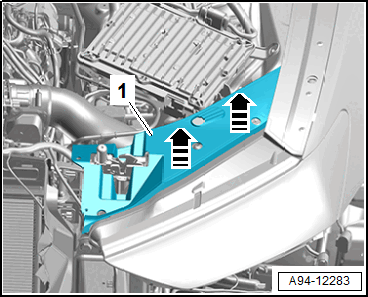
-- Remove the left and right headlamp cover -1- upward in direction of -arrows-.
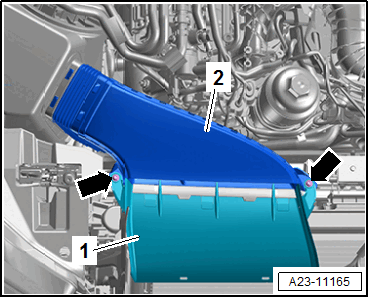
-- Remove the bolts -arrows- and air duct -1-.
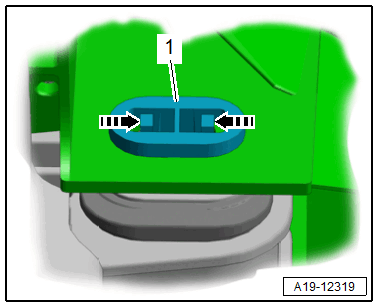
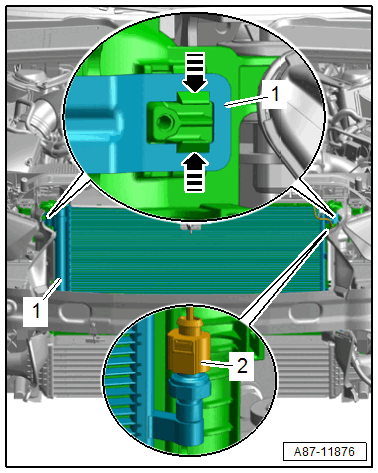
-- Release the left and right catches in direction of -arrows- and remove the retaining pin -1- for the radiator upward.
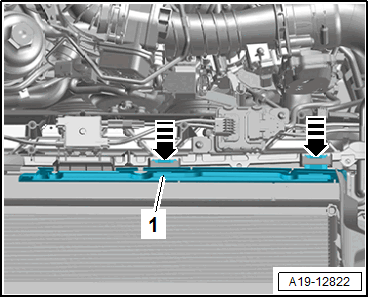
-- Release the catches in direction of -arrows- and remove the upper air duct -1-.
-- Place the : VAS6208 underneath.
There is a risk of injury if the radiator fan turns on by itself.
- When performing procedures near the radiator maintain a distance to the radiator.
-- Lift the clamp -2- and remove the coolant hose from the lower left side of the radiator.
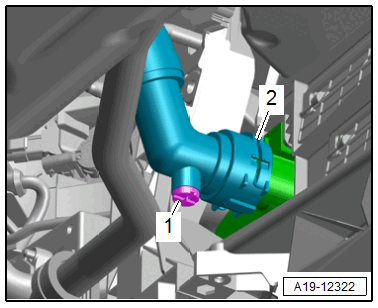
-- Release the catches -2- and remove the air duct -1-.
-- Disconnect the radiator fan connector -arrow-.

-- Remove the left and right bolt -2- and push the radiator bracket with the radiator toward the front.

-- Remove the bolt -1- and remove the left radiator bracket.
-- Disconnect the connector -2- for the High Pressure Sensor -G65-.
Risk of damaging the refrigerant lines and hoses by removing and pivoting the condenser.
- Do not bend, twist or stretch the refrigerant lines and hoses.
-- Release the left and right catches in direction of -arrows-, disengage the condenser -1- from the radiator and tie it up on the left side.
Risk of damaging the retainers due to improper handling.
- Carefully release the retainers.
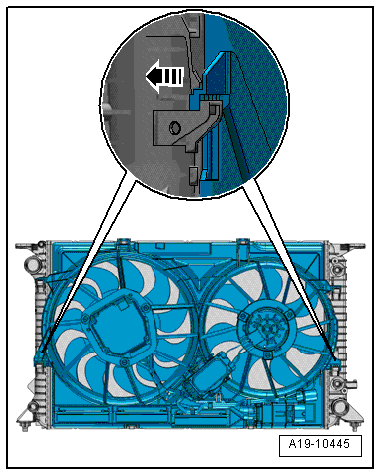
-- Press the left and right fan shroud locking tabs in direction of -arrow- at the same time and lift the fan shroud upward from the radiator. Then remove it downward by carefully pushing the radiator forward.