Sunroof Frame, Removing And Installing, A5 Coupe: Removing
-- Remove the glass trim. Refer to GLASS TRIM, REMOVING AND INSTALLING .
-- Remove the headliner and place on the seats. Refer to HEADLINER, REMOVING AND INSTALLING .
-- Disconnect the connector -1- from the power sunroof control module -2-.
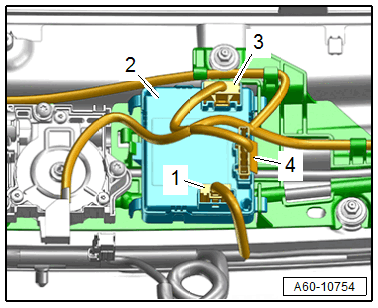
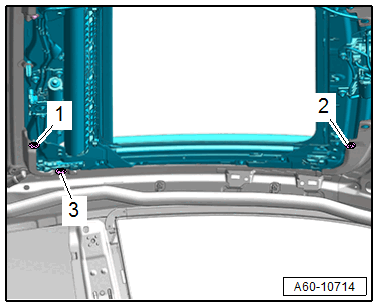
-- Remove the bolts -1, 2, and 3-.
TIP:
If there is difficulty cutting through the adhesive bead, heat up the sunroof frame in this area using the Wiring Harness Repair Set - Hot Air Blower :VAS1978/14A . Protect adjacent components from the temperature effects during this and note their permitted temperatures.
Risk of eye injury due to flying shavings.
Eye irritation and injury is possible.
- Wear protective eyewear.
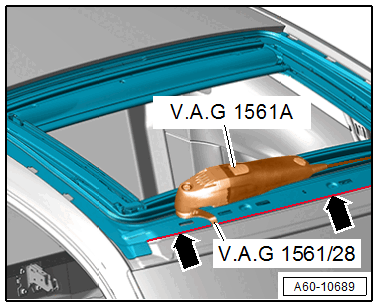
-- Cut free the front edge of the sunroof frame -arrows- using the :VAG1561A and the :VAG1561/28 ; at the same time, pay attention that the paint is not damaged.
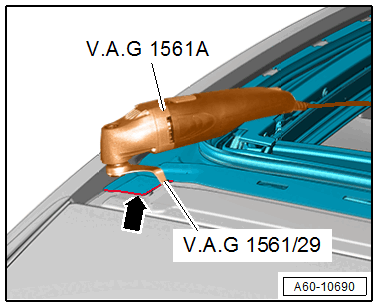
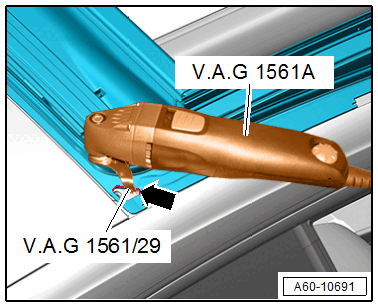
-- Cut free the front section of the sunroof frame -arrow- on the left and right side at the front and at the inside using the :VAG1561A and the :VAG1561/29 .
-- Guide the :VAG1561A using the :VAG1561/29 in the opening behind the sunroof frame and cut free the corners of the sunroof frame -arrow- on the left and right toward the inside.
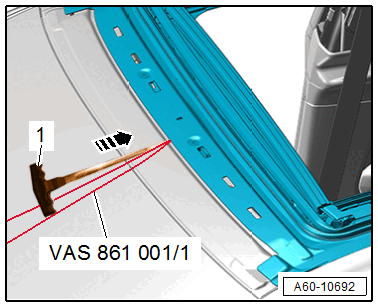
-- Guide the :VAS861001/1A using the front piercing awl -1- in the gap between the roof crossmember and sunroof frame in direction of -arrow-.
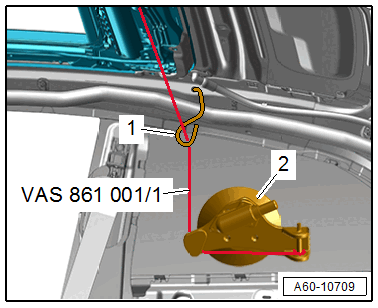
-- On the inside of the roof, engage the :VAS861001/1A with the hook -1- from the :VAS861001A at the left rear opening in the roof frame.
-- At the same time guide the cutting cord above the water drain hose -2-.
TIP:
If there is difficulty cutting through the adhesive bead, heat up the sunroof frame in this area using the :VAS1978/14A . Protect adjacent components from the temperature effects during this and note their permitted temperatures.
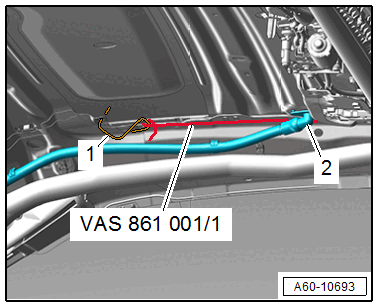
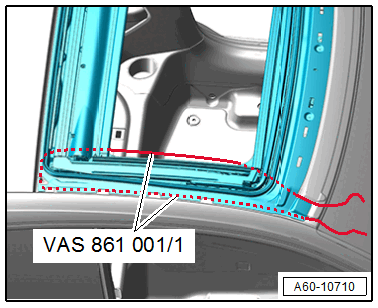
-- Guide the :VAS861001/1A forward from the gap between the sunroof frame and the roof crossmember and the side in the gap between the left roof pillar and the sunroof frame -arrows-.
-- Secure the removal device with the reel device -3- in the left upper edge of the rear window.
-- Bond the reinforced adhesive tape -2- between the sunroof opening and rear window on the roof edge.
-- Insert the :VAS861001/1A in the reel device -3-.
-- Tension the cutting cord with the reel device -3-.
-- Place the cutting guard -1- from the :VAS861001A under the edge of the roof to protect the paint.
-- Cut free the left side of the sunroof frame.
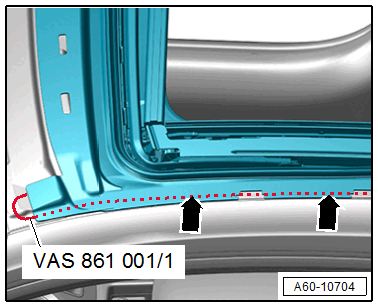
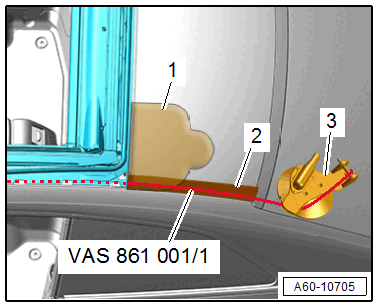
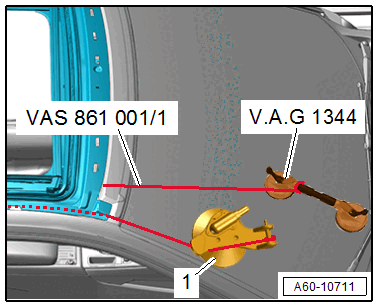
-- To cut free the rear edge of the sunroof frame, place the :VAS861001/1A around the left rear edge of the sunroof frame and guide to the right side of the vehicle.
-- Secure the :VAG1344 to the right rear side window.
-- Tie the cutting cord on the :VAG1344 .
-- Apply the reinforced adhesive tape -2- to protect the paint between the sliding sunroof and the side window.
-- Place the cutting guard -1- from the :VAS861001A underneath to protect the paint.
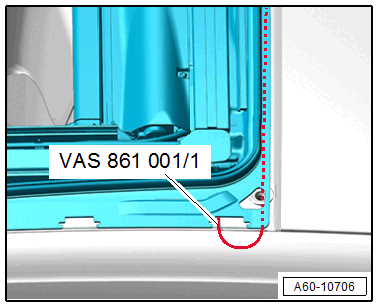
-- On the inside of the roof, guide the :VAS861001/1A from the left to the right side of the vehicle.
-- Pay attention that the separation cut is guided behind the centering pin -arrow-.
-- Secure the inner removal device -2- on the right rear side window.
-- Redirect the :VAS861001/1A over the hook -1- and push in the reel device on the removal device -2-.
-- Tension the cutting cord with the reel device.
-- Cut free the rear of the sunroof frame.
-- To cut free the right side of the sunroof frame, place the :VAS861001/1A sideways in the gap between the right roof pillar and the sunroof frame and guide forward.
-- On the inside of the roof guide the curring cord toward the front and between the roof crossmember and the sunroof frame.
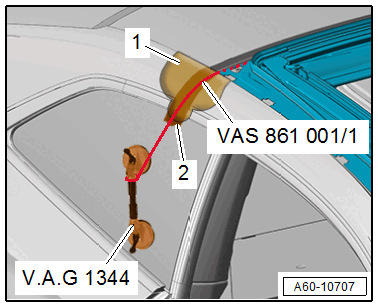
-- Secure the :VAG1344 on the windshield.
-- Secure the :VAS861001/1A coming from inside of the roof onto the suction lifter.
-- Secure the removal device -1- on the windshield.
-- On the outside of the roof thread the cutting cord in the removal device -1-.
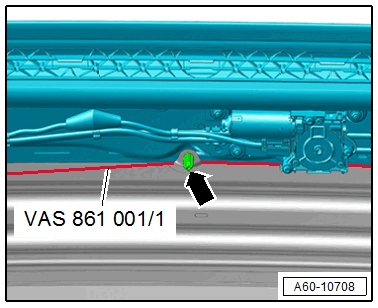
-- Cut free the right side of the sunroof frame.
-- Remove the sunroof frame upward.