Output Shaft, Disassembling And Assembling
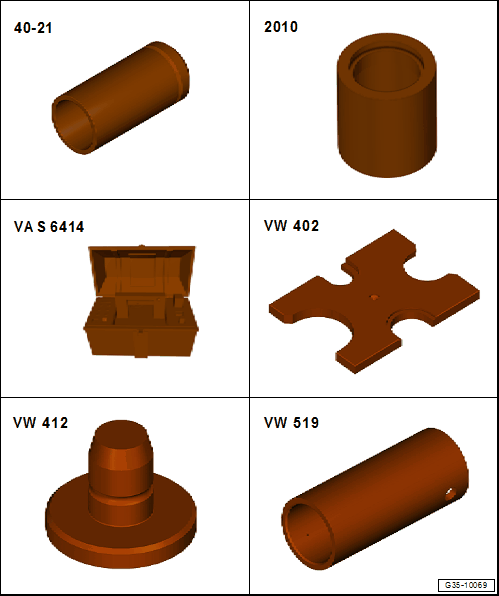
Special tools and workshop equipment required
- Bearing Installer - Differential Bearing :40-21
- Press Piece - Trailing Arm :2010
- Inductive Heater :VAS 6414
- Press Plate :VW402
- Press Piece - Multiple Use :VW412
- Press Piece - Multiple Use :VW519
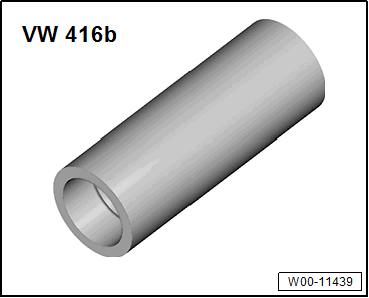
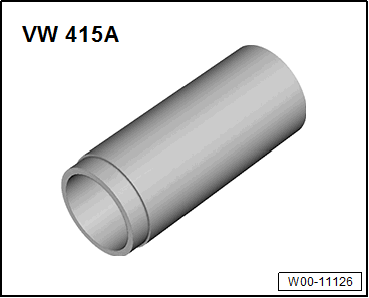
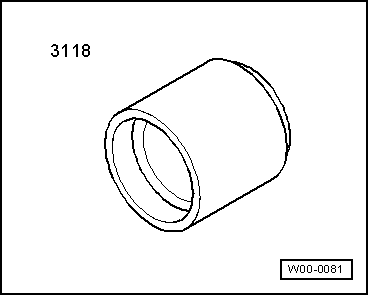
Special tools and workshop equipment required
- Press Piece - 37mm :VW416B
- Press Piece - 60mm :VW415A
- Press Piece - Multiple Use :VW429
- Press Piece - Bushing :3118

Disassembling
- Gear set, disassembled. Refer to GEAR SET, DISASSEMBLING AND ASSEMBLING .
Risk of damaging the output shaft!
- Secure the output shaft from felling when pressing on!
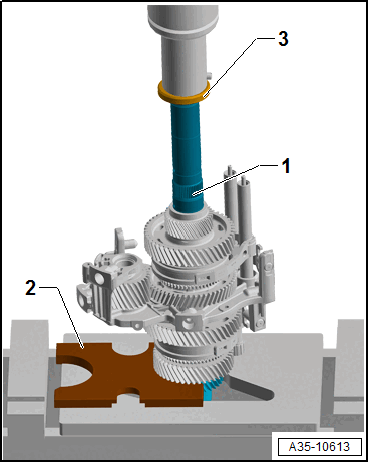
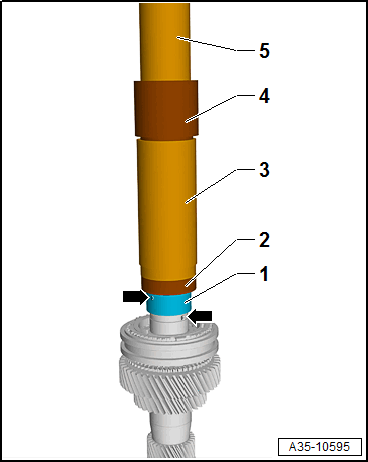
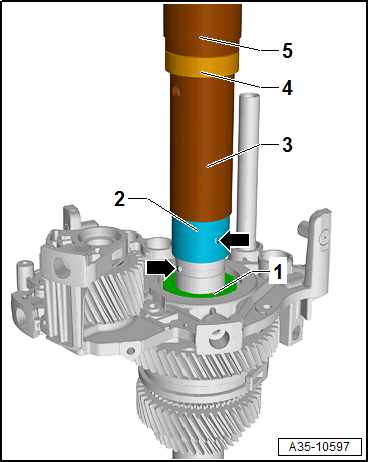
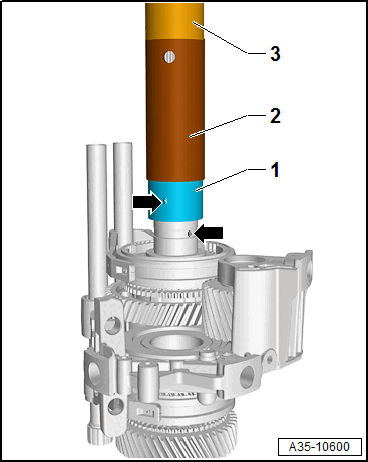
Press out the output shaft 1, vehicles without self-locking center differential
 Courtesy of AUDI OF AMERICA, LLC
2 - Press Plate :VW402
3 - Press Piece - Multiple Use :VW412
Damage to the output shaft components.
- Individual components may fall out when removing.
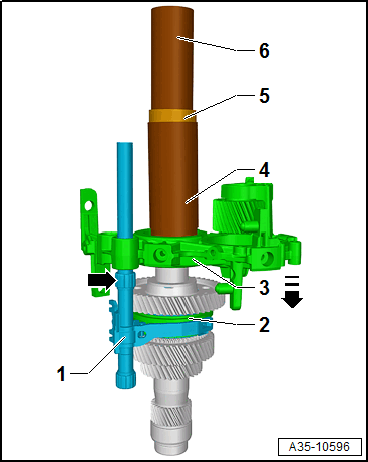
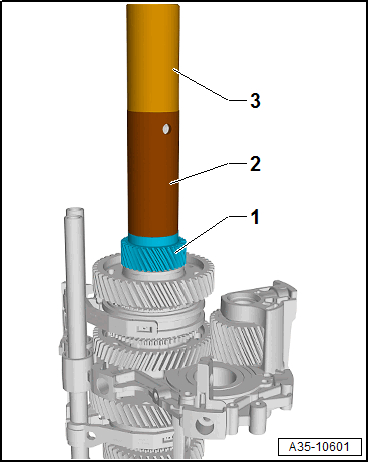
Press out the output shaft 1, vehicles with self-locking center differential
 Courtesy of AUDI OF AMERICA, LLC
2 - Press Plate :VW402
3 - Press Piece - Multiple Use :VW412
4 - Press Piece - 37mm :VW416B
Damage to the output shaft components.
- Individual components may fall out when removing.
Continuation for all vehicles
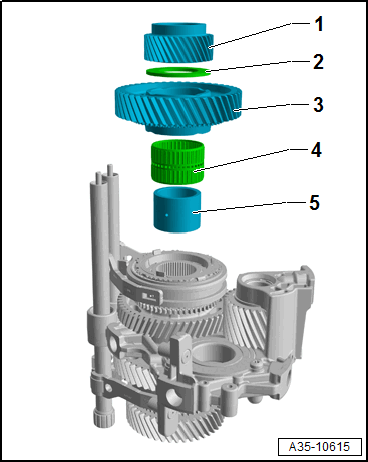
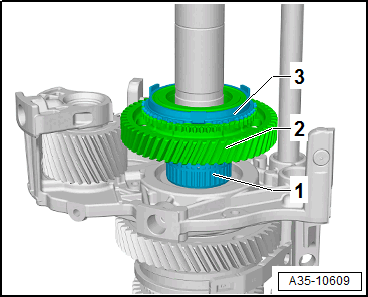
The following components can now be removed:
- 6th Gear
- Thrust Washer
- 2nd Gear Assembly
- Needle Bearing
- Inner Race/Needle Bearing
-- Switch the gearshift rail/shift fork for the 2nd and reverse gear -1- in the -direction of the arrow A-.
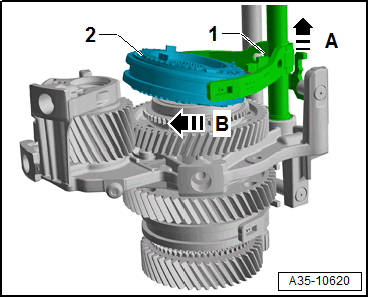
-- Remove the synchronization for the 2nd and reverse gear -2- with all individual parts out of the shift fork -1- in the -direction of the arrow B-.
-- Turn the gearshift rail/shift fork for the 2nd and reverse gear -1- slightly to the side and remove it from the bearing bracket.
The following components can now be removed:
- Reverse Gear Assembly
- Needle Bearing
- Inner Race/Needle Bearing
- Thrust Washer
-- Remove the bearing bracket with the shift fork -1- in the -direction of the arrow- from the synchronization -3-.
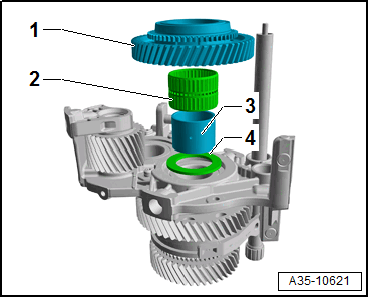
The following components can now be removed:
2 - 1st Gear Assembly with: Thrust Washer, Needle Bearing, Inner Race/Needle Bearing
3 - Synchronization for 1st Gear Assembly / 3rd Gear Assembly with All Individual Parts
4 - 3rd Gear Assembly with the Needle Bearing
Assembling
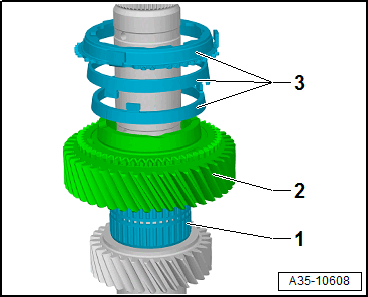
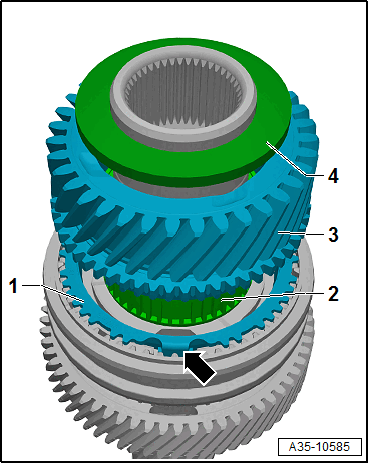
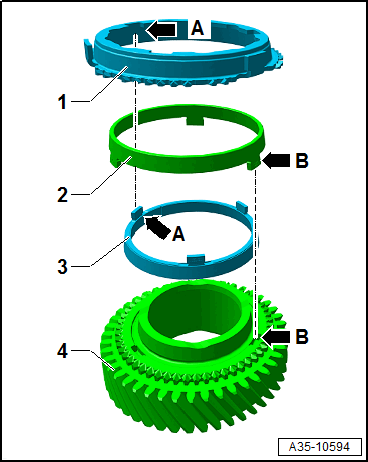
-- Position the needle bearing -1-, 3rd gear assembly -2- and synchronizer rings -3-.
Pay attention to the installation position of the synchronizer rings. Refer to Figure.
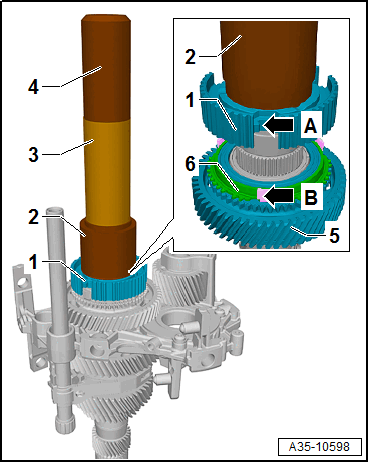
Synchronizer hub for 1st gear assembly / 3rd gear assembly 2, pressing on
 Courtesy of AUDI OF AMERICA, LLC
- Warm the synchronizer hub -2- using the Inductive Heater :VAS 6414 to 100 °C (212 °F).
- The lettered side of the synchronizer hub points to the Press Piece - Lower Ball Joint :3146 -3-.
1 - Press Plate :VW402
3 - Press Piece - Lower Ball Joint :3146
4 - Press Piece - Bushing :3118
5 - Press Piece - 60mm :VW415A
6 - Press Piece - Trailing Arm :2010 (Only on Vehicles with Self-Locking Center Differential)
7 - Press Piece - Multiple Use :VW412
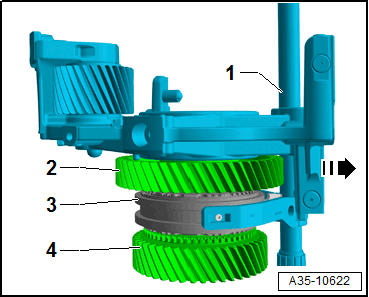
-- Lift the 3rd gear synchronizer ring -8- with 3rd gear assembly -9- slightly, until the anti-twist mechanism -arrow B- of the synchronization is flush with the cut-outs -arrow A- of the synchronizer hub -2-.
-- Insert the three thrust pieces -arrows-.
-- Push the double-toothed locking collar onto the opening -arrow A- with the lettering facing upward.
-- Press the tops of the thrust pieces in slightly by hand when installing.
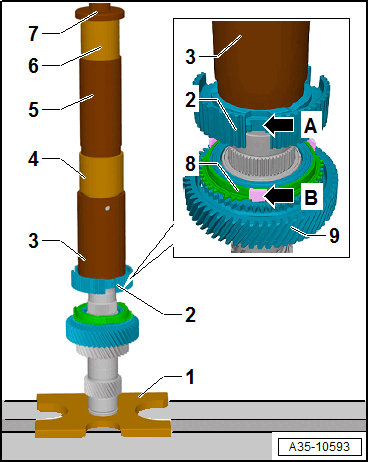
Inner Race Needle Bearing 1 for 1st Gear Assembly, Installing
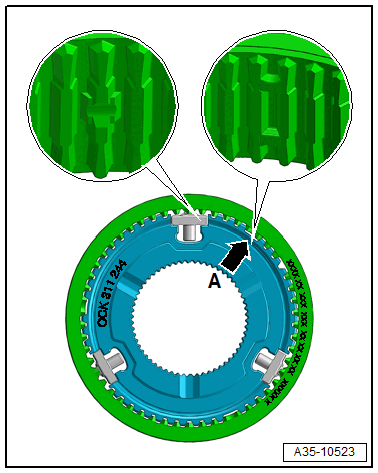
- Layout of the oil filler hole -arrows- at an offset of approximately 90°.
- Installation position: the lettering on the bearing -1- (thicker wall thickness) points to the Press Piece - Multiple Use :VW429 .
2 - Press Piece - Multiple Use :VW429
3 - Press Piece - 60mm :VW415A
4 - Press Piece - Bushing :3118
5 - Press Piece - Multiple Use :VW519 (Only on Vehicles with Self-Locking Center Differential)
-- Position the synchronizer rings for 1st gear -1-, needle bearing for 1st gear assembly -2-, and 1st gear assembly -3- and the thrust washer -4-.
Tip:
- The illustration shows a similar gear assembly!
- Pay attention to the installation position of the synchronizer rings -arrow-. Refer to Figure.
-- Press out the locking sleeves for the 1st and 3rd gear -1- and the 2nd and reverse gear -2- out of the bearing bracket. Refer to Figure.

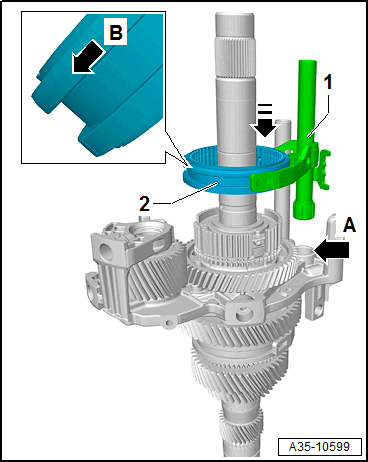
Bearing bracket 3, pressing on
- Insert the shift fork for 1st and 3rd gear -1- in the locking collar for 1st and 3rd gear -2-.
- Then pressing on the gearshift rail for the 1st and 3rd gear -arrow- guide in the bearing bracket -3-.
4 - Press Piece - 60mm :VW415A
5 - Press Piece - Multiple Use :VW429
6 - Press Piece - Multiple Use :VW519
Needle bearing inner race 2 for the reverse gear assembly
- Position the thrust washer -1- beforehand.
- Layout of the oil filler hole -arrows- at an offset of approximately 90°.
- Installation position: the lettering on the bearing -2- (thicker wall thickness) points to the Press Piece - Multiple Use :VW519 .
3 - Press Piece - Multiple Use :VW519
4 - Press Piece - Multiple Use :VW429
5 - Press Piece - 60mm :VW415A
-- Position the reverse gear assembly needle bearing -1- and reverse gear assembly -2- and synchronizer ring -3-.
Synchronizer hub for the 2nd gear assembly / reverse gear assembly 1, pressing on
 Courtesy of AUDI OF AMERICA, LLC
- Warm the synchronizer hub -1- using the Inductive Heater :VAS 6414 to 100 °C (212 °F).
- The lettered side of the synchronizer hub points to the Press Piece - Bushing :3118 .
-- Lift the reverse gear synchronizer ring -6- with reverse gear assembly -5- slightly, until the anti-twist mechanism -arrow B- of the synchronization is flush with the cut-outs -arrow A- of the synchronizer hub -1-.
2 - Press Piece - Bushing :3118
3 - Press Piece - Multiple Use :VW519
4 - Bearing Installer - Differential Bearing :40-21 (Only on vehicles without self-locking center differential)
-- Insert the three thrust pieces -arrows-.
-- Insert the shift fork for the 2nd gear / reverse gear -1- in the locking collar for the 2nd gear / reverse gear -2-.
-- Guide in the shift fork with the locking collar for the 2nd gear / reverse gear in the bearing bracket -arrow A-.
- The bevel of the locking collar -arrow- points to the 2nd gear assembly
-- Press on the double-toothed locking collar on the cut-out -arrow A-.
-- Press the tops of the thrust pieces in slightly by hand when installing.
Needle Bearing Inner Race 1, 2nd Gear Wheel, Installing
- Layout of the oil filler hole -arrows- at an offset of approximately 90°.
- Installation position: the lettering on the bearing -2- (thicker wall thickness) points to the Press Piece - Multiple Use :VW519 .
2 - Press Piece - Multiple Use :VW519
3 - Bearing Installer - Differential Bearing :40-21 (Only on vehicles without self-locking center differential)
-- Press on the synchronizer rings for 2nd gear -1-, needle bearing for 2nd gear assembly -2-, and 2nd gear assembly -3- and the thrust washer -4-.
- The illustration shows a similar gear assembly!
- Pay attention to the installation position of the synchronizer rings -arrow-. Refer to Figure.
Installing the 6th gear 1
- Warm the 6th gear using the Inductive Heater :VAS 6414 to 120 °C (248 °F).
2 - Press Piece - Multiple Use :VW519
3 - Bearing Installer - Differential Bearing :40-21 (Only on vehicles without self-locking center differential)
-- Assemble the gear set. Refer to GEAR SET, DISASSEMBLING AND ASSEMBLING .