Refrigerant Lines In Plenum Chamber, Removing And Installing: Installing
Install in reverse order of removal and note the following:
- Coat the O-ring seals lightly with refrigerant oil before installing. Refer to REFRIGERANT CIRCUIT SEALS .
- Install the refrigerant lines stress-free.
-- Always clean the expansion valve, pass-through, and refrigerant lines on the connection area and check them for damage.
-- Check the support ring -G- for proper installation position and check the grommet in the plenum chamber rear panel for damage and proper installation.
-- Insert the refrigerant lines -C and D- to the heat exchanger after installing the inner heat exchanger -F- and service connections -B and H- in the bracket.
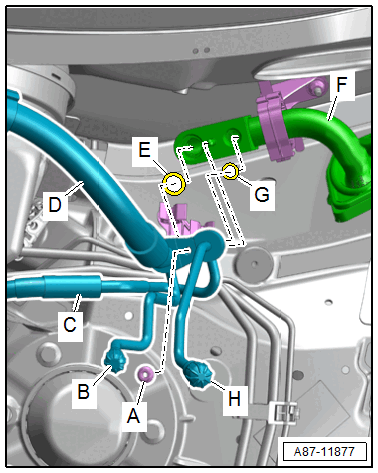
-- Tighten the nut -A-.
-- Check the routing of the refrigerant lines after attachment. They must be inserted in the provided brackets in a tension-free manner and must not come in contact with other components.
-- Evacuate and charge the refrigerant circuit. Refer to Refrigerant Circuit or Working with A/C Service Station (1 Of 2) / Working with A/C Service Station (2 Of 2) .
-- Switch the ignition on.
-- Start the A/C system after charging the refrigerant circuit. Refer to A/C SYSTEM, STARTING AFTER CHARGING REFRIGERANT CIRCUIT .