A/C Compressor, Removing And Installing At Bracket, Vehicles With 6-Cylinder Engine (Except 6-Cylinder 2.9L TFSI Engine): Removing
-- Switch off the ignition.
-- Remove the front noise insulation. Refer to NOISE INSULATION, REMOVING AND INSTALLING .
SQ5
-- Remove the left lower longitudinal member. Refer to Lock Carrier .
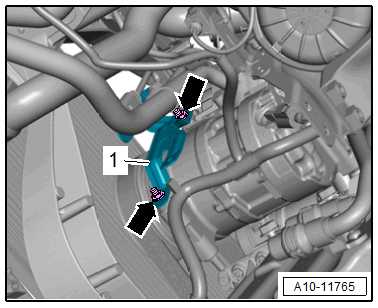
Vehicles with a TDI engine
-- Remove the nuts -arrows- and free up the bracket -1- for the SCR line.
Continuation for All Vehicles
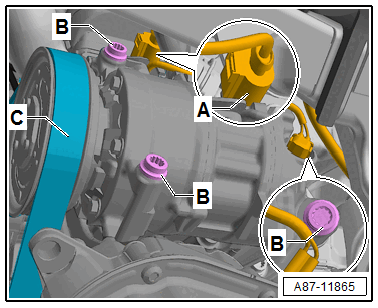
-- Remove the ribbed belt (for power take-off) -C- from the A/C compressor belt pulley. Refer to RIBBED BELT, REMOVING AND INSTALLING .
-- Mark the connector -A- for the A/C Compressor Regulator Valve -N280- (to prevent confusing it with other connectors which look identical).
-- Disconnect the connector -A-.
TIP
- Depending on the version of the A/C compressor (for example a version with an A/C Clutch - N25-) the connection -A- to the A/C Compressor Regulator Valve -N280- and/or to the A/C Clutch -N25- may be attached on the top on the A/C compressor.
- The connector to A/C Compressor Regulator Valve -N280- and the connector to the electric engine mounts are identical in construction. If these connectors are interchanged, no entry appears in the DTC memory. However, since the A/C compressor is continuously activated, the evaporator may ice up.
-- Remove the bolts -B-.
There is a risk of damaging the refrigerant lines and hoses by removing and tilting the A/C compressor.
- Do not bend, twist or stretch the refrigerant lines and hoses.
-- Remove the A/C compressor and move it away from the engine only so far without bending or pulling the refrigerant hoses.
-- Fasten the A/C compressor to the vehicle (for example, with a wire) without pulling or bending the refrigerant hoses.