BELT PULLEY (WITHOUT A/C Clutch -N25-), REMOVING AND INSTALLING, A/C COMPRESSOR "Denso" MANUFACTURER VERSION "2": Installing
-- Clean the A/C compressor flange before installing the belt pulley.
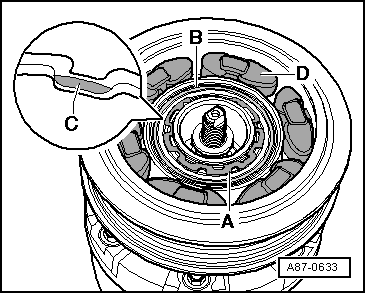
-- Install the belt pulley -B-.
- Only bend the circlip -A- as much as necessary for installation.
-- Insert the new circlip -A- on the correct side; the side with beveled insertion edge -C- faces away from the A/C compressor (install flat side facing A/C compressor).
-- Insert the rubber elements -D- in belt pulley -B- as shown.
-- When installing the drive plate, coat the rubber elements -D- lightly, for example, with tire mounting paste or soap solution (as lubricant).
-- Insert the drive plate -C- into the rubber elements -D- (see image above) until it rests on the compressor shaft -B-.
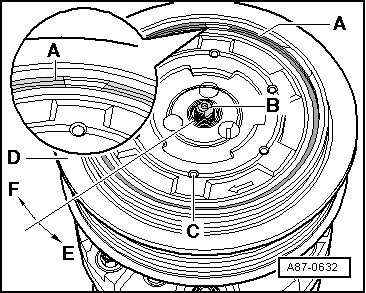
-- Screw in the drive plate -C- by turning in the direction of the arrow -F- on to the compressor shaft -B-.
-- Tighten the drive plate -C- (via the belt pulley -D-) by rotating in the direction of the arrow -F- using a commercially available strap wrench (with cloth tape). While doing so, hold the compressor shaft -B- securely with a commercially available hex socket wrench.
-- Install the circlip -A- (with rubber washer vulcanized on).