A/C Compressor, Removing And Installing At Bracket, Vehicles With 6-Cylinder 2.9L TFSI Engine: Removing
-- Remove the engine cover and heat shield. Refer to ENGINE COVER, REMOVING AND INSTALLING .
-- Place the Engine Support Bridge :10-222A on the left and right side of the longitudinal member.
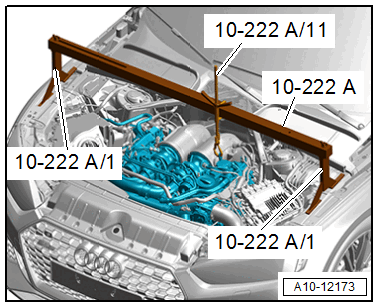
-- Engage the Engine Support Bridge - Spindle :10-222A/11 on the engine lifting eye at the left front side.
-- Remove the left and right wheel spoiler. Refer to OVERVIEW - FRONT WHEEL HOUSING LINER .
-- Remove the ribbed belt from the A/C compressor belt pulley. Refer to RIBBED BELT, REMOVING AND INSTALLING .
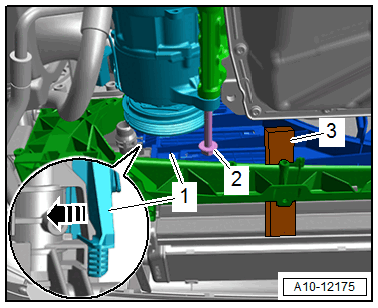
-- Disconnect the connector -1-.
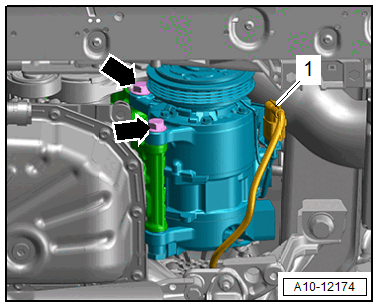
-- Remove the bolts -arrows-.
Proceed as follows to remove the bolts:
-- Loosen the engine mount bolt -2- on the left and right side several turns.
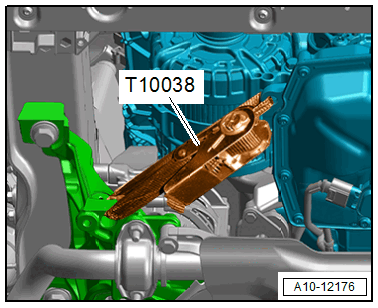
-- Pull the engine slightly to the right side as shown using the Tensioning Strap :T10038 .
-- Lift the engine with the Engine Support Bridge - Spindle :10-222A/11 slightly and remove the upper bolt for the A/C compressor.
-- Remove the spindle and tensioning strap.
-- Loosen the bottom of the bumper cover from the lock carrier. Refer to OVERVIEW - BUMPER COVER .
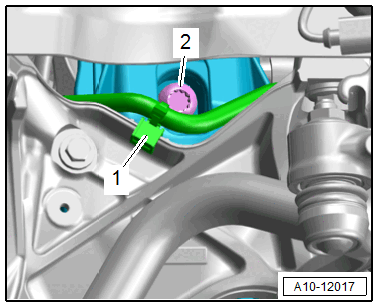
-- Unclip and remove the air duct -2-.
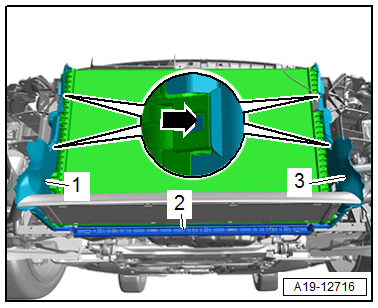
-- Push the left locking ring for the fan shroud -1- -arrow-, push the fan shroud slightly upward and secure it, as shown, with the medium-hard universal wedge -3- from the Scraper Set :VAS6845 .
There is a risk of damaging the refrigerant lines and hoses by removing and tilting the A/C compressor.
- Do not bend, twist or stretch the refrigerant lines and hoses.
-- Remove the lower bolt -2-, remove the A/C compressor and move it away from the engine only so far without bending or pulling the refrigerant hoses.
-- Fasten the A/C compressor to the vehicle (for example, with a wire) without pulling or bending the refrigerant hoses.