Fuel Injectors, Cleaning
Special tools and workshop equipment required
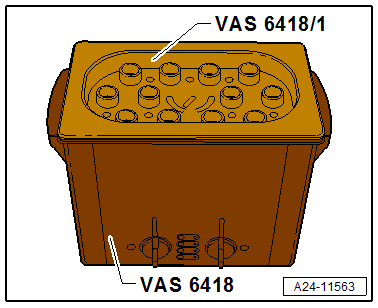
- Ultrasonic Cleaning Unit: VAS6418
- Ultrasonic Cleaning Unit - Mounting Plate for Injection Modules: VAS6418/1
- Cleaning Fluid: VAS6418/2 or commercially available neutral cleaner.
Cleaning
- Follow the guidelines for clean working conditions. Refer to GUIDELINES FOR CLEAN WORKING CONDITIONS .
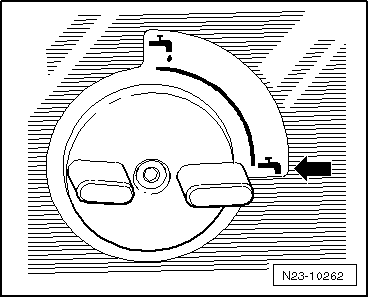
-- Connect the drain valve -arrow- to the Ultrasonic Cleaning Unit: VAS6418 on the right side of the housing.
-- Fill the ultrasonic sensor.
Cleaning Fluid Mixture Ratio:
- 2100 ml settled tap water and 20 ml Cleaning Fluid: VAS6418/2 or commercially available neutral cleaner.
-- Remove the fuel injectors. Refer to FUEL INJECTORS, REMOVING AND INSTALLING .
-- Place the Mounting Plate for Injection Modules VAS6418/1: VAS6418/1 on the cleaning unit.
- Pay attention to the safety precautions in the Owner's Manual before operating the Ultrasonic Cleaning Unit: VAS6418 .
- The ideal fluid level is reached when the cleaning fluid is approximately 1 to 4 mm above the bottom of the mounting plate. A fluid level which is too low can damage the Ultrasonic Cleaning Unit: VAS6418 .
-- Insert the FSI fuel injectors all the way into the guides on the Mounting Plate for Injection Modules VAS6418/1: VAS6418/1 .
-- Switch on the cleaning unit by pressing the on/off button -C-.

-- Set the cleaning time on the knob -A- to 30 minutes.
-- Set the temperature on the knob -B- to 50 °C (122 °F).
-- Press the → button -D- to start cleaning.
- The temperature controlled cleaning is now switched on. During the heating-up phase the ultrasonic switches on the cleaning fluid circulation in intervals. After reaching the pre-selected temperature the ultrasonic is switched on for a long period.
- The cleaning must take at least 30 minutes and first begins once a temperature of at least 50 °C (122 °F) is reached.
-- Install the fuel injectors with a new combustion chamber seal. Refer to FUEL INJECTORS, REMOVING AND INSTALLING .