Fuel Tank, Removing, TFSI Vehicles
Special tools and workshop equipment required
- Engine and Gearbox Jack :VAS6931
- Gearbox Support :T40173
Removing
-- Follow all safety precautions. Refer to SAFETY PRECAUTIONS .
-- Follow the guidelines for clean working conditions. Refer to GUIDELINES FOR CLEAN WORKING CONDITIONS .
Risk of destroying electronic components when disconnecting the battery.
- Follow the steps for disconnecting the battery.
-- Disconnect the ground cable from the battery terminal. Refer to BATTERY, DISCONNECTING AND CONNECTING .
Risk of accident due to the weight of the fuel tank.
- The fuel tank must be empty when removing it.
-- Drain the fuel tank. Refer to FUEL TANK, DRAINING .
-- Remove the bench seat / single seat. Refer to BENCH SEAT/SINGLE SEAT, REMOVING AND INSTALLING .
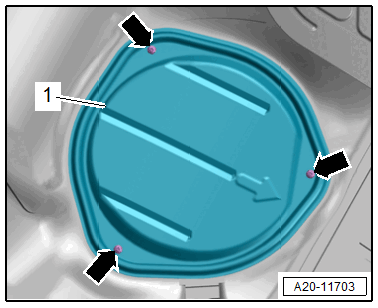
-- Remove the bolts -arrows- and remove the sealing flange cover -1-.
-- Disconnect the connectors -1 and 3- on the sealing flange by unlocking the connector safety catch.
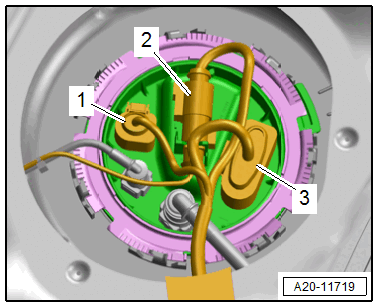
-- Market-specific version/equipment version: Release the connector safety catch and disconnect the connector -2-.
-- Remove the right rear wheel housing liner. Refer to REAR WHEEL HOUSING LINER, REMOVING AND INSTALLING .
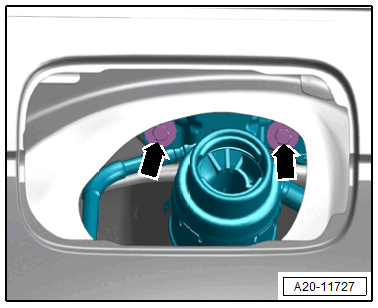
-- Remove the fuel filler door unit. Refer to FUEL FILLER DOOR UNIT, REMOVING AND INSTALLING .
A4:
-- Remove the fuel filler neck bolts -arrows-.
A5:
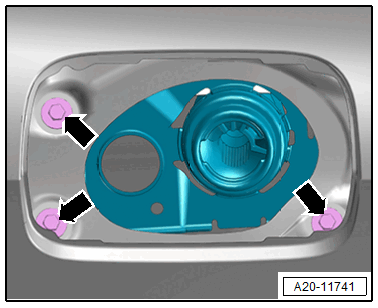
-- Remove the fuel filler neck bolts -arrows-.
Continue All Vehicles
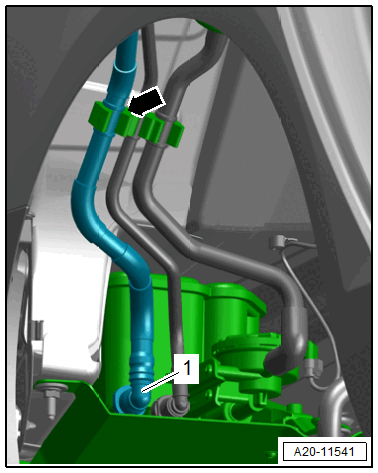
-- Disconnect the breather line -1- from the EVAP canister. Disconnect the connector couplings. Refer to CONNECTOR COUPLINGS, DISCONNECTING .
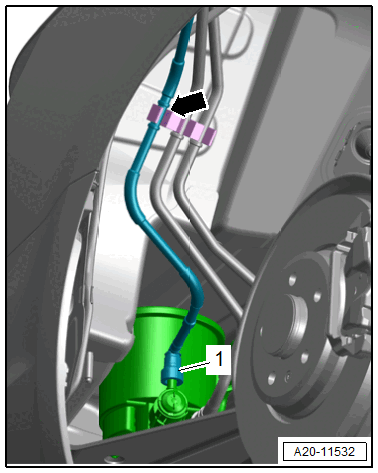
-- Disengage and free up the bleeder line at the bracket -arrow-.
-- Disconnect the bleeder line -1- from the EVAP canister. Disconnect the connector couplings. Refer to CONNECTOR COUPLINGS, DISCONNECTING .
-- Disengage and free up the bleeder line at the bracket -arrow-.
-- Remove the rear underbody trim panels. Refer to OVERVIEW - UNDERBODY TRIM PANELS .
-- Remove the rear section of the exhaust system. Refer to MUFFLER, REMOVING AND INSTALLING .
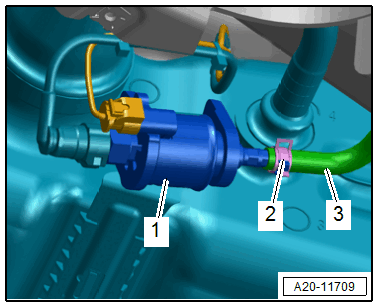
-- Rest of World market-specific version/equipment version: loosen the lock washer -2- and remove the fuel hose -3- from the metering pump -1-.
Place a cloth under the separating point to catch any escaping fuel.
The fuel system is under pressure.
Risk of injury from fuel spraying out.
- Wear protective eyewear.
- Wear safety gloves.
- Reduce the pressure: Place clean cloths around the connection point and carefully open the connection point.
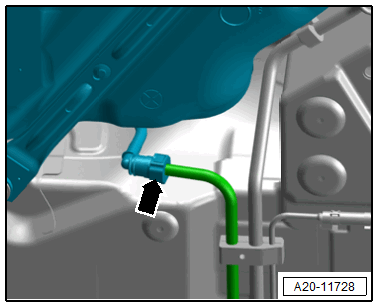
-- Disconnect the fuel line -arrow-. Disconnect the connector couplings. Refer to CONNECTOR COUPLINGS, DISCONNECTING .
Rest of World FWD Vehicles
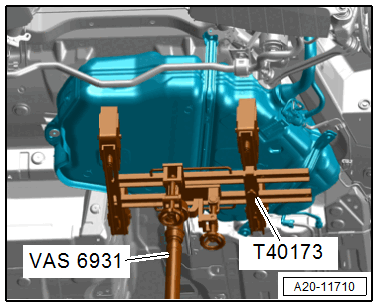
-- Place the :T40173 on the :VAS6931 and support as shown on the fuel tank.
Risk of accident due to the weight of the fuel tank.
- The fuel tank must be empty when removing it.
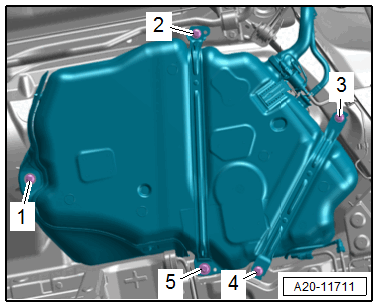
-- Remove the bolts -1 to 5-.
For clarity, the fuel tank is shown without the engine and gearbox jack.
-- Lower the fuel tank with the :VAS6931 .
When guiding out the fuel tank check the clearance to the fuel filler neck.
AWD Vehicles
-- Equipped on some models: remove the diagonal brace. Refer to DIAGONAL BRACES, REMOVING AND INSTALLING .
-- Remove the driveshaft. Refer to the appropriate service information. .
FWD/AWD Vehicles North American Market-Specific Version and Rest of World AWD Vehicles:
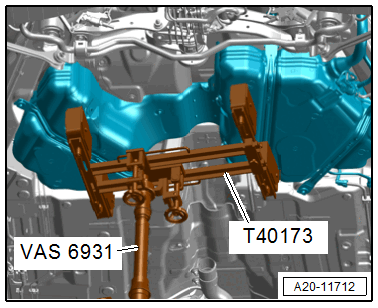
-- Place the :T40173 on the :VAS6931 and support as shown on the fuel tank.
Risk of accident due to the weight of the fuel tank.
- The fuel tank must be empty when removing it.
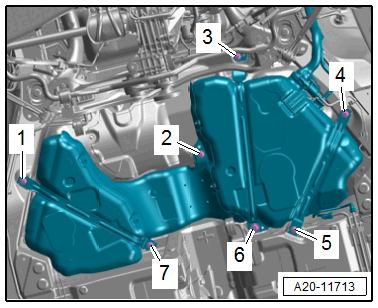
-- Remove the bolts -1 through 7-.
For clarity, the fuel tank is shown without the engine and gearbox jack.
-- Lower the fuel tank with the :VAS6931 .
When guiding out the fuel tank check the clearance to the fuel filler neck.