Overview - Coolant Pipes, Vehicle With High-Voltage System: Notes
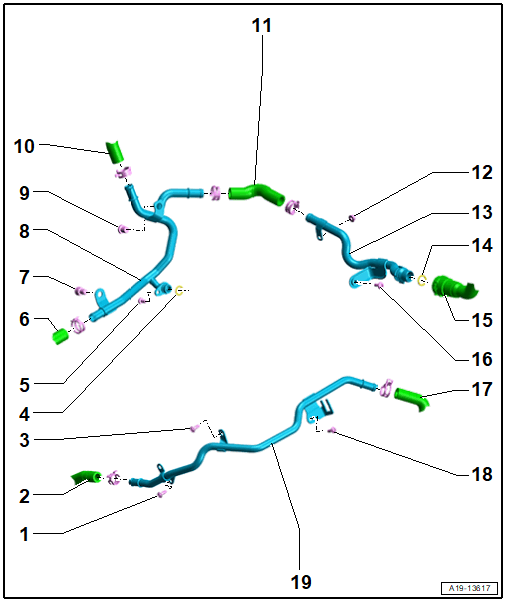
Coolant Pipes on the Engine
 Courtesy of AUDI OF AMERICA, LLC
- Bolt
- 9 Nm
- Coolant Hose
- Bolt
- 6 Nm
- Thread cutting
- Position the bolt by hand and tighten it until it finds the old threads. Then tighten the bolt to the specification.
- O-Ring
- Replace after removing
- Bolt
- 9 Nm
- Coolant Hose
- Bolt
- 20 Nm
- Right Coolant Pipe
- Removing and Installing. Refer to RIGHT COOLANT PIPE, REMOVING AND INSTALLING, VEHICLES WITH SECONDARY AIR SYSTEM .
- Bolt
- 20 Nm
- Coolant Hose
- Coolant Hose
- Nut
- 9 Nm
- Rear Coolant Pipe
- Removing and Installing. Refer to REAR COOLANT PIPE, REMOVING AND INSTALLING, VEHICLES WITH HIGH-VOLTAGE SYSTEM .
- O-Ring
- Replace after removing
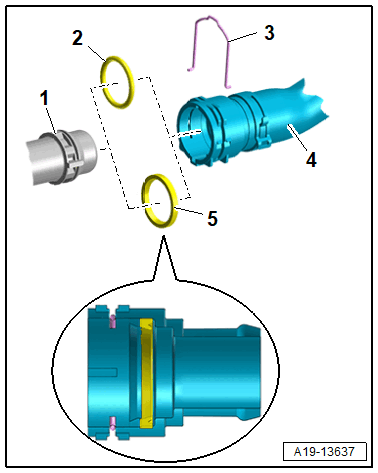
- Coolant Hose/Plug
- Fold back and pry up the clip to remove the heat shield boot
- Connecting. Refer to Figure.
- Bolt
- 9 Nm
- Coolant Hose
- Bolt
- 9 Nm
- Left Coolant Pipe
- Removing and installing
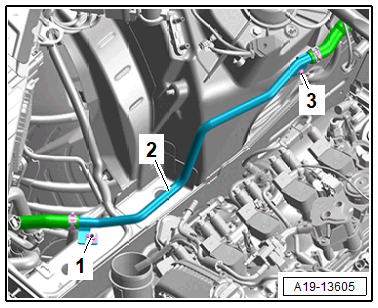
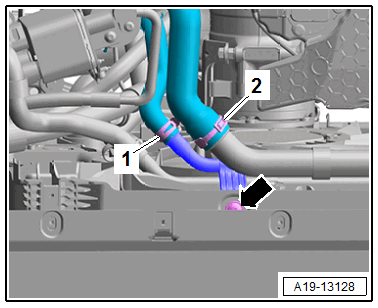
Audi Q5: Coolant Pipe at Left Longitudinal Member - Tightening Specification
-- Tighten the nuts -arrows- to 9 Nm.
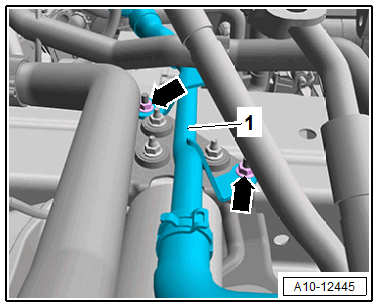
Coolant Pipe at Right Longitudinal Member - Tightening Specification (Example Illustration)
 Courtesy of AUDI OF AMERICA, LLC
-- Tighten the bolt -3- and nut -1- to 9 Nm.
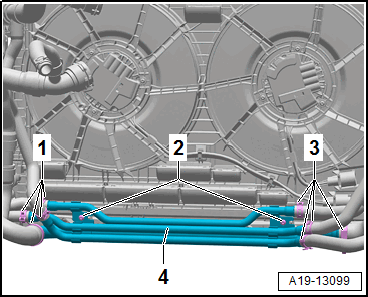
Audi A6/A7: Lock Carrier Coolant Pipes - Tightening Specification
 Courtesy of AUDI OF AMERICA, LLC
-- Tighten the bolt -2- to 5 Nm.
Audi Q5: Lock Carrier Coolant Pipes - Tightening Specification
-- Tighten the bolt -arrow- to 9 Nm.