Contacts In Connector Housing, Repairing
Procedure
-- First, open or release if necessary the secondary lock of the connector housing. Refer to CONNECTOR HOUSINGS, RELEASING AND DISASSEMBLING .
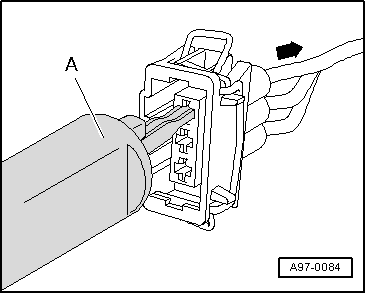
-- Release contact (primary lock) using the appropriate release tool. Refer to CONNECTOR HOUSINGS, RELEASING AND DISASSEMBLING .
-- Pull the contact back out of the connector housing -arrow- at the single wire (with the single wire seal if necessary).
-- Cut off the old contact (with the single wire seal) from the vehicle-specific wiring harness.
-- Take the yellow repair wire with the correct contact out of the :VAS1978B .
-- Free up the wire to be repaired approximately 20 cm on both sides of the repair point.
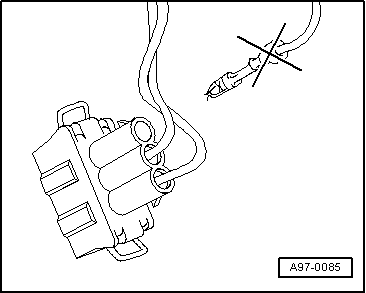
Risk of damaging the electrical wires.
- Expose wrapped wiring harnesses carefully.
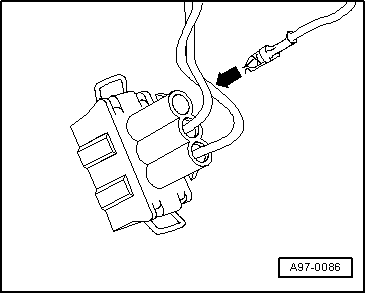
-- If necessary, removing the wiring harness wrapping.
-- Slide the new repair wire contact into the corresponding connector housing compartment until it engages.
-- If necessary, install the single wire seal on the repair wire. Refer to SINGLE WIRE SEALS, INSTALLING .
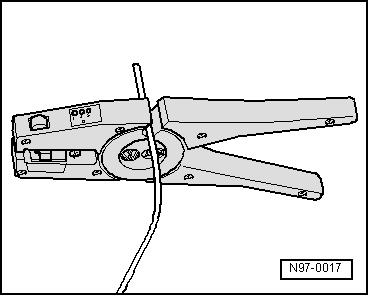
-- Shorten the repair wire and the vehicle-specific wiring harness single wire as needed using the :VAS1978/3 .
-- Remove the insulation from the ends of the repair wire and vehicle-specific single wire and crimp the ends with the crimping wires and a crimp connector. Refer to 0.22 MM or REPAIRING A WIRE 0.35 MM .