Wiring Eyelets, Repairing
Special tools and workshop equipment required
- Torque Wrench 1331 5-50Nm :VAG1331
Do not use rust remover, contact spray or grease because the lack of friction will cause the torque to be exceeded when installing and this will lead to the threaded connection breaking.
The gray sanding pads are for slight contamination and suitable for "soft surfaces". The red sanding pads are for heavy contamination and suitable for "hard surfaces".
Risk of injury. Observe warning notes and safety precautions. Refer to WARNINGS AND SAFETY PRECAUTIONS
-- Disconnect battery.
-- Loosen the cap nut and remove the wiring eyelet from the threaded connection.
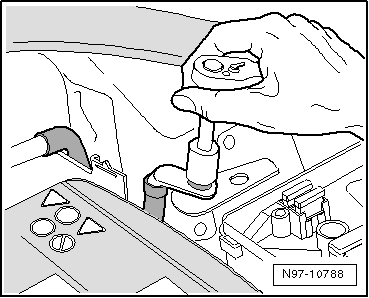
-- Check the wiring eyelet for corrosion, contamination, etc.
-- Select the corresponding adapter and the corresponding sanding pad.
The sanding block can be used instead.
Make sure the tin layer is not worn down too much and the copper is not visible. A galvanic element can form from this, destroying the metal and causing incorrect repairs.
Due to the different thicknesses of the tin layer, the cleaning process must be performed in several steps and a visual inspection of the wiring eyelet between steps is necessary.
-- Insert the adapter in the wiring eyelet and sand off the corrosion and contamination with circular motions.
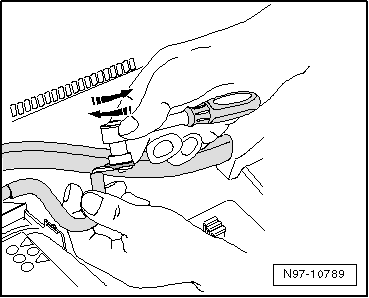
-- Check the wiring eyelet and sand it again if necessary.
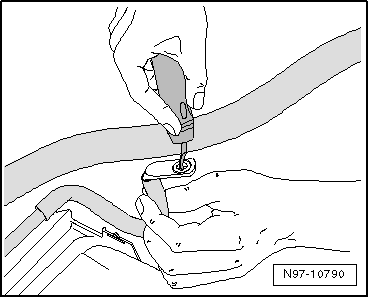
-- If necessary, remove the burr on the wiring eyelet with the deburrer.
-- Reinstall the wiring eyelet with the specified torque. Refer to the appropriate Wiring Diagram
Optimal contact is ensured if the bolted components are tightened to the specified torque after cleaning.
-- Apply protection material to the connection. Refer to PROTECTING .
-- Reconnect the battery.
Risk of injury. Prior to handling or servicing batteries, read, understand and observe the Warning and Safety Measures. Refer to WARNINGS AND SAFETY PRECAUTIONS
-- Reprogram the window regulators, enter the radio code, set the clock and, if necessary, recode the control modules that have error messages.